
Cisco Meraki
Knocknoc integrates with Cisco Meraki to dynamically control which source IPs are allowed through Meraki MX firewall policy. The integration uses the Meraki Dashboard API to maintain a single Policy Object Group per Knoc. The orchestration is performed by a Knocknoc orchestration Agent which is subscribed to the central Knocknoc Server.
As users authenticate to Knocknoc and grants expire, the agent creates and deletes CIDR Policy Objects and adds or removes them from the group. A Meraki firewall rule that references the group (as GRP(id)) then gates traffic on whether the user's current IP is a member. Because Meraki is cloud-managed, membership changes propagate to your MX appliances automatically: there's no feed to host and nothing to refresh.
IPv4 only. Meraki
cidrpolicy objects support IPv4 addresses only. Knocknoc applies IPv4 grants to Meraki and skips IPv6 grants, so pair a Meraki Knoc with IPv4 access.
Step 1: Note the Organisation ID
The wizard needs the Organisation ID. Read it from the Dashboard's own data using your browser:
- Sign in to the Meraki Dashboard.
- Open your browser's developer tools (right-click the page and choose Inspect, or press F12) and select the Network tab.
- Reload the page, then type
organizationsin the Network filter box. - Click the
organizations?perPage=…request and open its Response (or Preview) tab. Find your organisation by name and copy itsid. That's the Organisation ID for the wizard.
Step 2: Create the API key
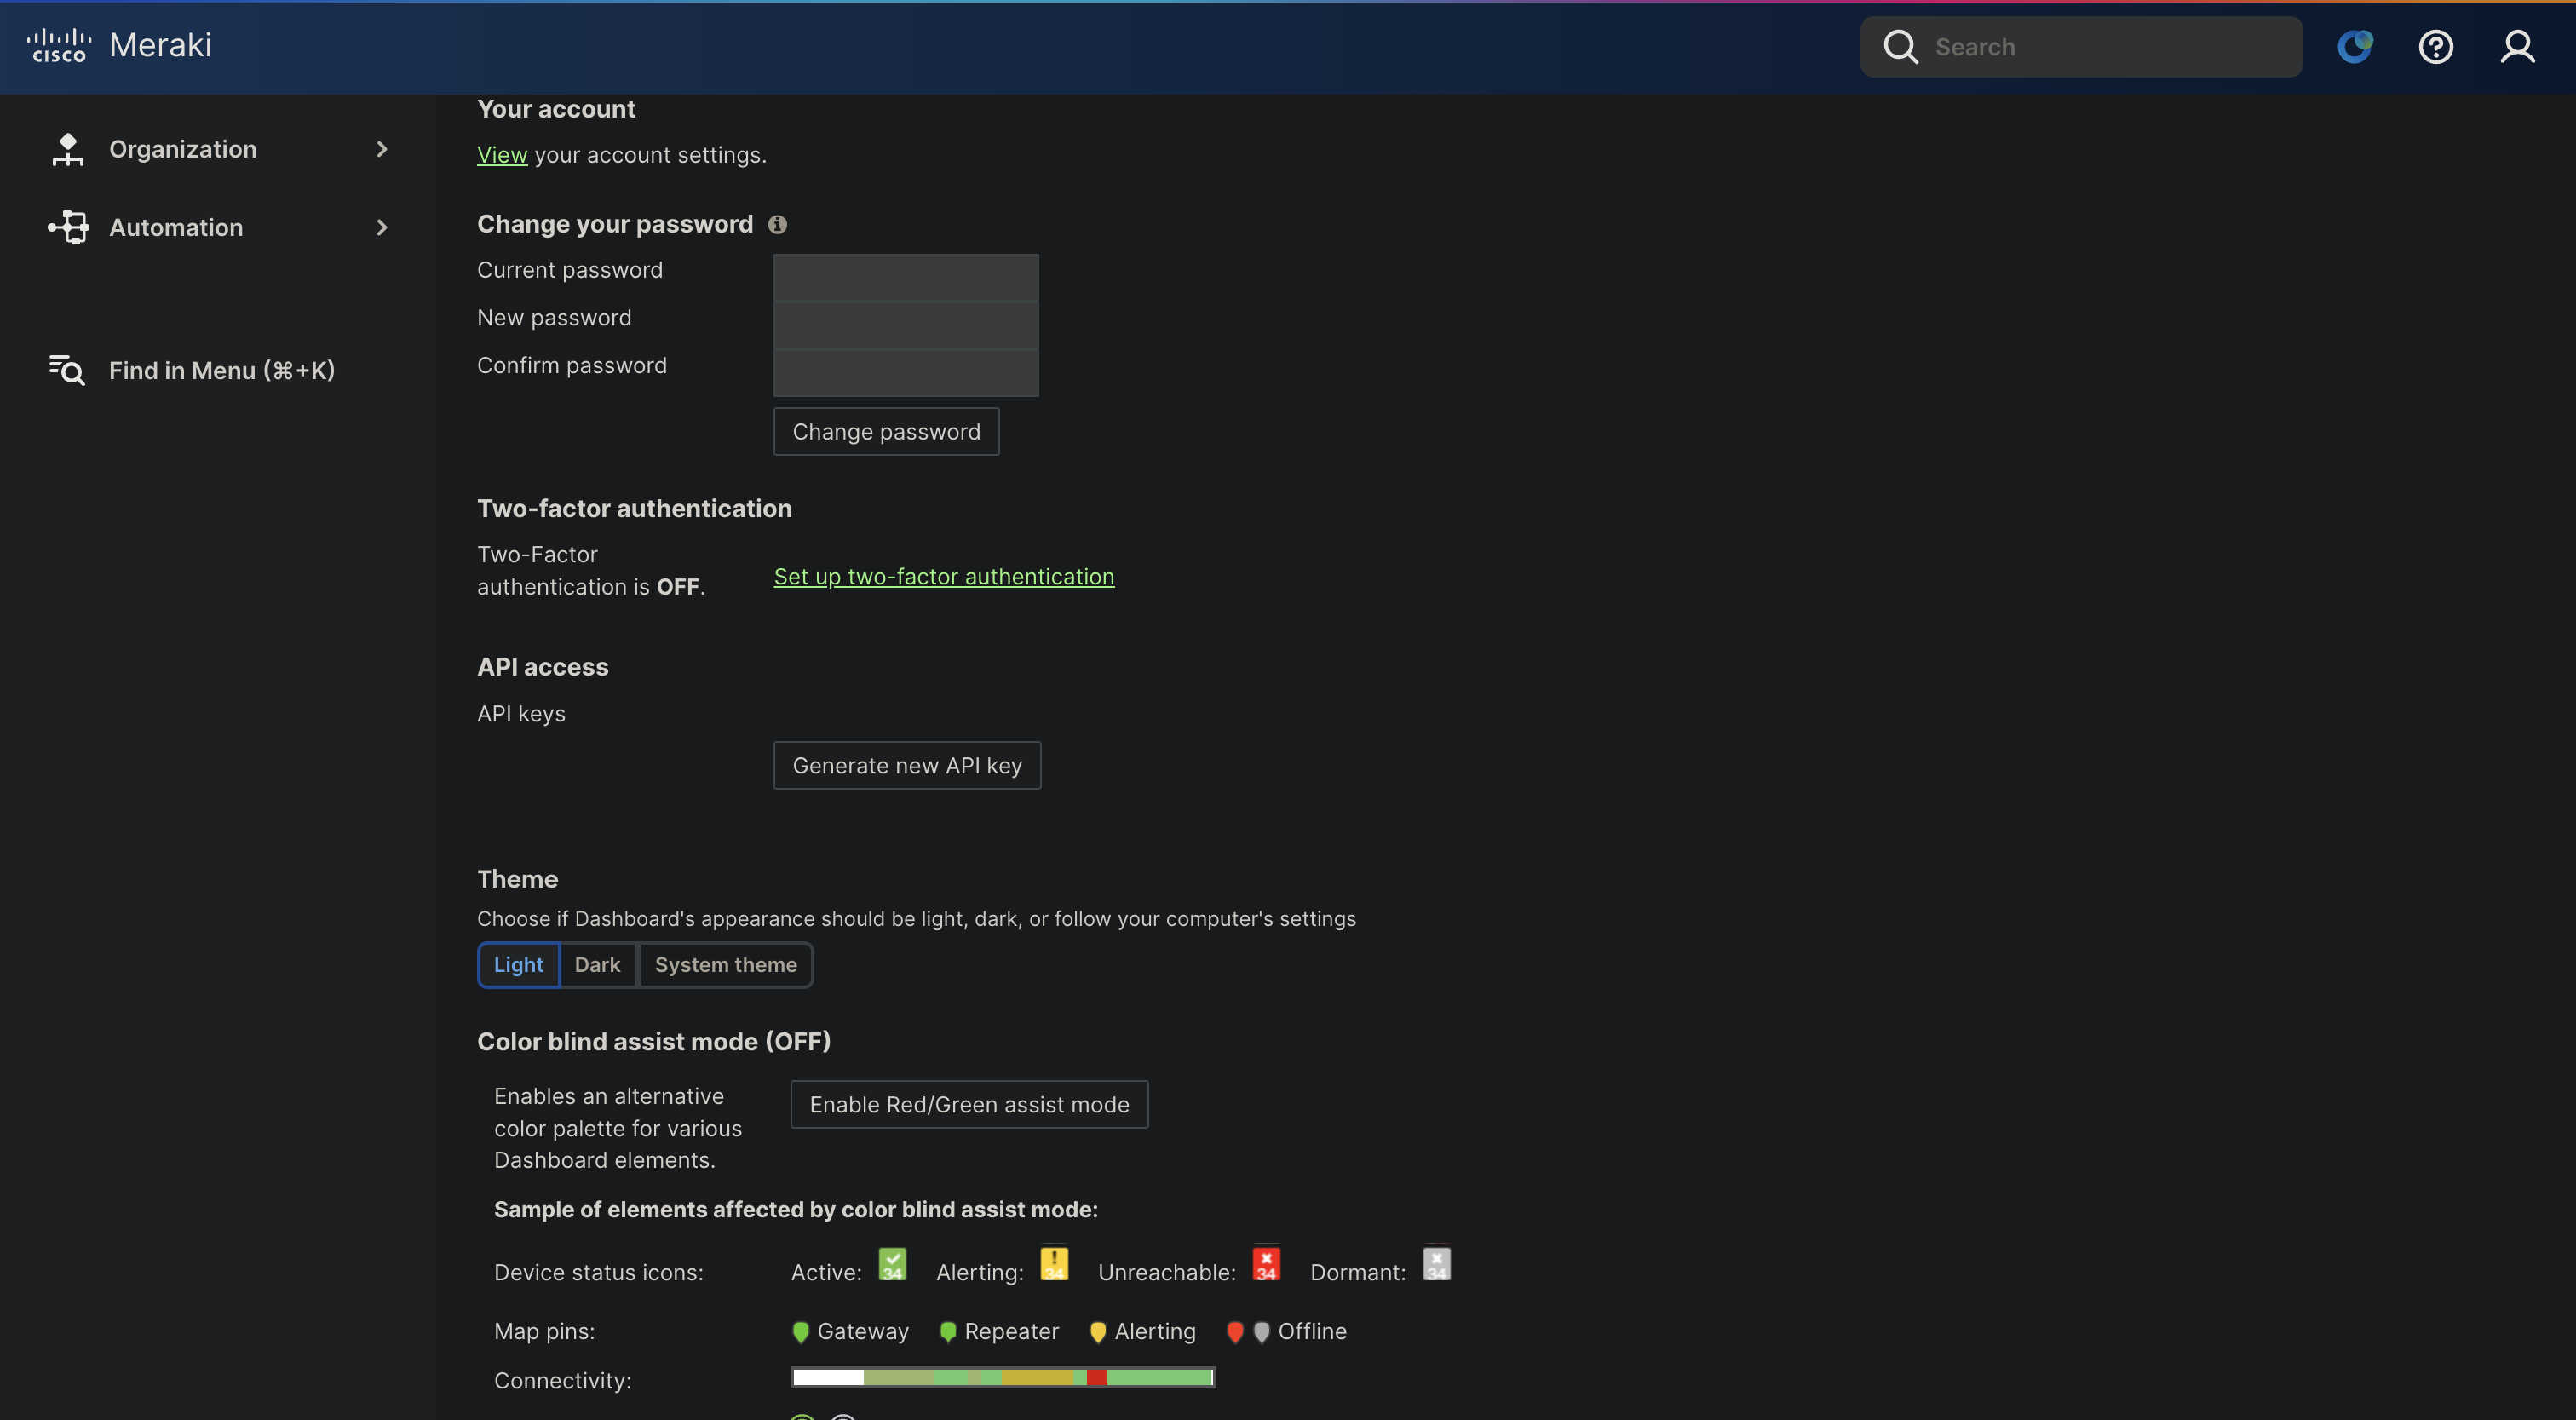
- Log into the Meraki Dashboard
- Click your account profile (top-right menu), click My profile, and scroll down find the API access section
- Click Generate new API key. The Dashboard shows it once, so copy it
- Prefer a dedicated administrator account (with write permission) for this key so access can be scoped and audited
Step 3: Create the Policy Object Group
-
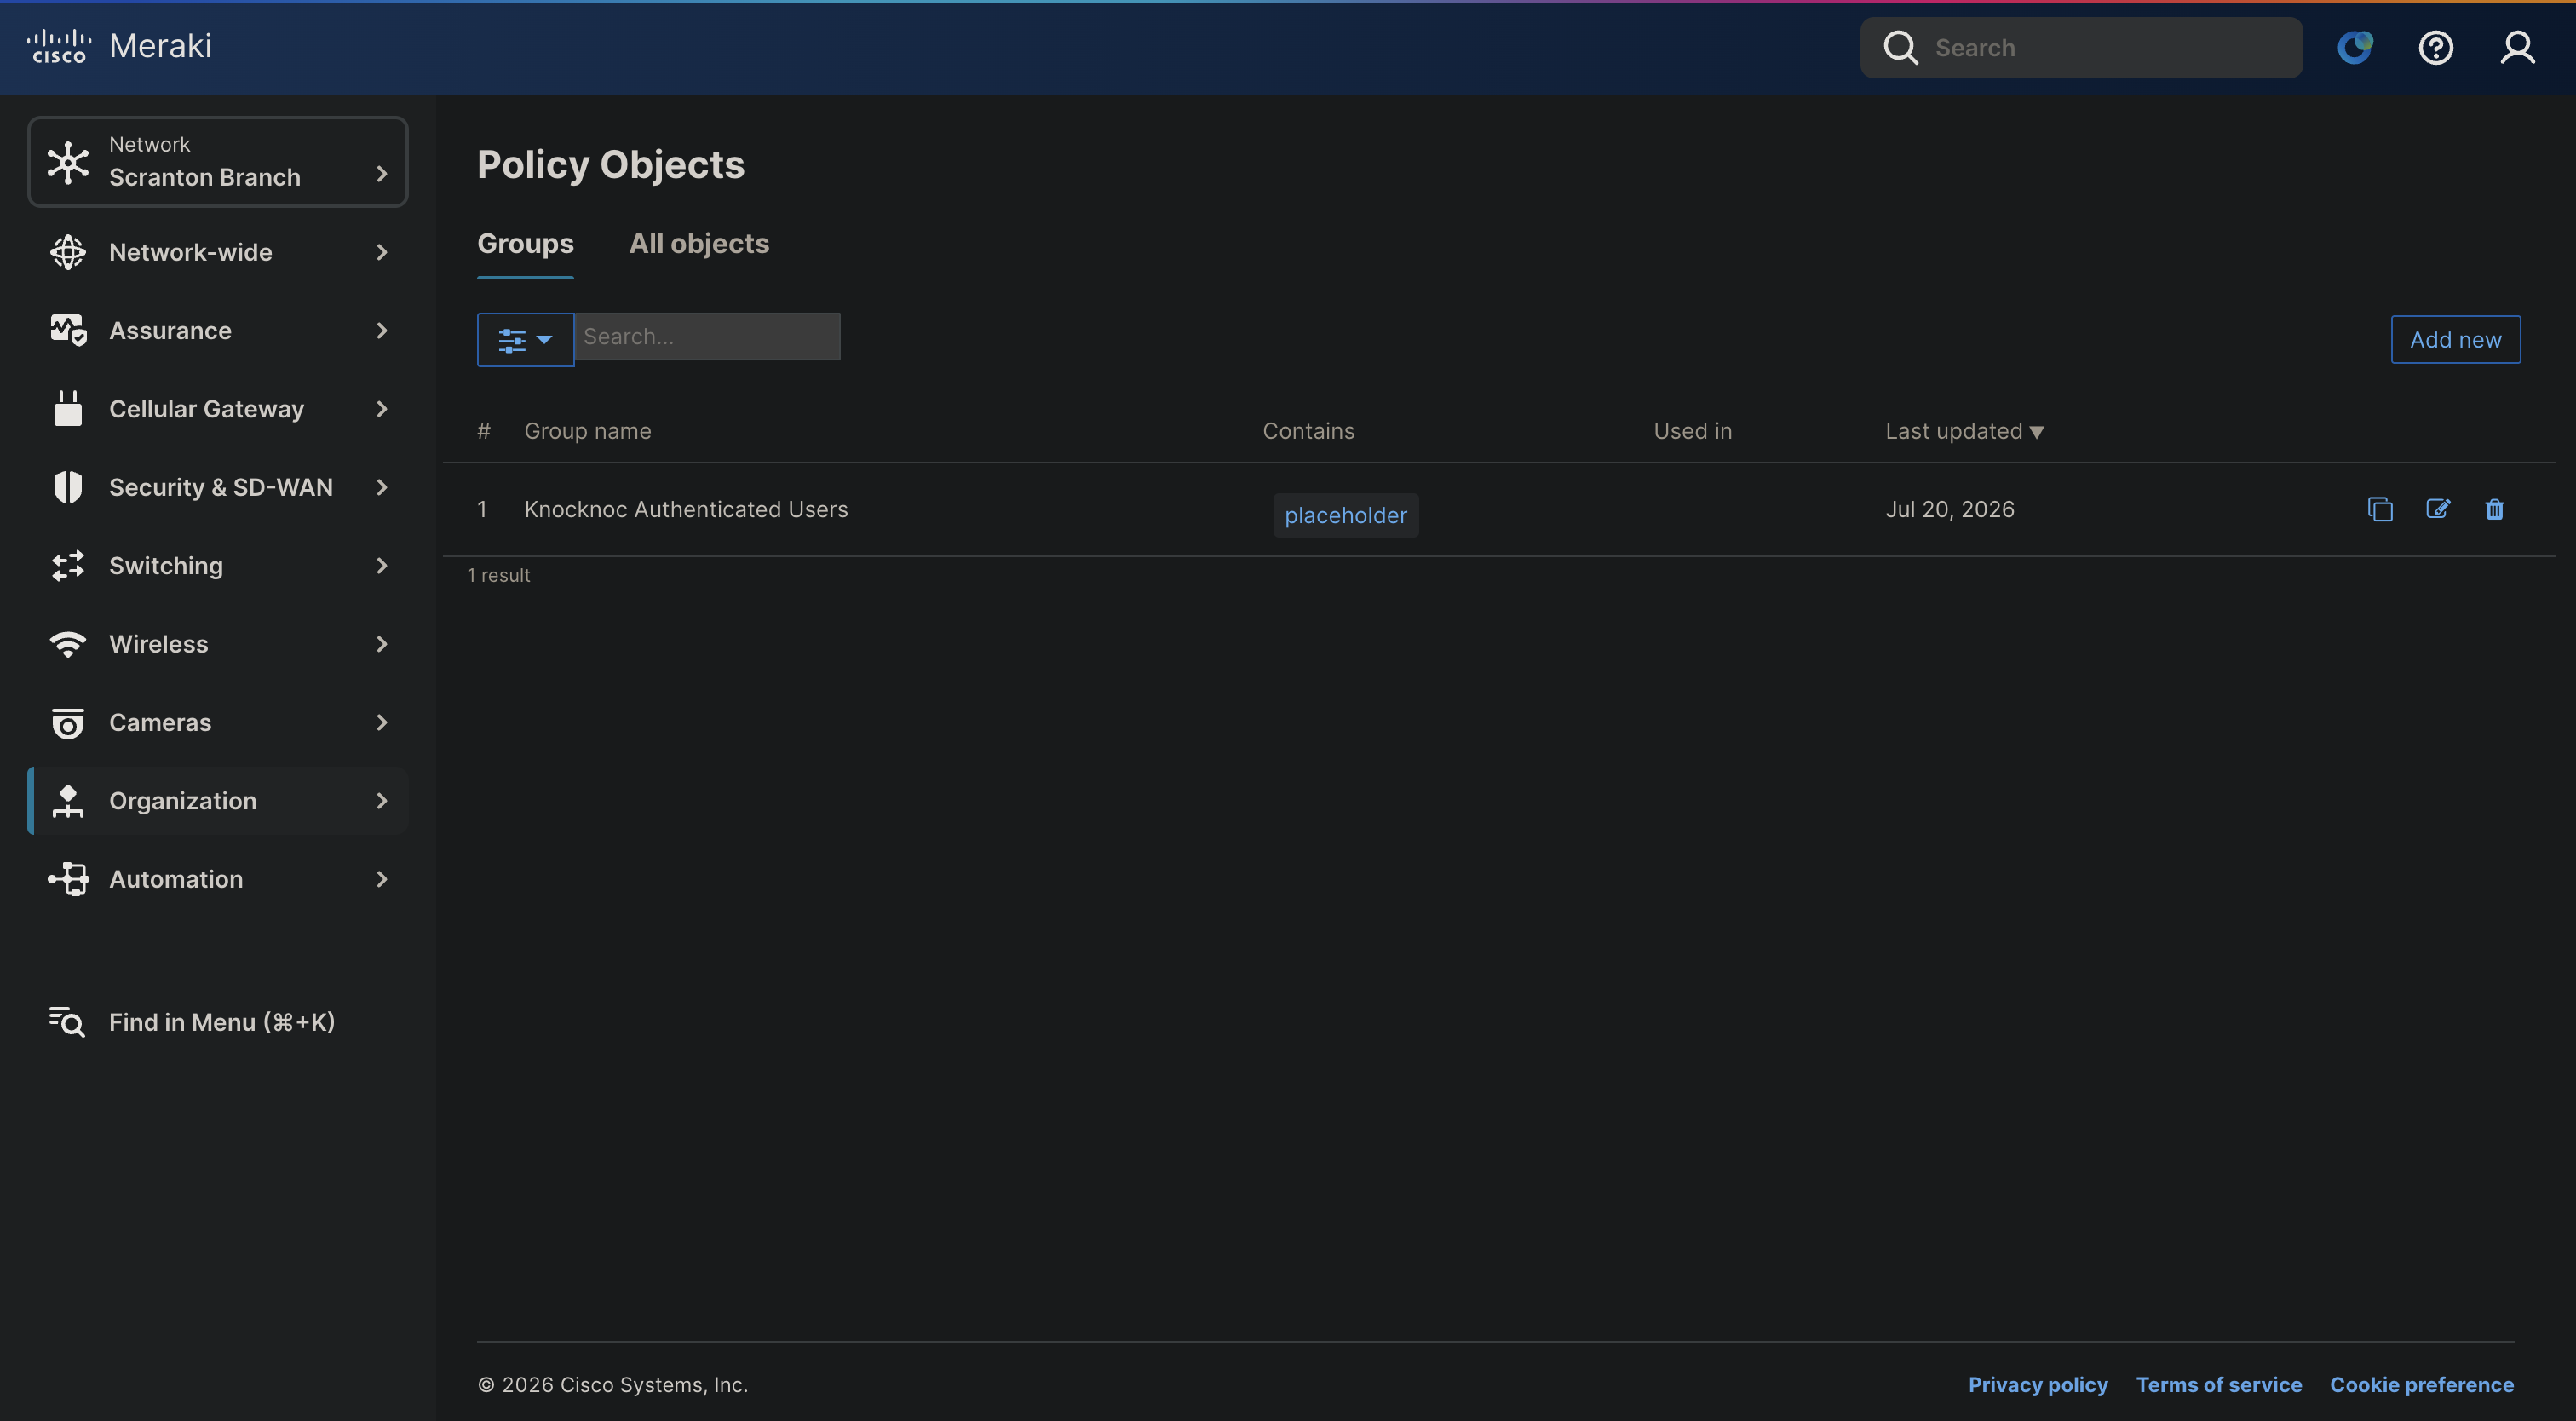
In the Dashboard, go to Organisation > Policy Objects > Groups
-
Create a group (e.g.
Knocknoc Authenticated Users), containing policy object127.0.0.1/32with Object labelplaceholder. -
Get the group's ID for the wizard. The Dashboard doesn't show the ID on the Groups page, so read it from the page's own data using your browser:
- On the Organisation > Policy Objects > Groups page, open your browser's developer tools (right-click the page and choose Inspect, or press F12) and select the Network tab.
- Reload the page, then type
groupsin the Network filter box. - Click the request that loads the groups (its name contains
policyObjectsorgroups) and open its Response (or Preview) tab. - Find your group by name and copy its
idvalue and save that for later. That's the Policy object group ID for the wizard.
Dedicate one group per Knoc. Knocknoc owns the group's entire membership: it adds and removes CIDR policy objects as users come and go. If you need static allow-list entries, put them in a separate group and reference both groups from your firewall rule.
Step 4: Reference the Group in a Firewall Rule
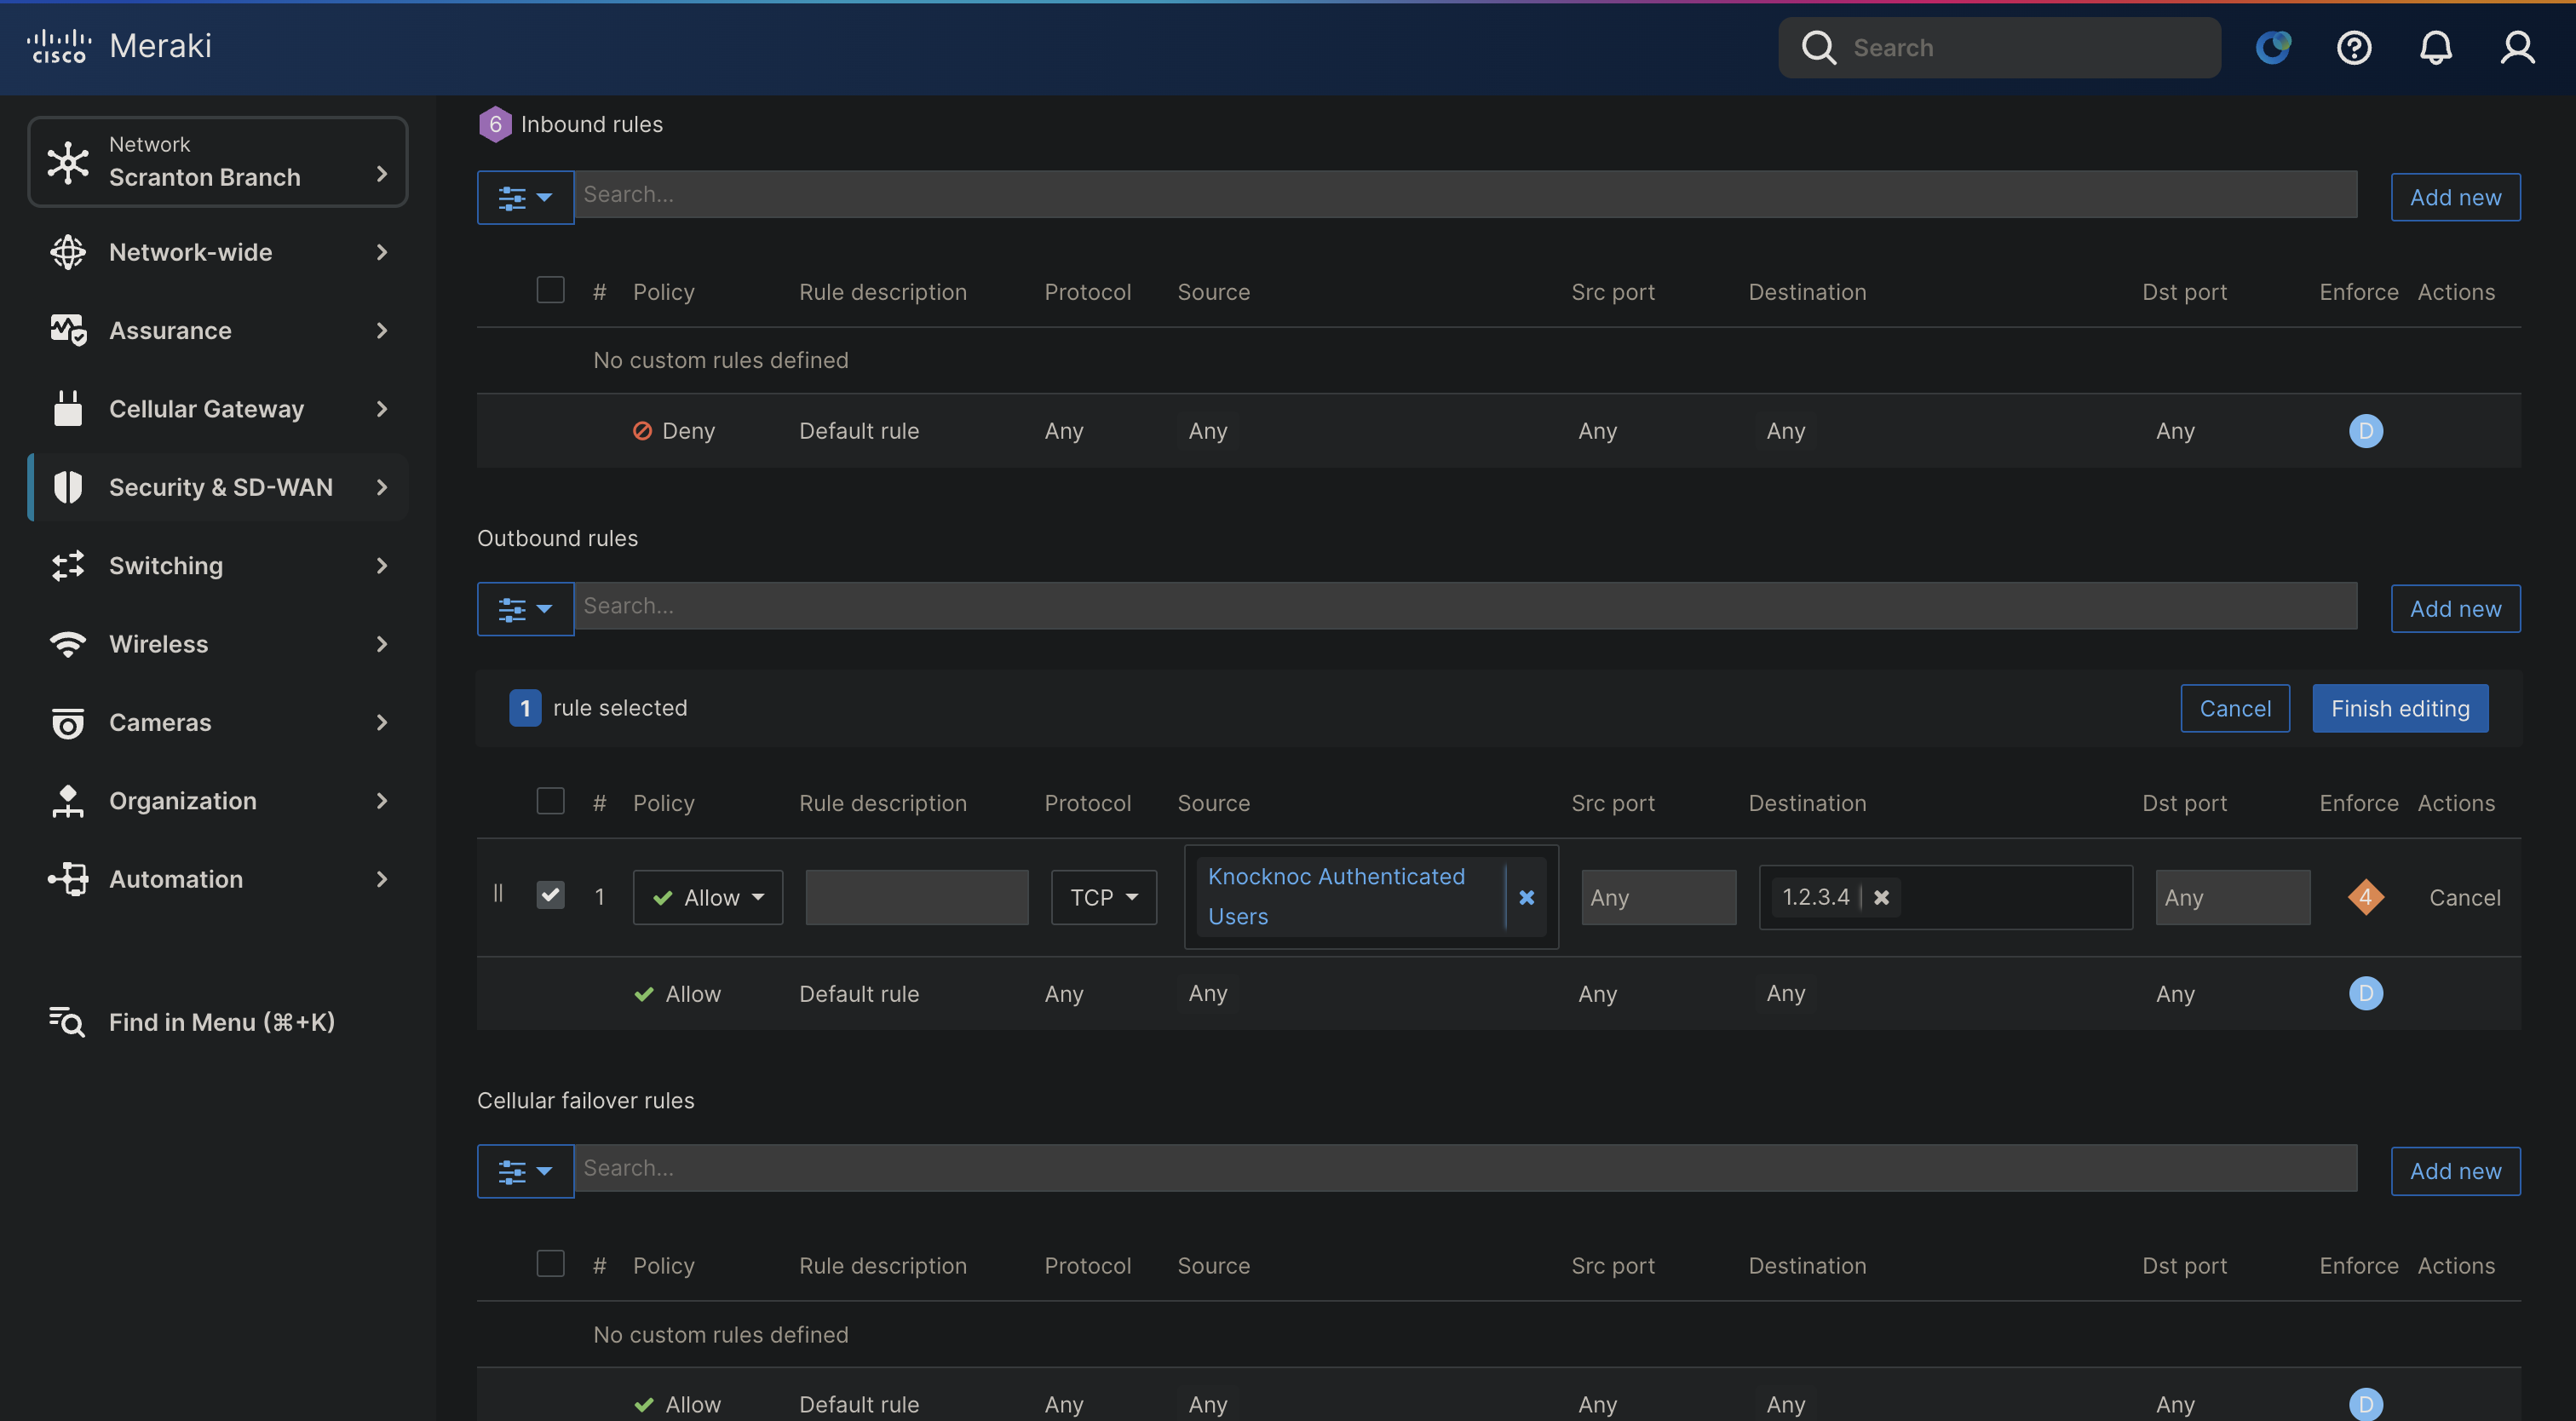
Knocknoc doesn't create firewall rules. Reference the group in a rule so its membership controls access.
- In the network with your MX, open Security & SD-WAN > Configure > Firewall and find the Layer 3 outbound rules
- Add a rule.
- In the Source field, start typing the group name (
Knocknoc Authenticated Users) and choose it from the auto-suggestion list. - Set the Policy to Allow
- Set the Destination to the protected resource
- In the Source field, start typing the group name (
- Order matters: Meraki evaluates rules top-down and takes the first match, so keep a broader deny (or a default-deny posture) below this rule for the same destination, otherwise membership won't actually restrict anyone
- Click Finish editing, then Save
Policy object groups also work in Layer 3 inbound and failover cellular firewall rules if your policy needs them.
Step 5: Deploy the Knocknoc Agent
Deploy the Knocknoc orchestration agent on a server with outbound HTTPS (TCP 443) access to the Meraki Dashboard. See Agent installation for the platform-specific install steps (Linux, Windows, OpenBSD).
The Dashboard API redirects to a per-organisation shard host (for example n123.meraki.com), so if you restrict egress allow the whole *.meraki.com domain (or your regional equivalent, e.g. *.meraki.cn), not just api.meraki.com.
Step 6: Create the Knoc in Knocknoc
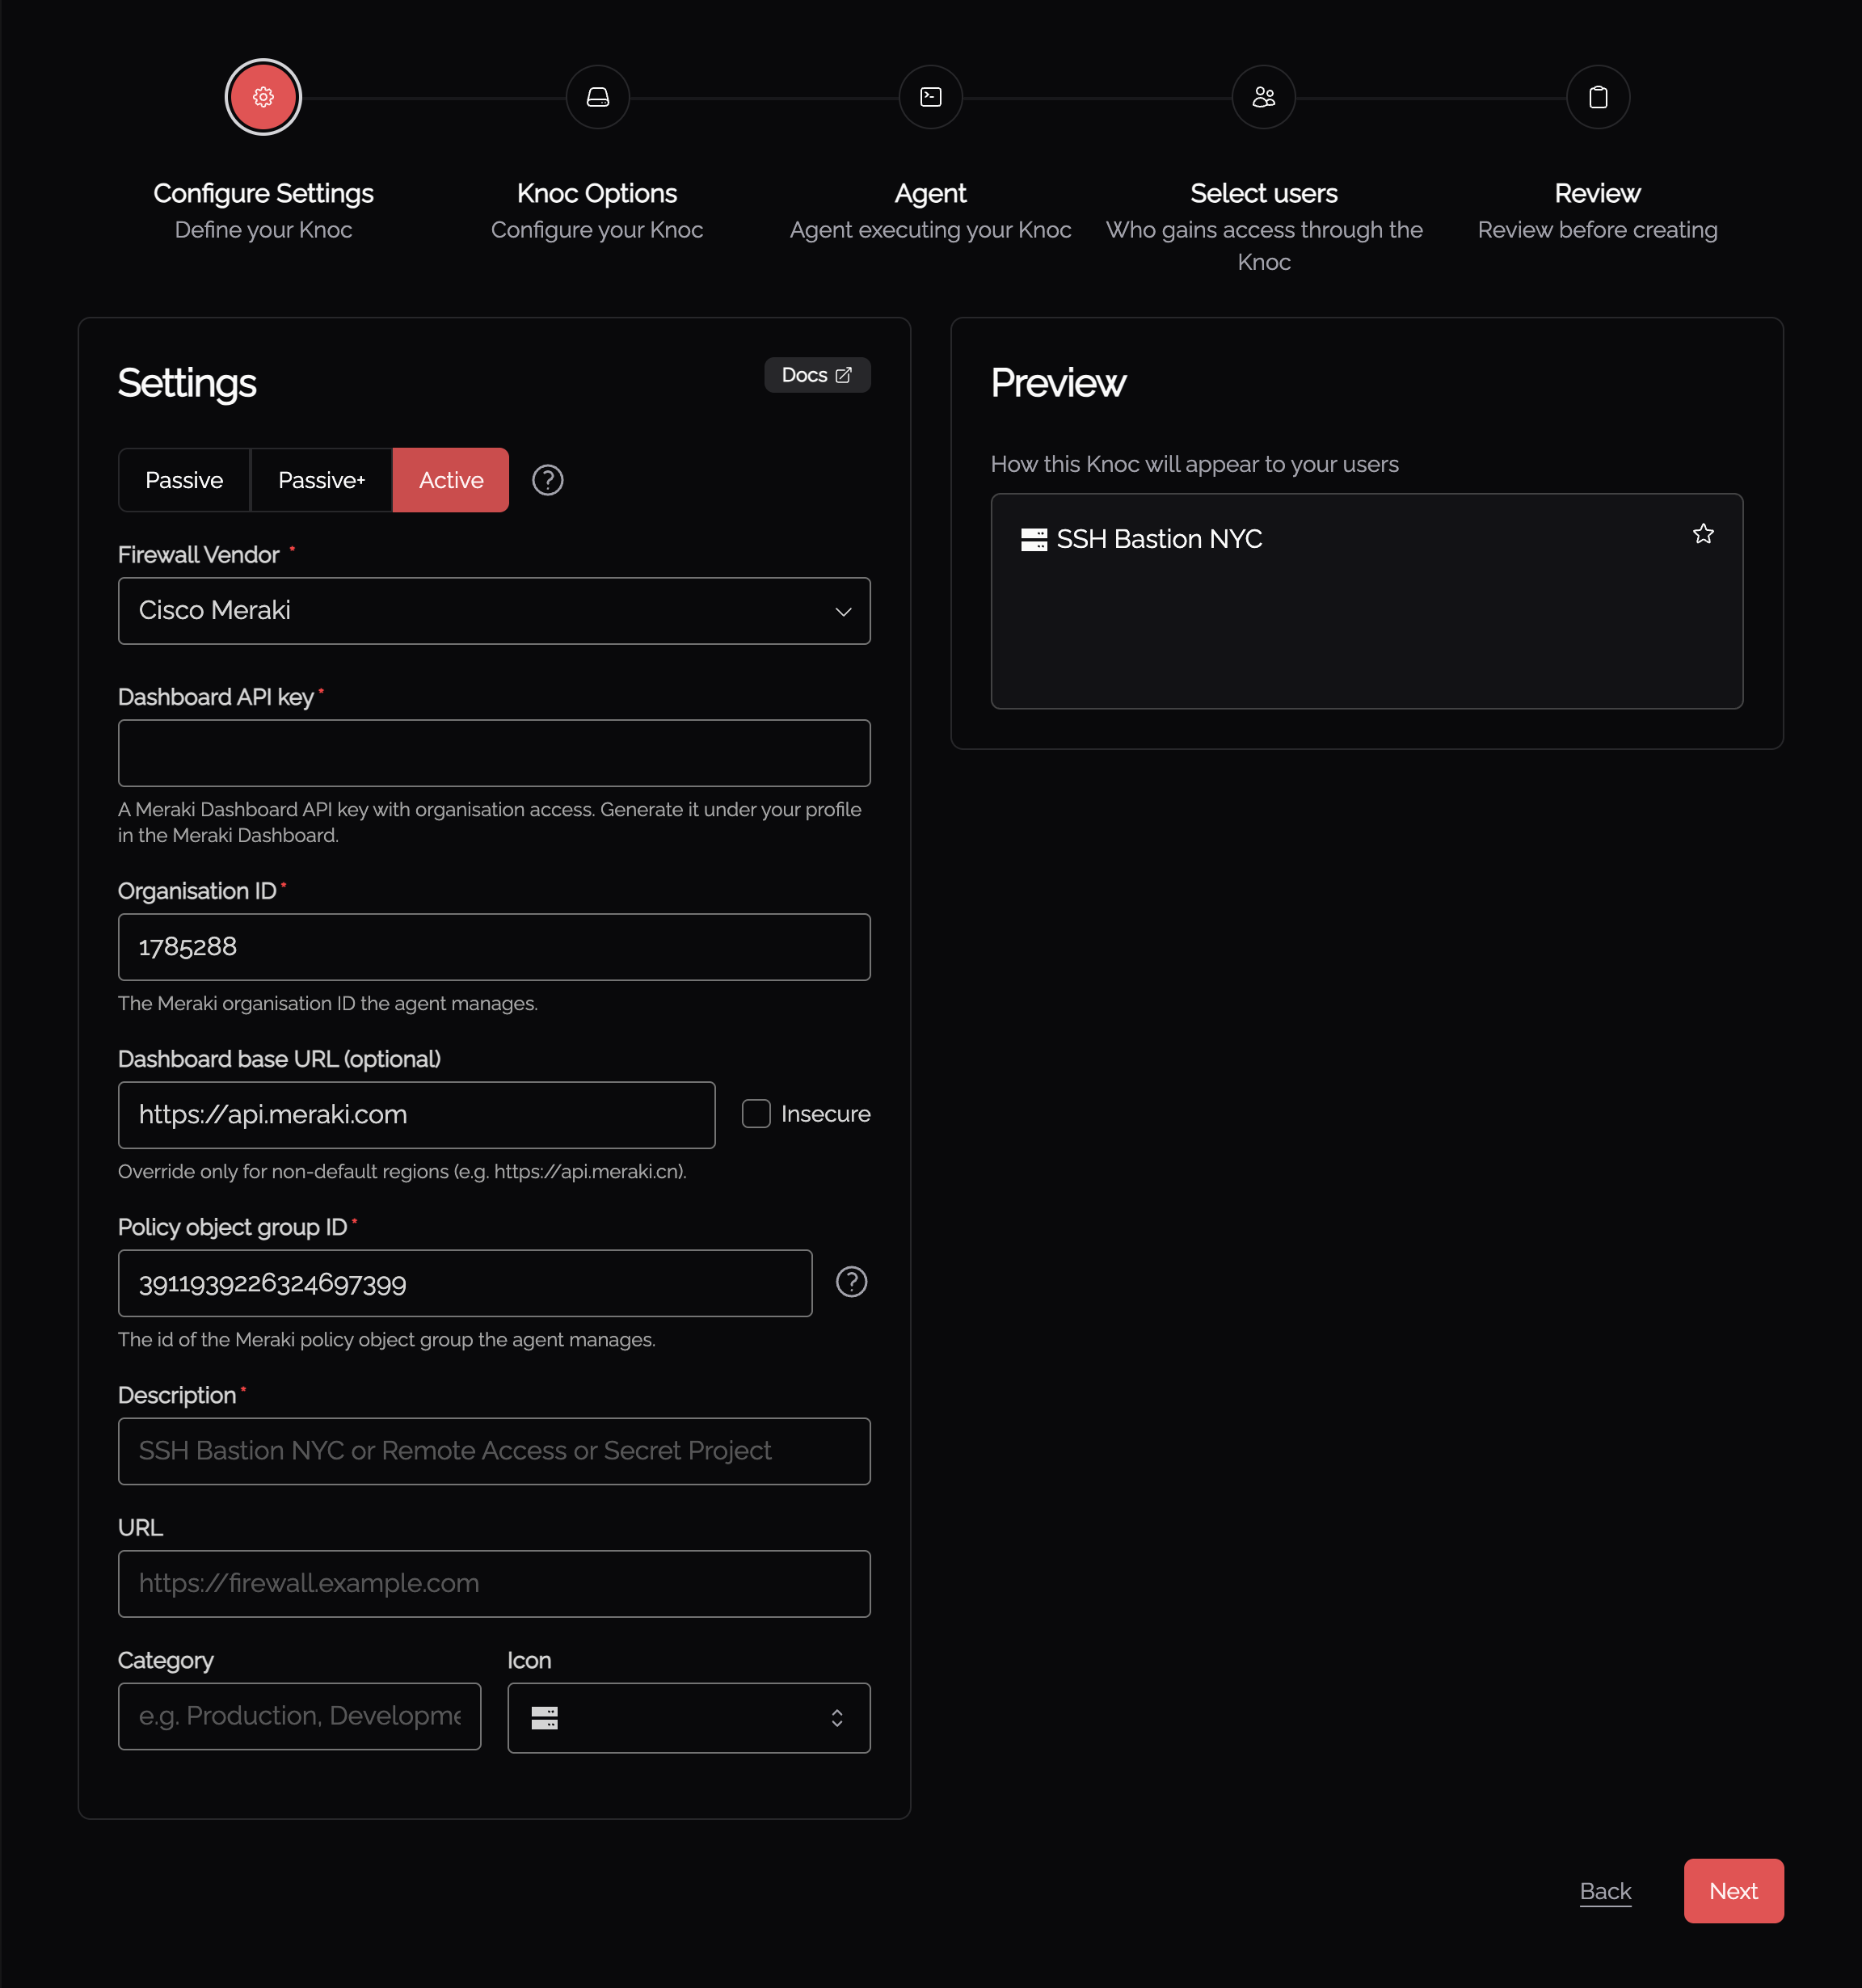
- Create an Application Knoc
- Set Application Type to Active (Meraki is active-only)
- Choose Cisco Meraki as the Firewall Vendor
Configure the backend
| Field | Description |
|---|---|
| Dashboard API key | The API key generated in Step 2. |
| Organisation ID | The organisation that contains your policy object group, from Step 1. |
| Dashboard base URL | Optional. Override only for non-default regions (e.g. https://api.meraki.cn). Blank uses the default. |
| Insecure | Optional. Skips TLS certificate verification. Leave off for api.meraki.com, and enable only for a proxy that presents a self-signed certificate. |
| Policy object group ID | The group ID from Step 3. |
Step 7: Validate, Assign Users, and Test
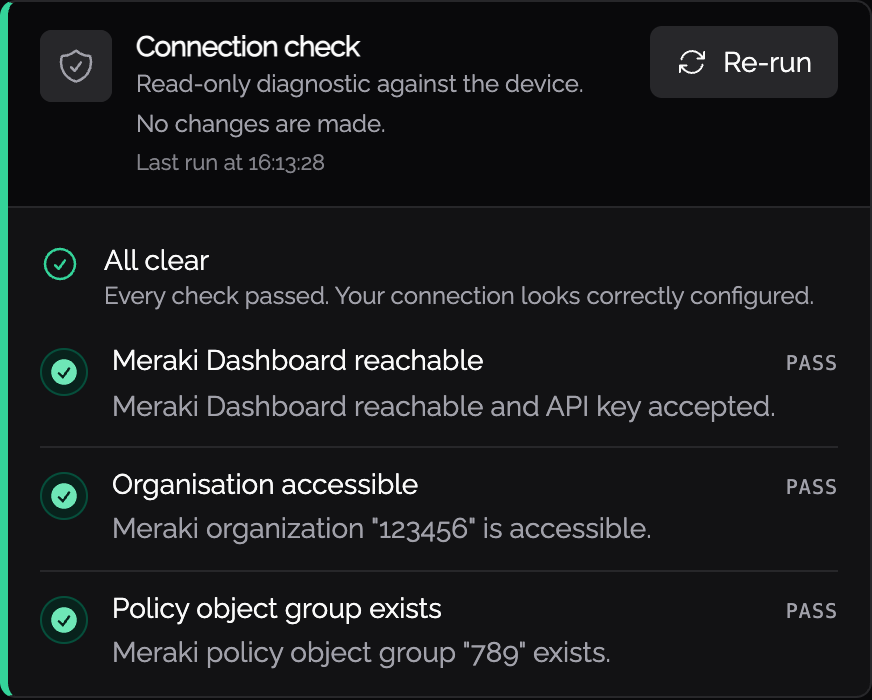
- Use the wizard's Validate connection step. It checks Dashboard reachability, organisation access, and that the group exists
- Assign users and/or groups to the Knoc
- Log in as a test user via the Knocknoc portal
- In the Dashboard, open the group under Organisation > Policy Objects and confirm an object with the
knoc-prefix for the user's IP appears - Confirm access through the Meraki-protected path works, and that the object is removed on logout or grant expiry
Scale Note
Knocknoc creates one Policy Object per active grant. Meraki doesn't document a hard per-organisation cap, but large numbers of policy objects degrade Dashboard and MX performance. For high-volume Knocs, monitor the policy object count. Knocknoc removes objects on revoke, expiry, and flush to keep the working set bounded.
Troubleshooting
Validate connection runs three read-only checks against the Meraki Dashboard: that the Dashboard is reachable and the API key authenticates, that the configured organisation is accessible, and that the policy object group exists. A failing check shows an agent error code that links straight to the matching troubleshooting page.
An authentication failure (agent error #MERA001) means the API key is invalid or was regenerated. Generate a new key and update the backend configuration. An authorisation failure (#MERA002) means the key's administrator can't reach the configured organisation, or the Organisation ID is wrong.
If validation passes but granted IPs don't appear in the group, confirm the Policy object group ID matches the group in the Dashboard, that the firewall rule references the group as GRP(id),group, and that the API key's administrator has write access to policy objects.
Error codes
The Knocknoc agent reports structured error codes when Meraki operations fail. You can find more details on resolving these issues here.
Meraki Documentation References
- Policy objects: policy object schema and endpoints
- Network objects configuration: using
GRP(id)