
SaaS deployment
Knocknoc can host and operate your server as a managed cloud instance. Use the Instances page to provision it, monitor its status, and open its admin portal.
Create a managed cloud instance
- Sign in to the Knocknoc licensing portal.
- Open Instances.
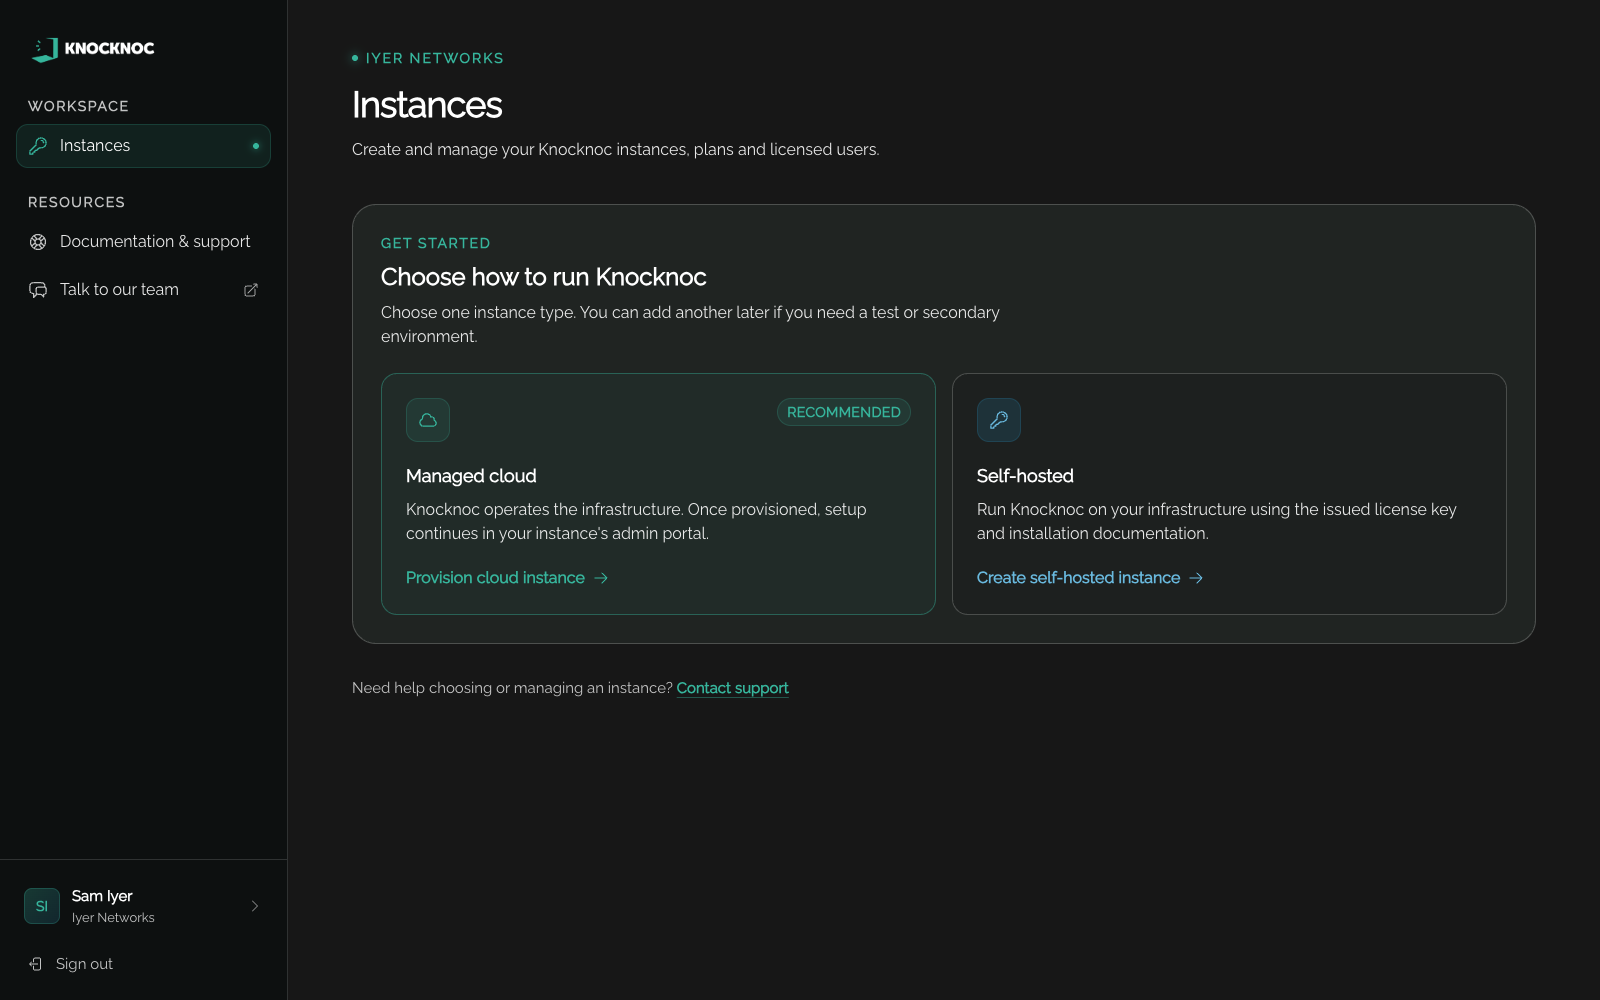
- If this is your first instance, select Provision cloud instance under Managed cloud.
If your account already has an instance, select Provision instance, then Cloud instance.
Configure the instance
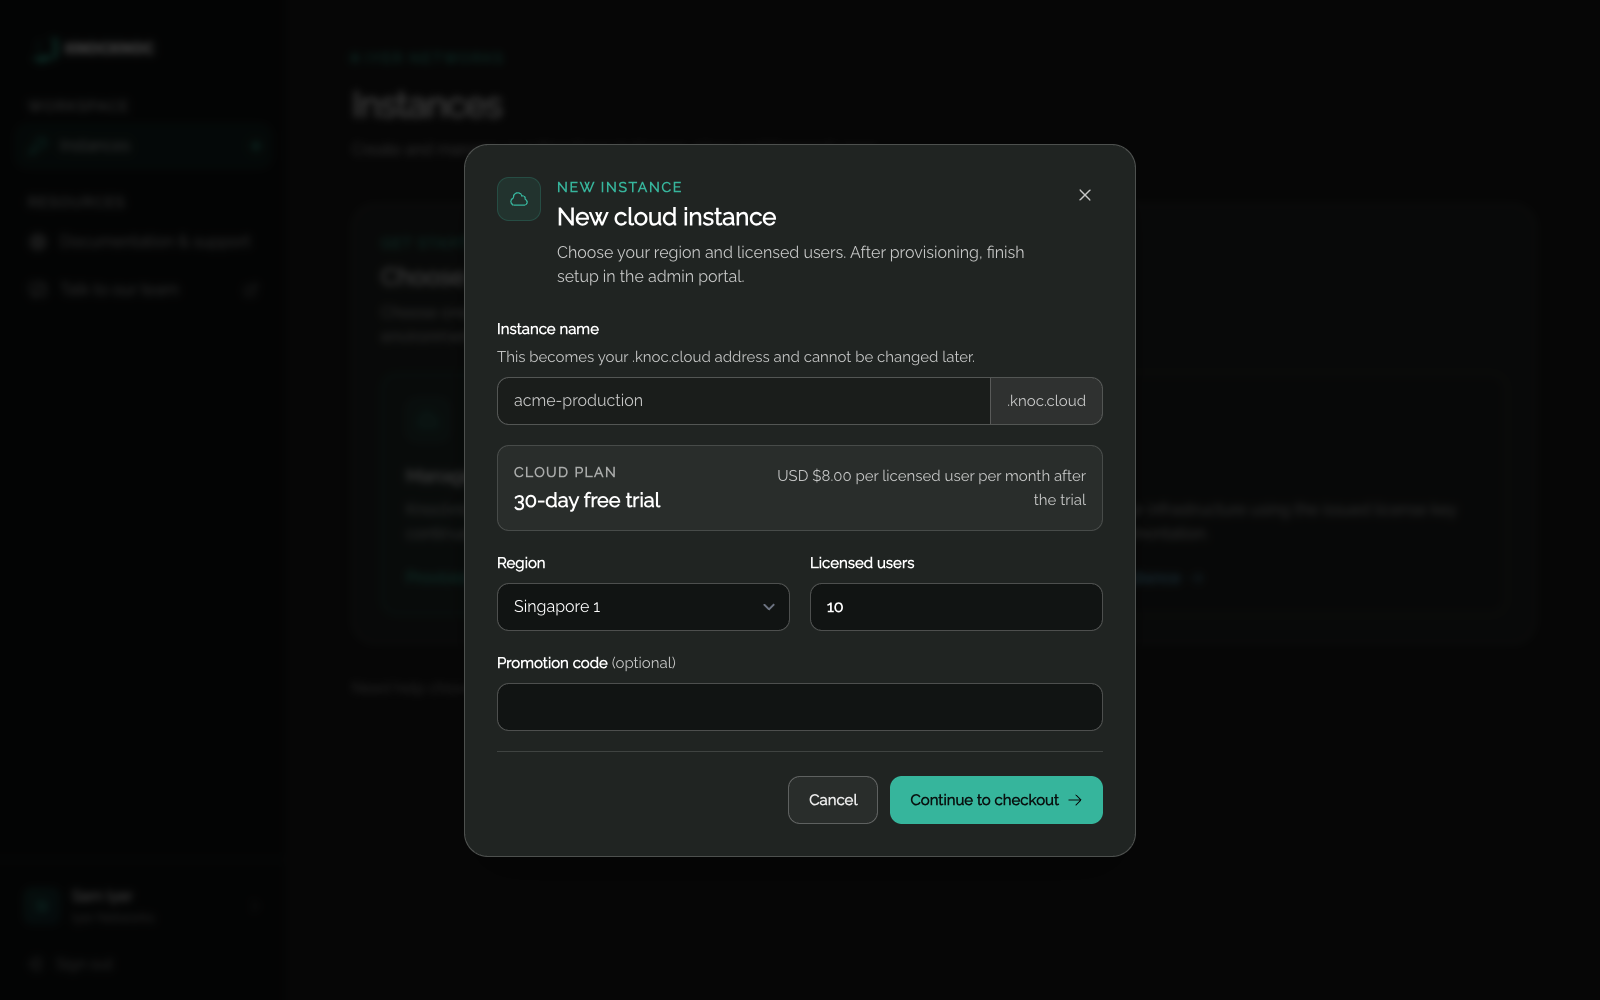
Enter or review the instance details:
- Instance name — becomes the first part of the managed address, such as
example.knoc.cloud. You cannot change it after requesting the instance. - Cloud plan — review the trial or subscription and its billing summary. If more than one plan is available, select the one you need.
- Region — choose where Knocknoc will run the instance.
- Licensed users — enter the number of people permitted to use the instance.
- Promotion code — enter a code if Knocknoc has provided one.
Select Continue to checkout, then complete checkout if prompted.
Monitor provisioning
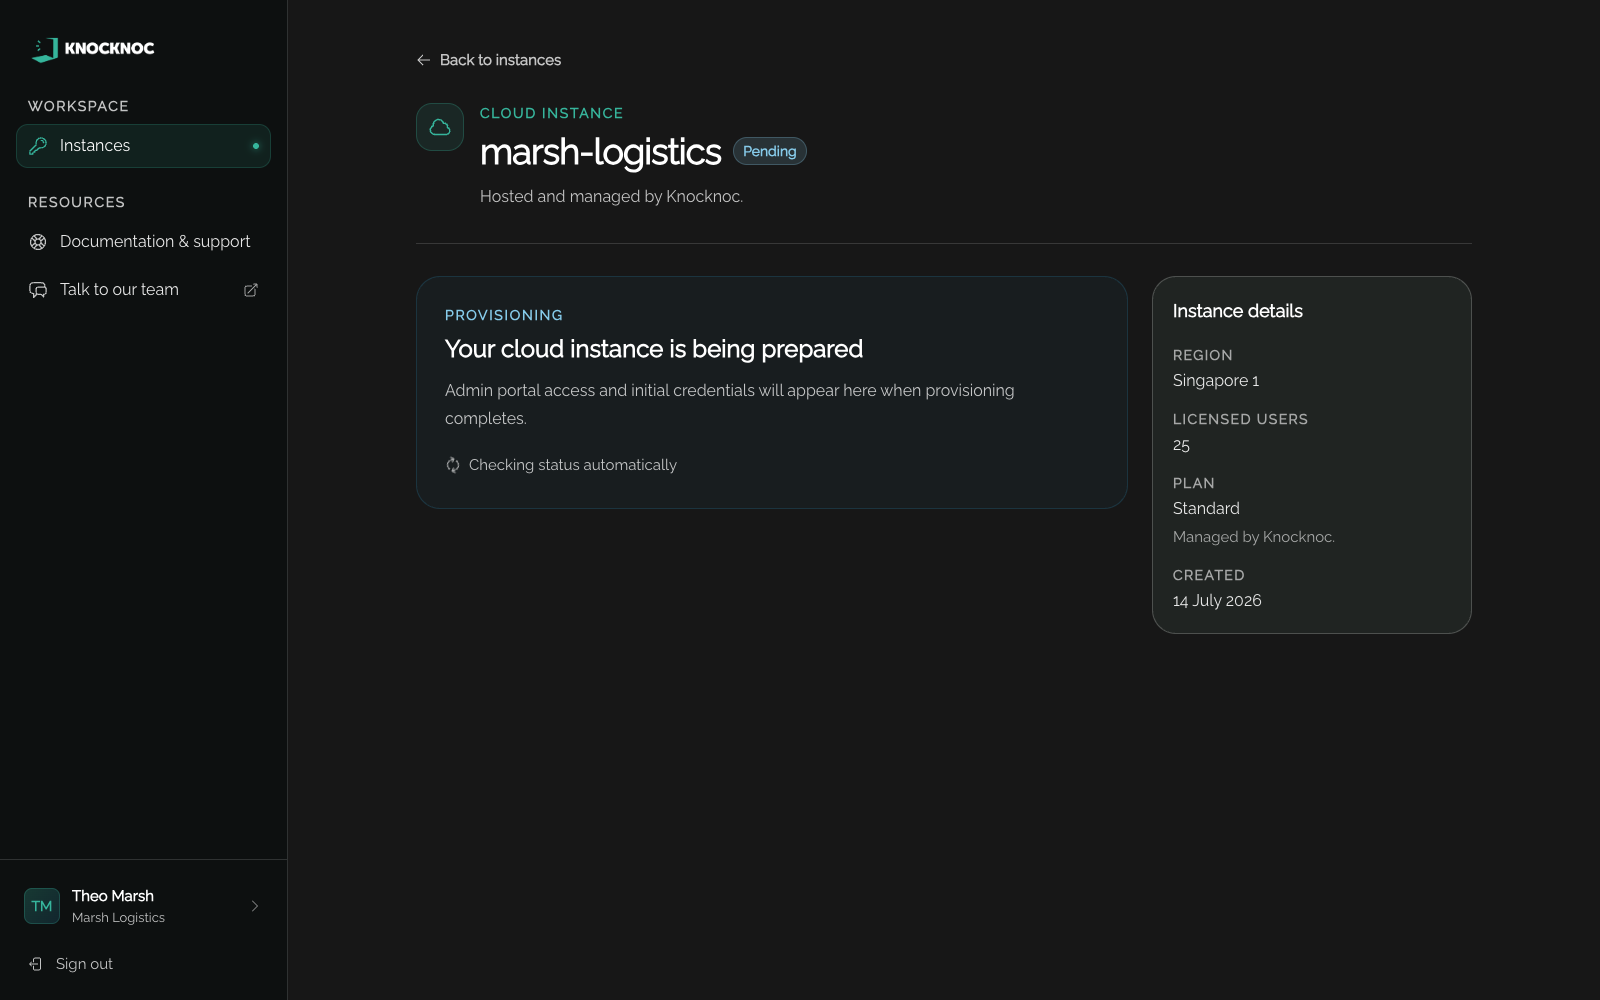
After checkout, the new instance appears on the Instances page with a Pending or Provisioning status. Select View details to open it.
The instance details page shows the region, licensed-user count, plan, and creation date. It checks the provisioning status automatically, so you can leave the page open while Knocknoc prepares the instance.
Open the admin portal
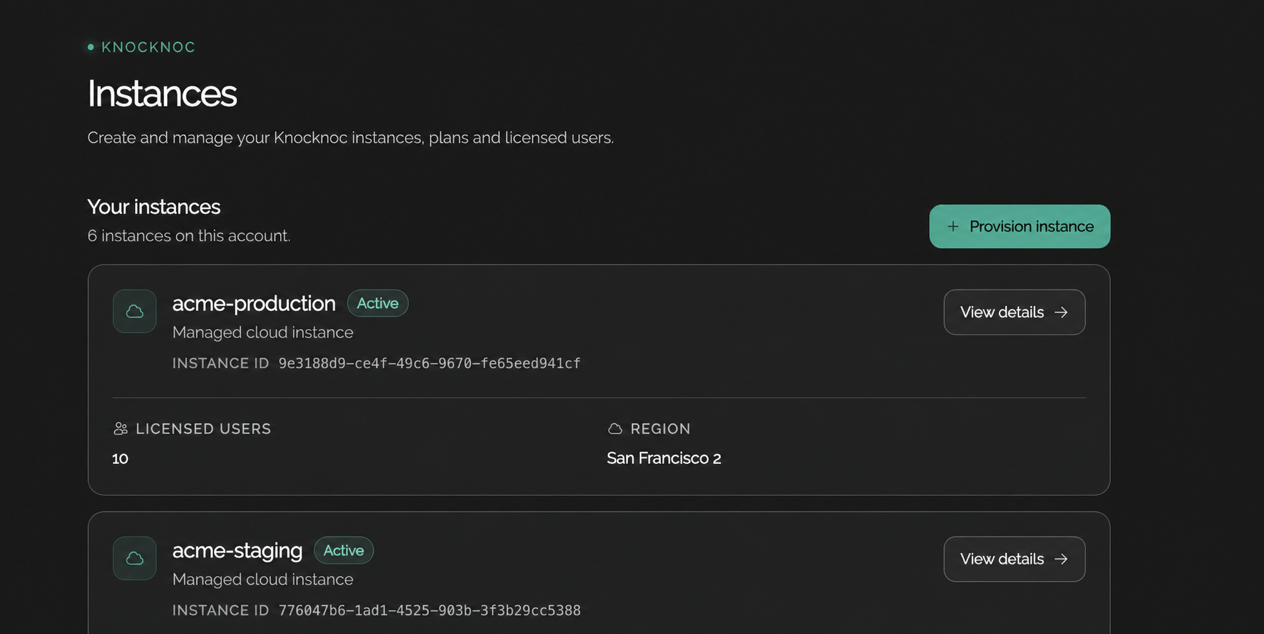
When provisioning is complete, the instance status changes to Active.
- Open Instances.
- Find the active managed cloud instance and select View details.
https://<deployment-name>.knoc.cloud/admin
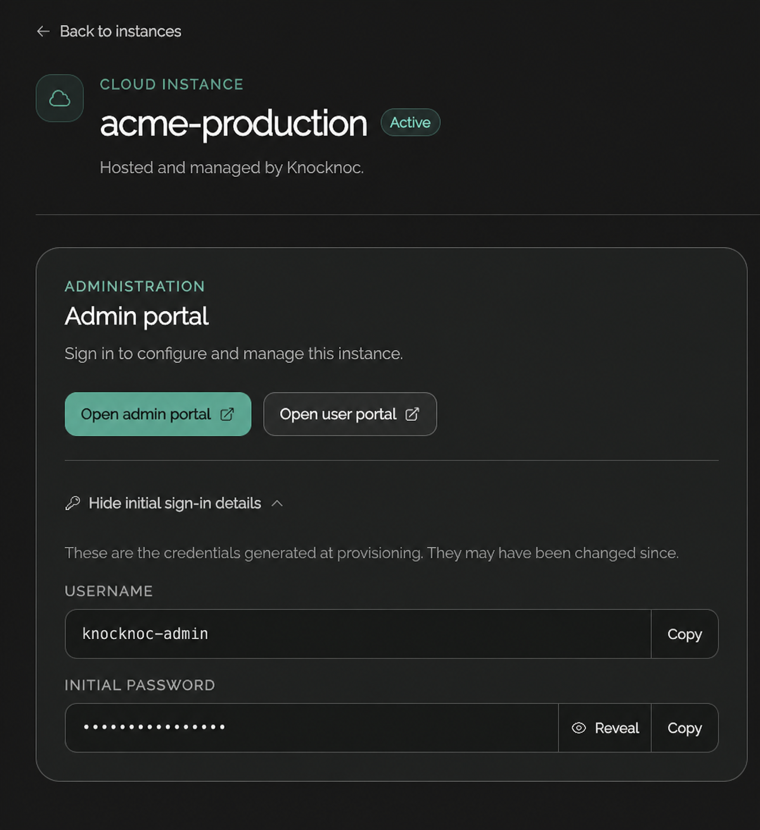
The Admin portal panel provides two actions:
- Open admin portal — opens the administration interface.
- Open user portal — opens the end-user interface.
The admin URL follows this format:
https://<instance-name>.knoc.cloud/admin
Get the initial sign-in details
- In the Admin portal panel, expand Show initial sign-in details.
- Copy the generated username and initial password.
- Select Open admin portal to open the administration interface in a new browser tab.
The password remains masked until you select Reveal, but you can copy it without revealing it. These credentials were generated during provisioning and may have been changed since.
After signing in, configure the authentication methods and other initial settings required for your environment.
Choose passive or active orchestration
Knocknoc can orchestrate your firewall and access-control layers actively through an agent, or passively through an external dynamic list (EDL).
Passive orchestration
Passive orchestration is the quickest way to prove the service without installing an agent. Your firewall or other system polls an allowlist published by the Knocknoc server.
See Allowlist (EDLs).
You do not need a Knocknoc orchestration agent for a passive Knoc.
Active orchestration
Active orchestration provides the best experience when the target firewall or control layer supports it. Install the Knocknoc orchestration agent, then configure the required integration.
See Agent installation.