
PF (Packet Filter)
Knocknoc integrates with the PF packet filter to dynamically control network access on a host that the agent runs on directly. As users authenticate and grants expire, the agent adds and removes their IPs from a PF table; your own pass/block rules reference that table by name.
This is a local backend: the agent runs on the same machine as PF and drives it with pfctl. It works anywhere pfctl is available and the agent is supported.
This is not the same as the pfSense backend. pfSense is a remote integration; PF here is the in-kernel packet filter managed locally with
pfctl. If you run pfSense or OPNsense, use the vendor-specific backend instead.
What the Agent Does
You point the agent at a PF table. When a user is granted access, the agent adds their IP to that table; when the grant expires or the user logs out, it removes the IP. The agent keeps the table's contents matched to the set of currently granted users.
The table itself enforces nothing. You write pass and/or block rules in pf.conf that reference the table by name, and PF applies them to traffic.
Requirements
- The Knocknoc agent installed and running on the PF host.
- PF enabled (
pfctl -e). - A persistent PF table declared in
pf.conf(for exampletable <knoc_ssh_allowed> persist). - One or more pass/block rules referencing the table.
Setup
Step 1: Install the Agent on the PF Host
Deploy the Knocknoc orchestration agent on the machine running PF. The agent connects out to the Knocknoc server over WebSocket; it does not need an inbound port.
See the Linux or OpenBSD setup guide.
Step 2: Declare a PF Table and Rules
Add a persistent table to /etc/pf.conf and write rules that reference it. The table must be persist so it survives with no members. For example, to gate SSH:
table <knoc_ssh_allowed> persist

pass  in quick proto tcp from <knoc_ssh_allowed> to port 22
block drop in quick proto tcp to port 22
The pass rule must come before the block rule, since both are quick. Adjust the protocol, port, and destination to fit your policy. Note the table name; you will enter it in the Knocknoc wizard.
Note, on a standard OpenBSD installation, a set of tables will be created by default.
Step 3: Reload PF
Check the configuration, then load it:
pfctl -nf /etc/pf.conf   # validate without applying
pfctl -f  /etc/pf.conf   # apply
pfctl -e                 # enable PF if it is not already
Step 4: Create the Knoc in Knocknoc
-
Create a Local firewall Knoc and select the agent running on the PF host.
-
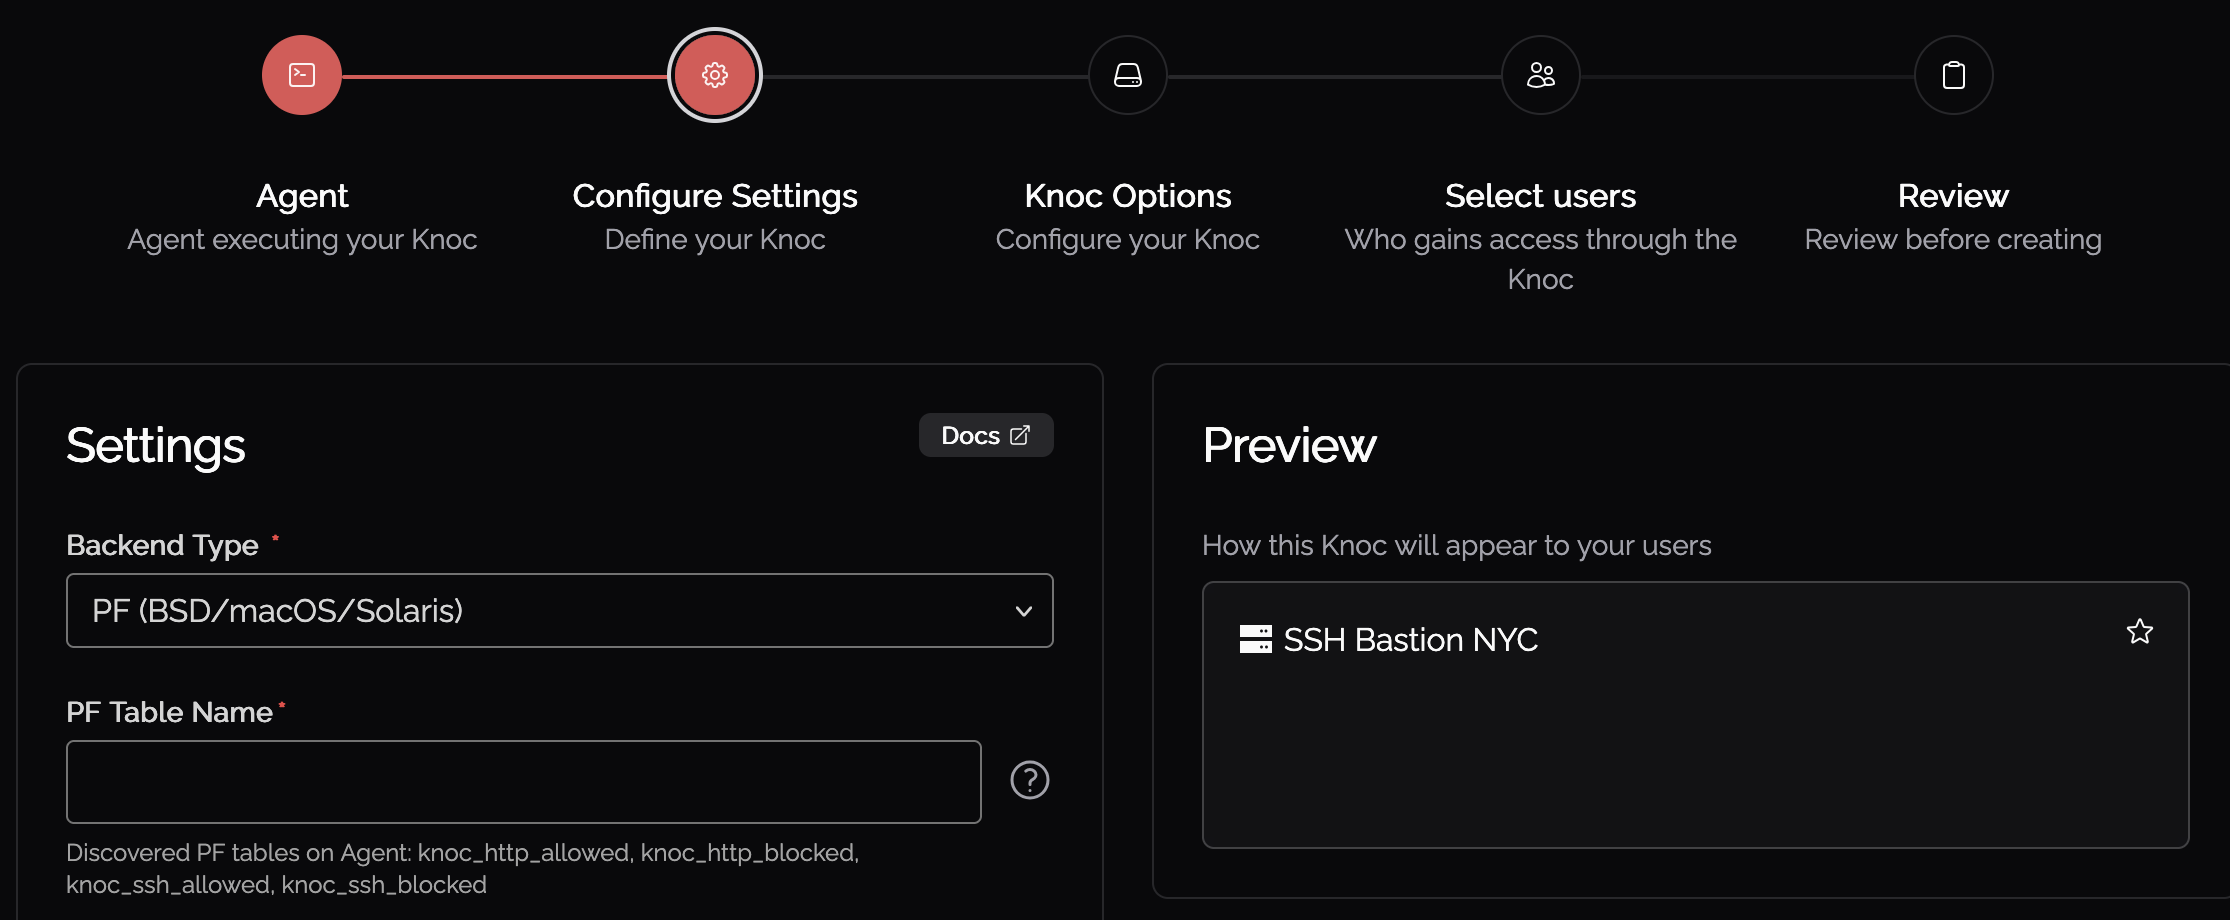
For the backend type, choose PF (BSD/macOS/Solaris).
If PF is grayed out, the agent on that host did not report PF as available. Confirm
pfctlis on the host and the agent can run it (see troubleshooting).
Step 5: Configure the ACL
Set the PF table the agent writes to (e.g., knoc_ssh_allowed). The wizard lists tables it discovered on the agent; you can also type a new name, but you must then create that table on the host yourself. The table name must match a persist table in pf.conf.
Step 6: Assign Users and Test
-
Assign users and/or groups to the Knoc.
-
Log in as a test user.
-
On the PF host, confirm the IP appears in the table:
pfctl -t knoc_ssh_allowed -T show -
Verify access through the service the rule protects.
-
On logout or grant expiry, confirm the IP is removed from the table.
Troubleshooting
Agent Logs
Start with the agent logs on the PF host. To view the agent logs on Debian/RHEL, run `journalctl -xefu knocknoc-agent`. On OpenBSD, run `tail -f -1000 /var/log/daemon | grep knocknoc_agent`.
Common problems:
- PF backend not offered in the wizard: the agent did not report PF as available. Confirm
pfctlis installed on the host, and that the agent runs as root or has workingdoas/sudoaccess topfctl. pf not enabled: PF is installed but off. Enable it withpfctl -e.permission denied: the agent cannot runpfctlwith enough privilege. Run it as root, or check thedoas/sudorule scoped topfctl.Table does not exist/No such table: the table named in the ACL is not declared inpf.conf, or PF has not been reloaded since it was added. Addtable <name> persistand runpfctl -f /etc/pf.conf. Table names are case-sensitive and must match the ACL exactly.
IP Added but Access Still Blocked
If the user's IP shows up in the table (pfctl -t <table> -T show) but traffic is still denied:
- Confirm
pf.confhas apassrule referencing the table, and that it precedes anyblockrule (both should bequick). - Reload after editing rules:
pfctl -f /etc/pf.conf. - Check the rule's interface, protocol, port, and direction match the traffic you expect.
Entries Disappear or Do Not Persist
- Ensure the table is declared
persist. Without it, PF drops an empty table and the agent cannot add IPs to it. - Avoid manually editing or flushing the table; the agent manages its contents and will restore granted IPs, but manual changes can briefly drop access.
PF Documentation References
- OpenBSD pf.conf(5): PF rule and table syntax
- OpenBSD pfctl(8): the PF control utility
- OpenBSD PF FAQ: tables, rules, and tutorials
- FreeBSD Handbook: PF: PF on FreeBSD