
User authentication
User sessions can be created using the API. This is handy for machine to machine authentication, and is where knocknoc-client authentication requests are also configured.
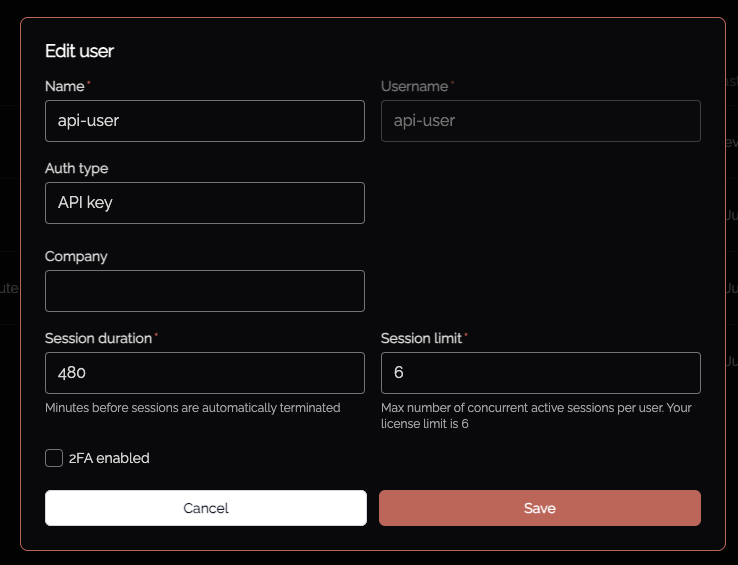
As an Admin, create a local user, selecting API Key as the authentication method:
Visit the API keys section and choose "User Authentication", selecting the user who has been permitted API access.
If no local users have the API key authentication method yet, this step shows a No API key users available message hinting that you must create a user with the "API key" auth type first. Use the Go to Users button to create one, then come back to issue the key.
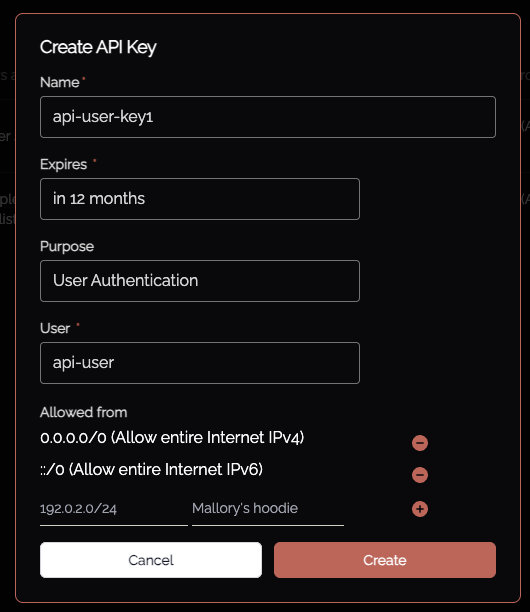
Note the IP restrictions.
Knocknoc client
This is used for machine to machine authentication, such as during scripted authentication grant/revocation as part of SCP/Rsync transfers or ephemeral/scripted SSH access.
The client knocknoc-client can be installed with sudo apt install knocknoc-client, and requires the following configuration:
- Knocknoc server URL
- Username
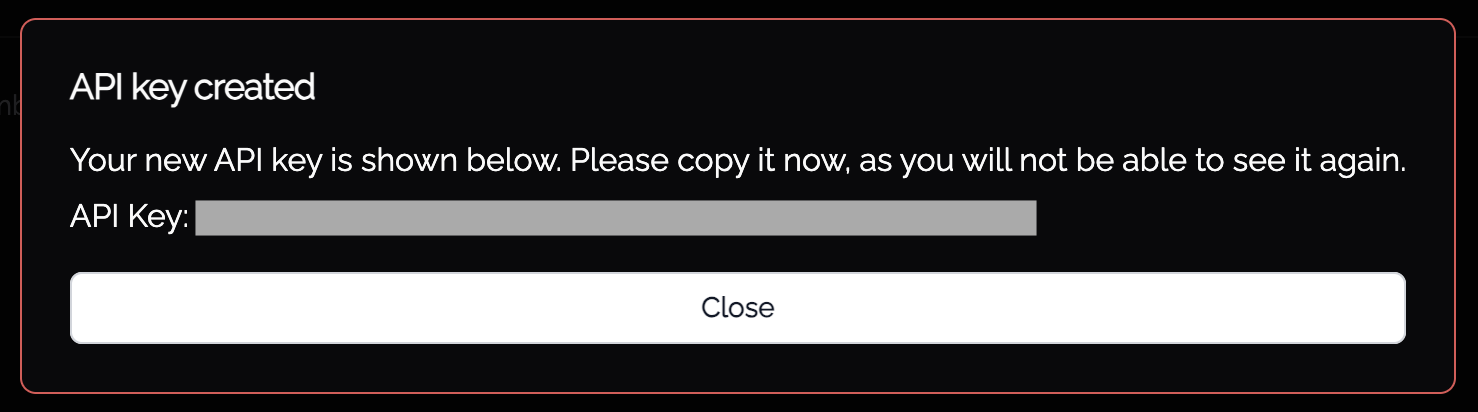
- API key (can be granted in the admin panel)
A template can be created by running knocknoc-client -newconfig <configfile>
To create a session, the user runs knocknoc-client -config <file>. This will contact the Knocknoc server at the specified URL, and attempt to log in as the specified user with the given API key. If that login is successful, then a regular user session will be created, with the ACLs granted in the usual fashion, for the session duration specified for the user, and then exit. If the operation (e.g., file transfer) takes longer than the Knocknoc session, it will be terminated as access is removed in most cases. For IPSets, if the blocklist is not used, the established TCP connection will continue without disruption, however new (TCP SYN) sessions will be blocked. This is naturally firewall configuration dependent.
If the -persist command-line option is passed to knocknoc-client, then rather than exiting, the client will enter a loop, which behaves similarly to the user home/webpage view. It polls the "user status" endpoint every 30 seconds, which handles IP address changes automatically.