
AWS (EC2) Security Groups
Knocknoc can orchestrate Amazon AWS Security Groups, which essentially provide network level firewalling across various asset types, including EC2 VMs, meaning just-in-time network exposure (and access) for authenticated users, tied to your IDP not to AWS IAM or authentication
This is achieved by connecting a Knocknoc orchestration agent to your Knocknoc server, setting up a restricted AWS API user, then proceeding to the per-security-group configuration.
AWS configuration
IAM policy, user and access key
The Knocknoc orchestration agent requires a low number of AWS IAM privileges to add/remove IP addresses from existing firewalls, along with reading existing states. More recently AWS requires users to create-tags, which is also included below.
The broad process is: create the user and related (restricted) policy, then obtain an AWS access key for this user
- Log in to AWS
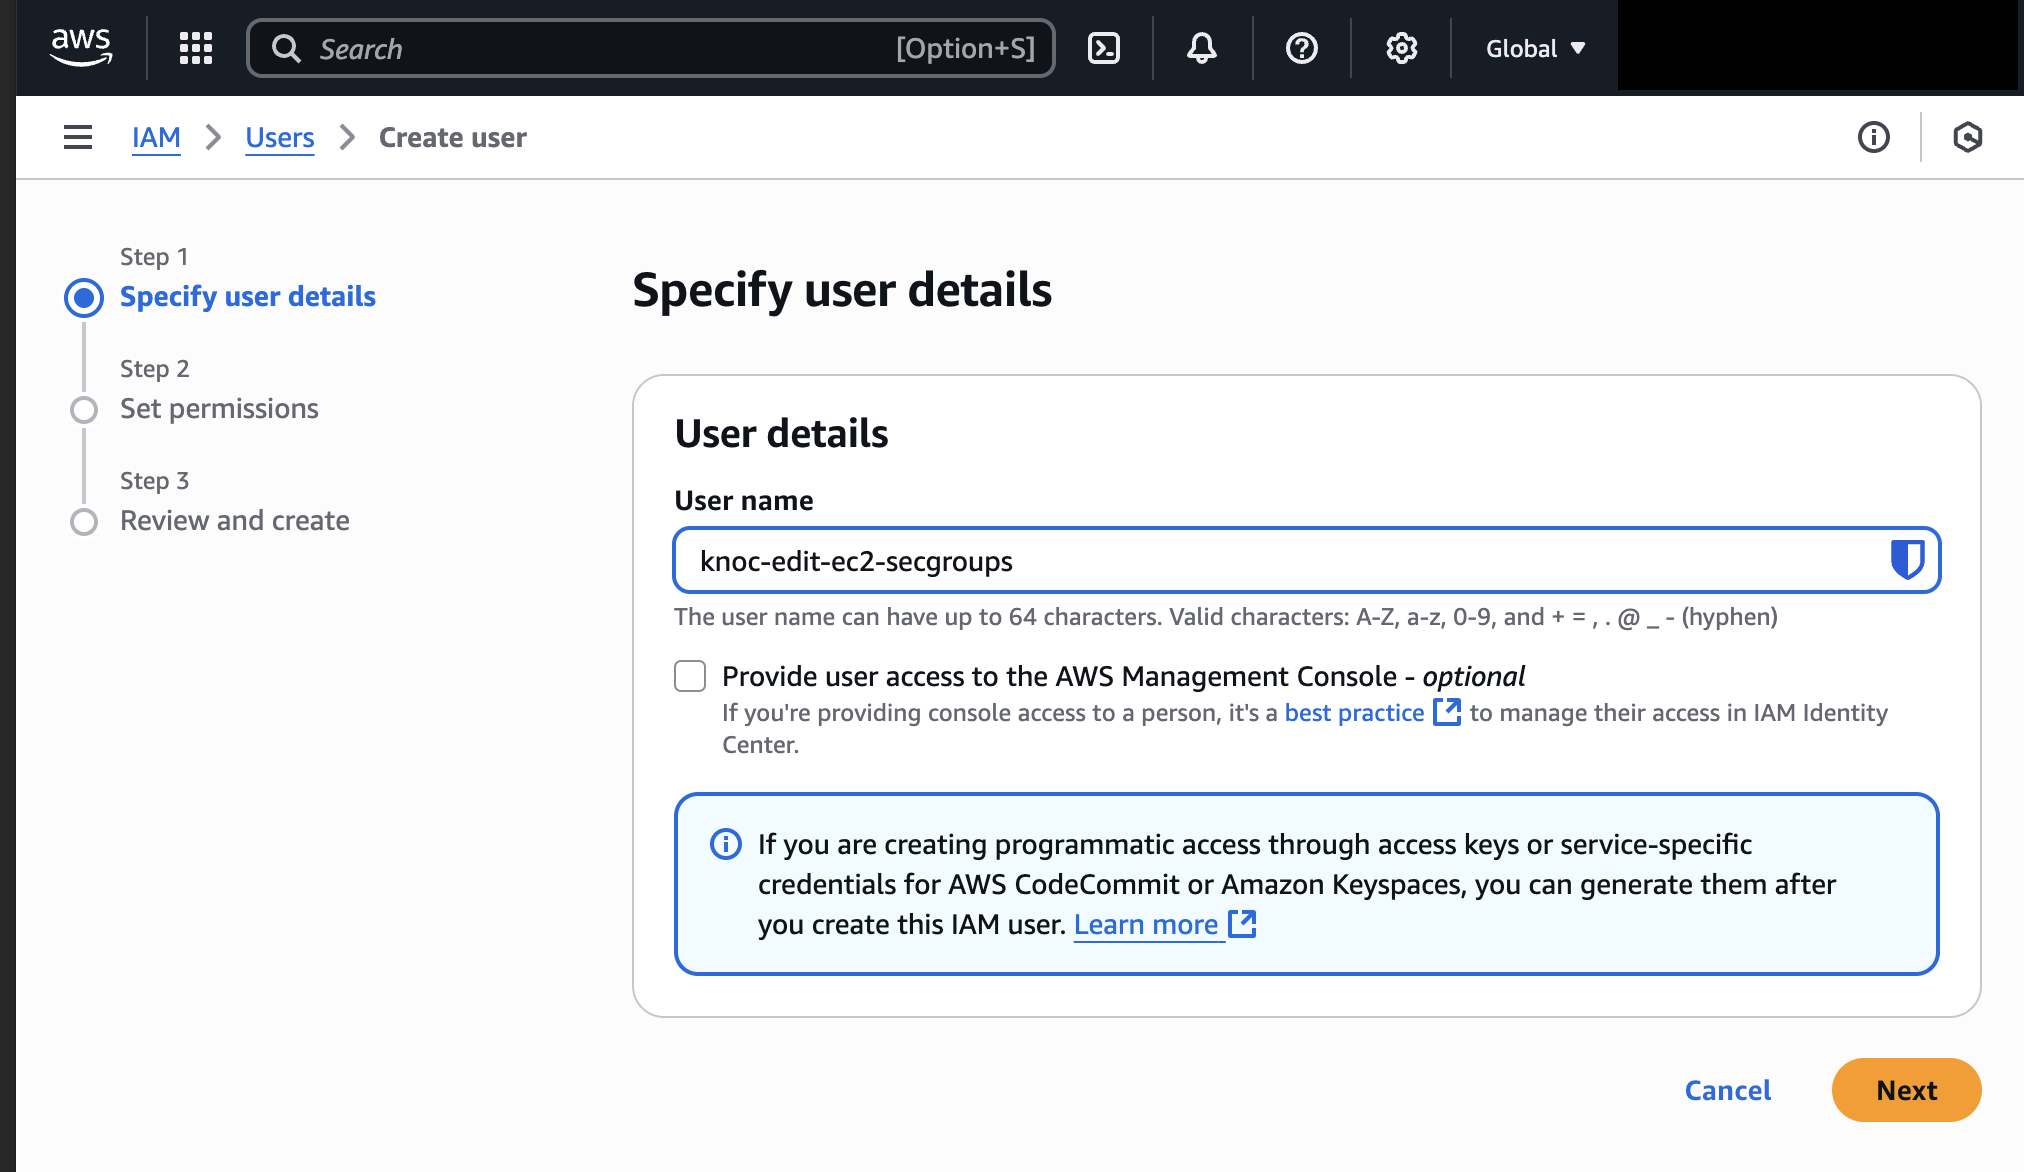
- Visit IAM -> Access Management -> Users and click "Create user"
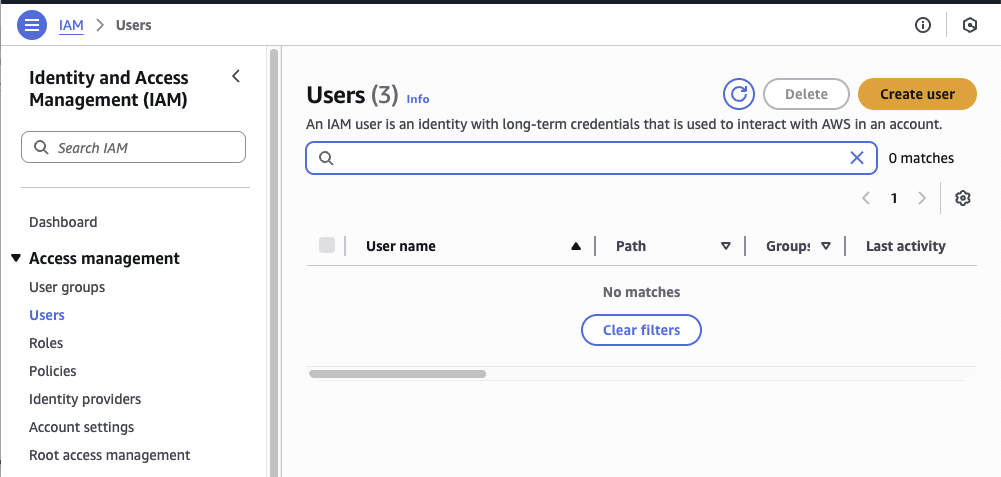
- Provide a sensible name, this may be re-used across assets. Do not grant access to the AWS management console, this is not required.

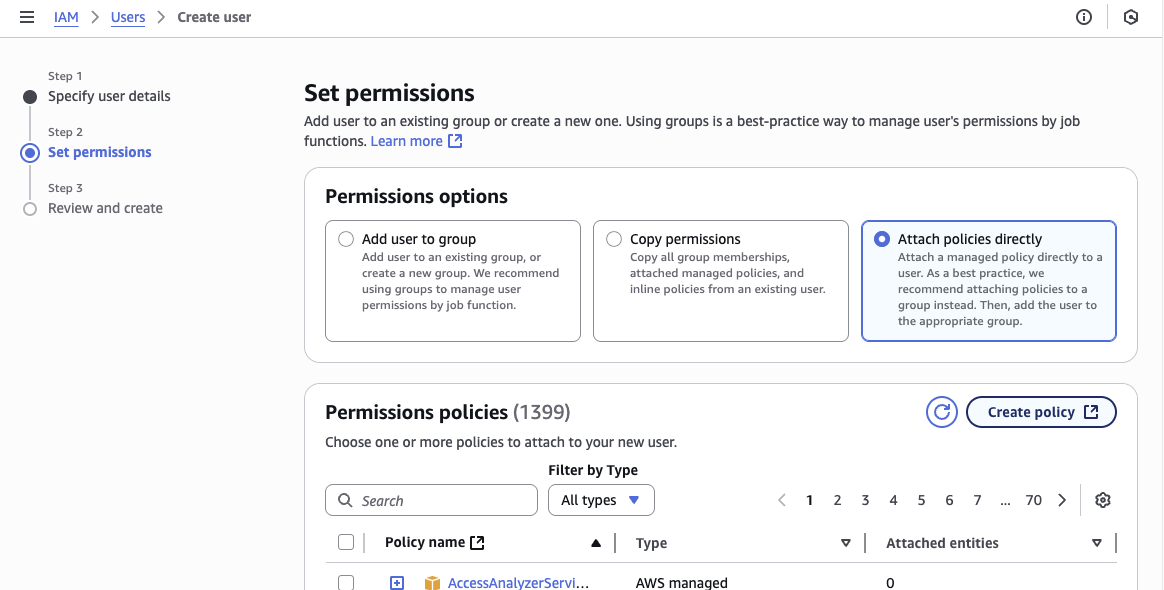
- Select "Attach policies directly" if you are doing this for the first time, we need to create a policy. Otherwise select the existing Knoc policy.
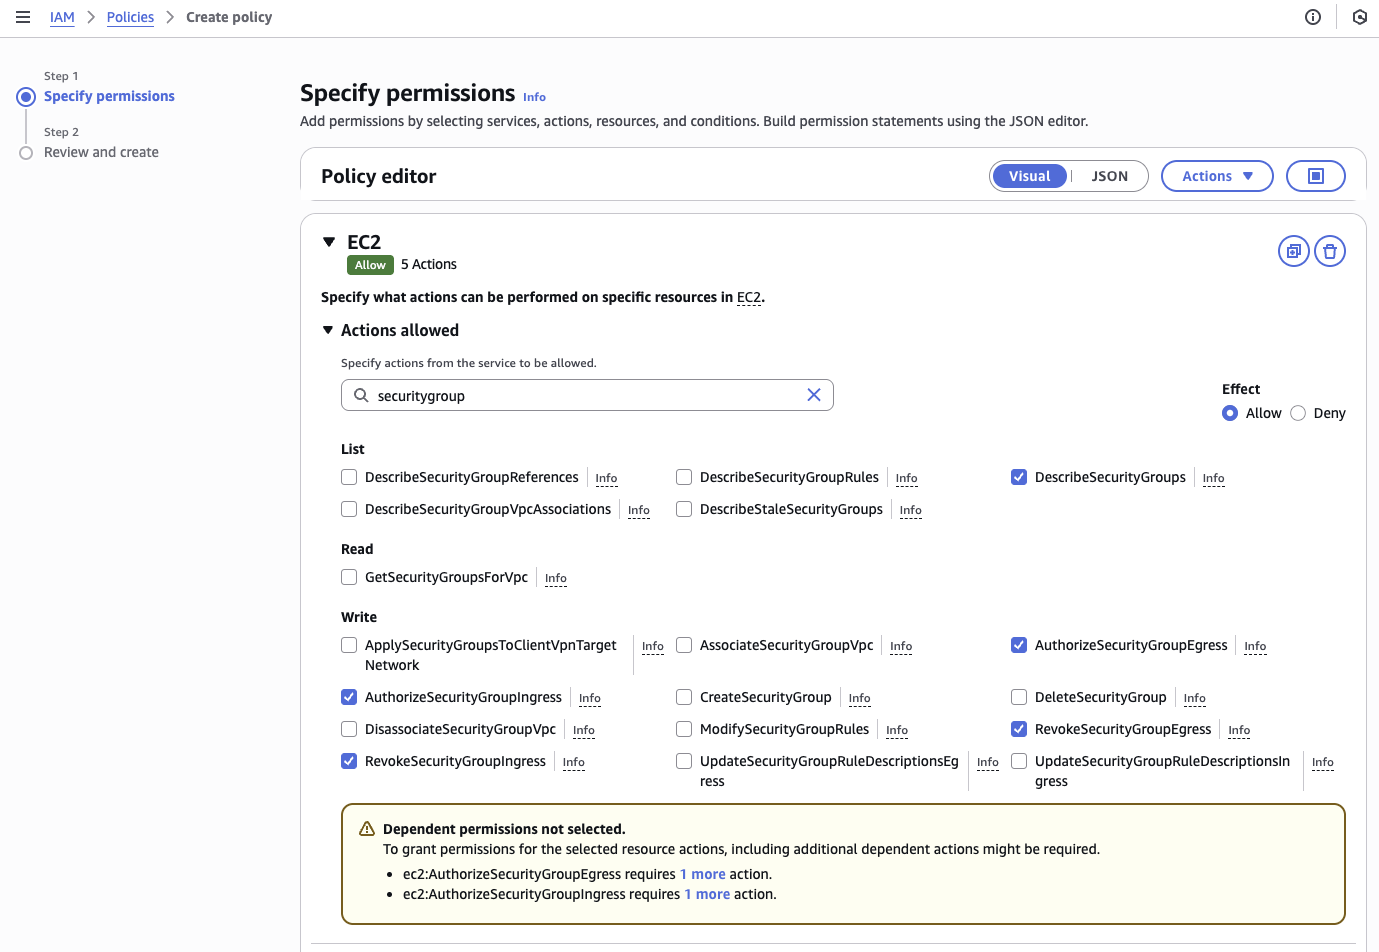
- If using the Visual editor:
- Type in "EC2"
- Search for the below policies and add them. Searching for "securitygroup" helps.
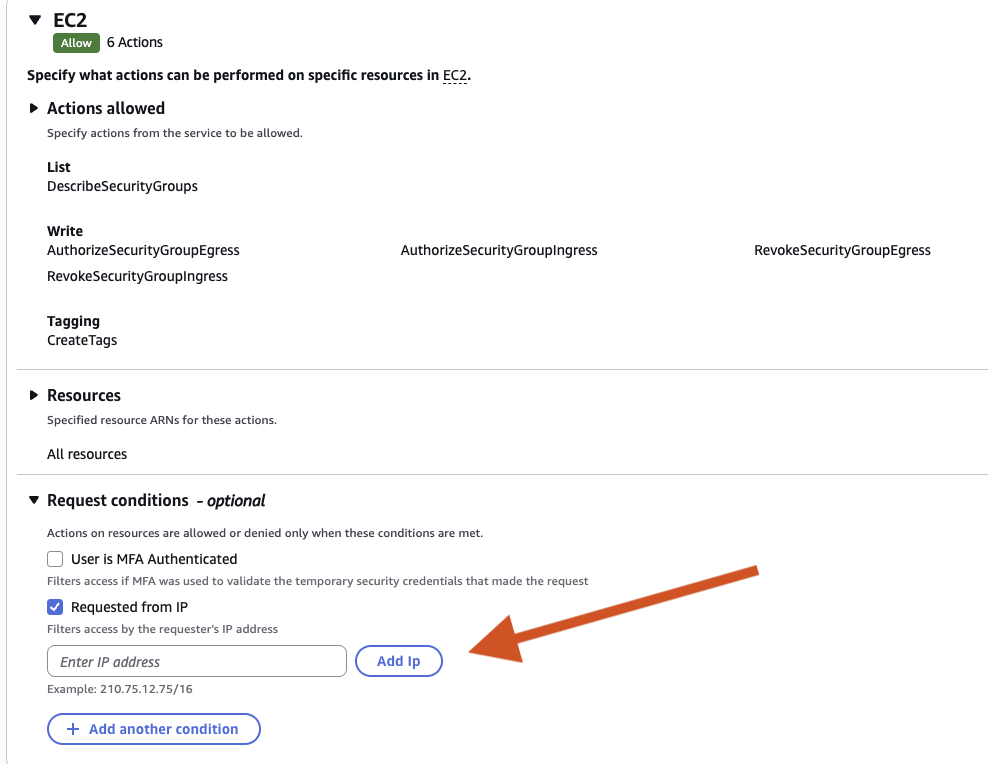
- DescribeSecurityGroups, AuthorizeSecurityGroupIngress, AuthorizeSecurityGroupEgress, RevokeSecurityGroupIngress, RevokeSecurityGroupEgress
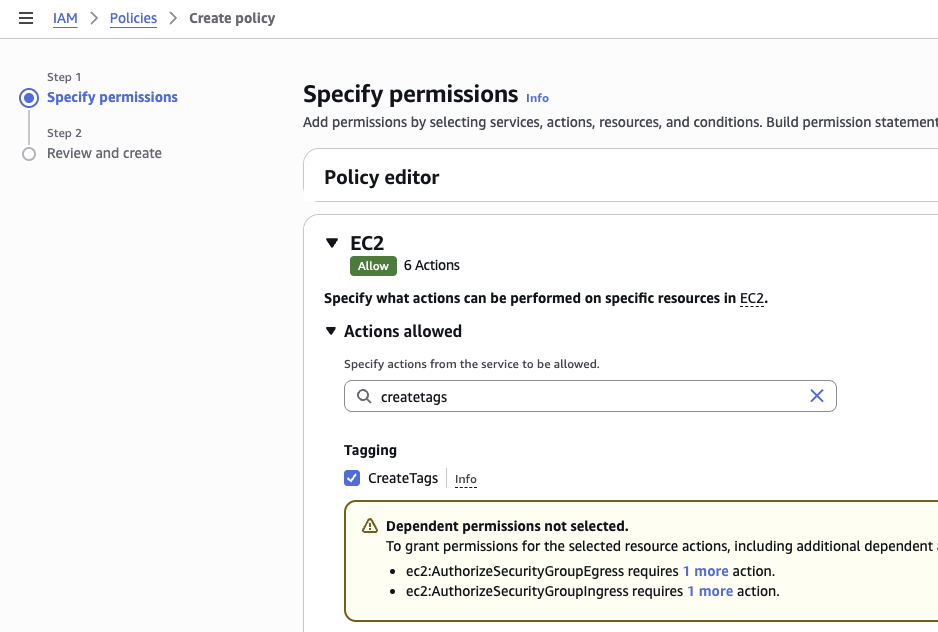
- Add "createtags" as Amazon requires this also.
- If using JSON, you can merge this block in with the existing policy header/footer
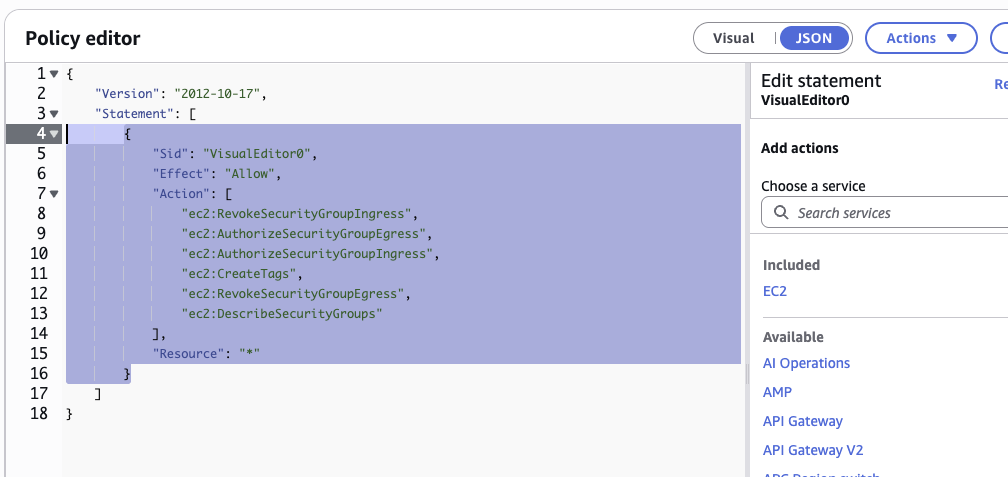
{ "Sid": "VisualEditor0", "Effect": "Allow", "Action": [ "ec2:RevokeSecurityGroupIngress", "ec2:AuthorizeSecurityGroupEgress", "ec2:AuthorizeSecurityGroupIngress", "ec2:CreateTags", "ec2:RevokeSecurityGroupEgress", "ec2:DescribeSecurityGroups" ], "Resource": "*" } -
Optionally, you can also specify the IP address of the orchestration Agent(s) that may be using this access.
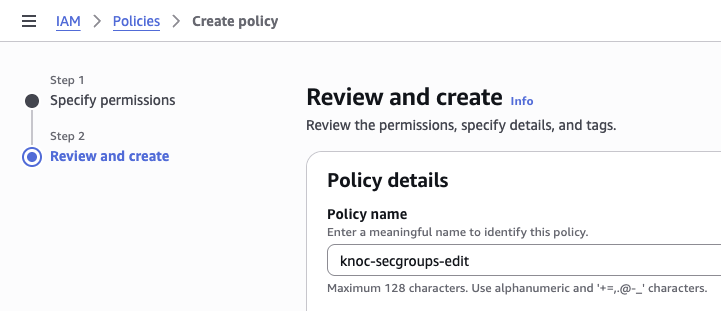
- Set a policy-name and click Create policy

- Return to your create-user page, and select the policy. This can be easily found by the "filter by type" drop down being "customer managed"

- Select the policy and click Next
- Click Create User.


Access key
You now need to create an access key for this user, which should be performed alongside the Knoc configuration (below) to copy/paste this information from AWS to Knocknoc, and ideally saved securely in your secret/vault for re-use later should it be required.
- Visit IAM -> Users -> "your-newly-created-user"
- Click on "Security credentials"

- Scroll down to "Access keys" and click "Create access key"
- Select "Command Line Interface (CLI)" and confirm "I understand", and click "Next"
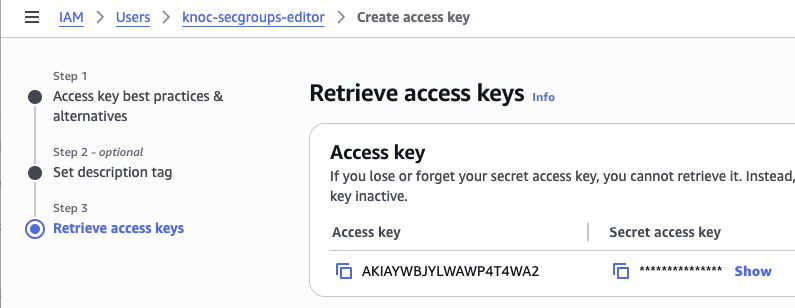
- Click "Create access key" and optionally add a tag.
- Copy the "Access key" and "Secret access key" and save these for the Knoc configuration

- You are now complete.

Agent capability + AWS CLI
The orchestration agent granting access via Knocknoc requires the AWS CLI to function, this is provided by Amazon as operating system packages, as "awscli" in most distributions, e.g., Redhat/Debian/derivatives and Windows
Linux
Debian/Ubuntu: sudo apt-get install awscli
Redhat/etc yum install awscli
$ sudo apt-cache search awscli
awscli - Unified command line interface to Amazon Web Services

$ sudo apt-get install awscli
Reading package lists... Done
Building dependency tree... Done
Reading state information... Done
The following NEW packages will be installed:
  awscli
0 upgraded, 1 newly installed, 0 to remove and 11 not upgraded.
Need to get 0 B/8624 kB of archives.
After this operation, 96.5 MB of additional disk space will be used.
Selecting previously unselected package awscli.
(Reading database ... 69176 files and directories currently installed.)
Preparing to unpack .../awscli_2.9.19-1_all.deb ...
Unpacking awscli (2.9.19-1) ...
Setting up awscli (2.9.19-1) ...
Processing triggers for man-db (2.11.2-2) ...
Microsoft Windows
Download the Windows CLI package from here: https://docs.aws.amazon.com/cli/latest/userguide/getting-started-install.html 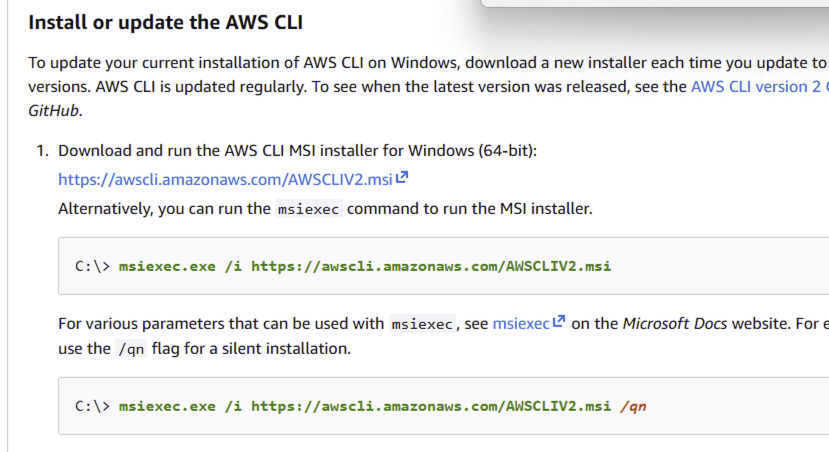
If you installed the CLI after the Agent, you may need to restart the Agent to pick up the new path. Assign the Knoc to the Windows Agent and you're away.
Knoc configuration
Knoc access flows for AWS are based on the AWS "Security Groups", you will need to obtain information on these along with the region the SG exists within, along with the key information from the IAM configuration to complete the configuration.
AWS Information
- Log in to AWS
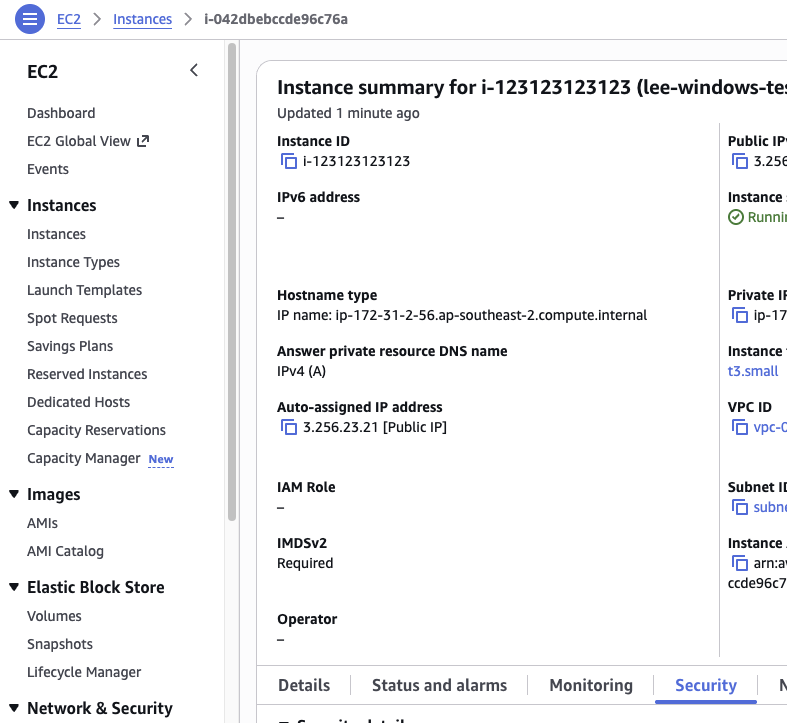
- Find the Security Group for the asset, in this case we are using an EC2 VM so will view this via the EC2 host

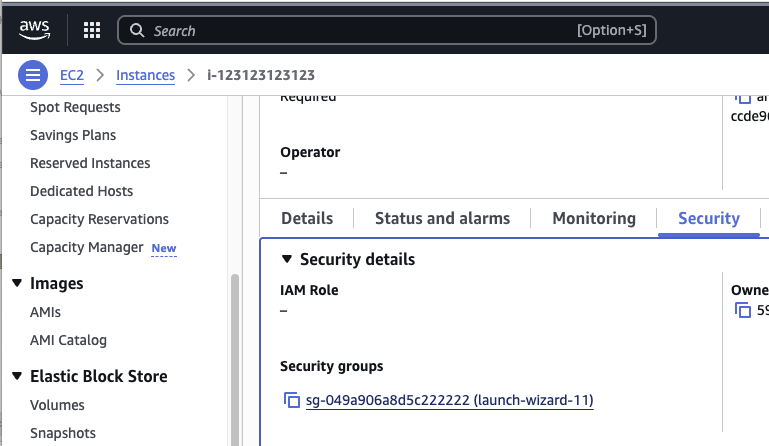
- Scroll down to "Security" (as above)
- Copy the Security Group ID (sg-xxxxx)

- Determine the AWS Region, this can be extracted from the "Instance ARN", e.g., arn:aws:ec2:REGIONHERE:numbers
- Proceed to the Knoc configuration as below.
- Alternatively you can view all Security Groups instead of viewing per EC2 asset, via EC2 -> Security Groups and view all groups, however this depends on your naming...
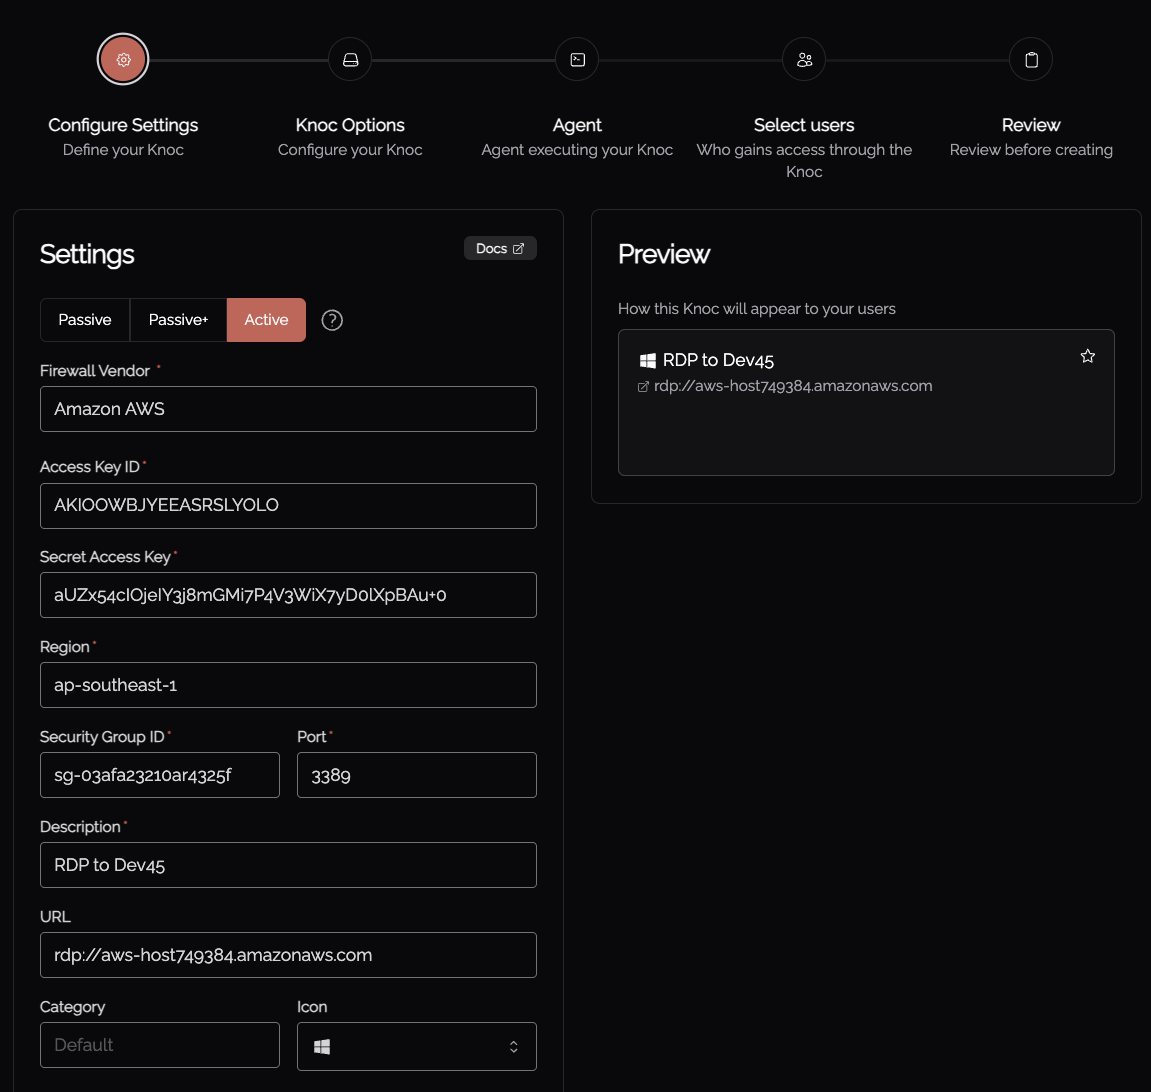
Knoc configuration
The information obtained earlier from within AWS is required, including the AWS Access key, Secret access key, Security Group and Region.
- Log in as an Admin, and select Knocs, Create new Knoc
- Select Firewalls -> Active -> Amazon AWS
- Provide the AWS "Access Key"
- Provide the "Secret Access Key"
- Provide the Region - this is available in AWS for the asset.
- Provide the Security Group ID
- Enter the Port (e.g. 3389 for RDP)
- Enter a Description for the Knoc/access
- Provide a URL, if you're using RDP lead with the protocol handler, e.g., rdp:// or ssh:// etc.
The AWS Security Group will now be updated with the end-user's IP address dynamically, and be automatically removed on user logout or after the pre-defined time period.