
Windows Agent Installation
On a Windows machine as an Admin, download and install the Orchestration Agent. It will install as a service by default. You then provide token information to connect to your Knocknoc Server for centralized management.
This is not installed by end users for access. This orchestration agent controls access but is not required by end users.
Requirements
- Supported Windows version (e.g. Windows Server 2016+ or Windows 10/11 Pro/Enterprise)
- Knocknoc Agent version 25.12 or later
- Local admin rights on the Windows server where the agent will run
Installing the Agent
- Download the Windows Knocknoc agent from here.
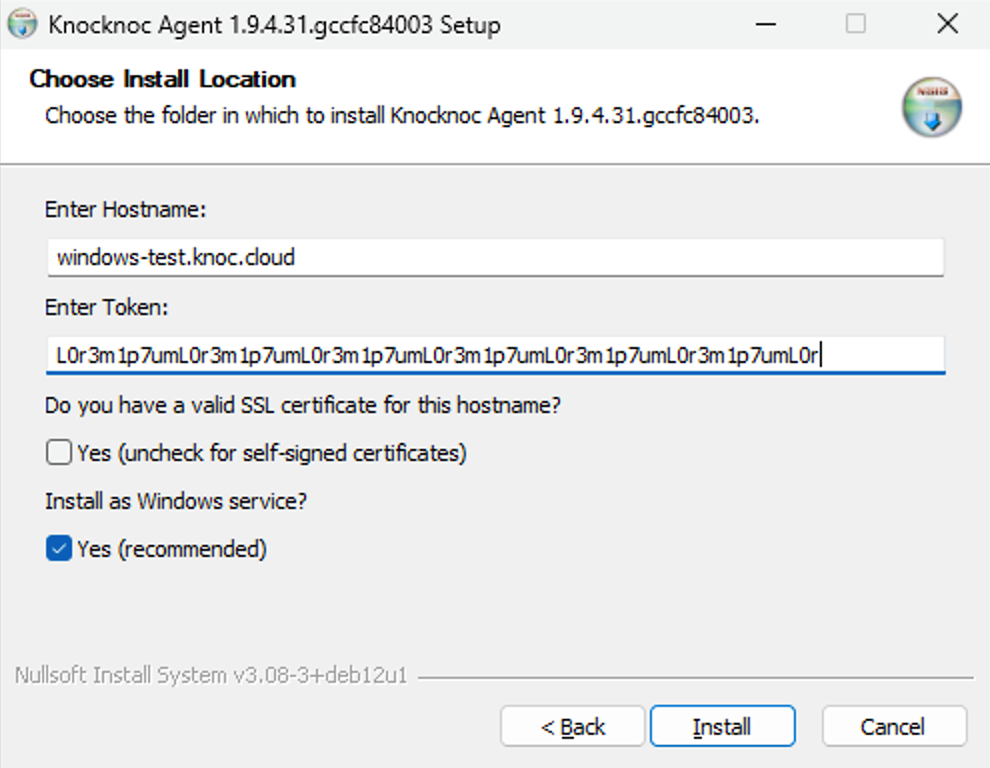
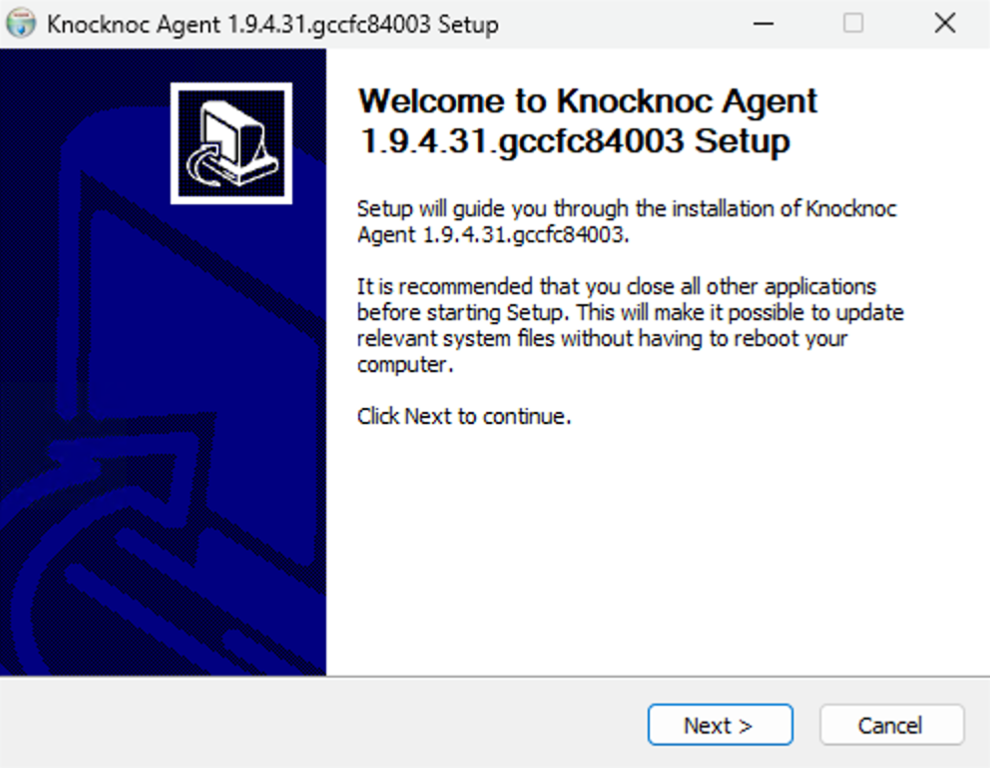
- Follow the installation process.

- Log in to your Knocknoc Server, e.g., https://myserver.example.org/admin/
- Create an Agent
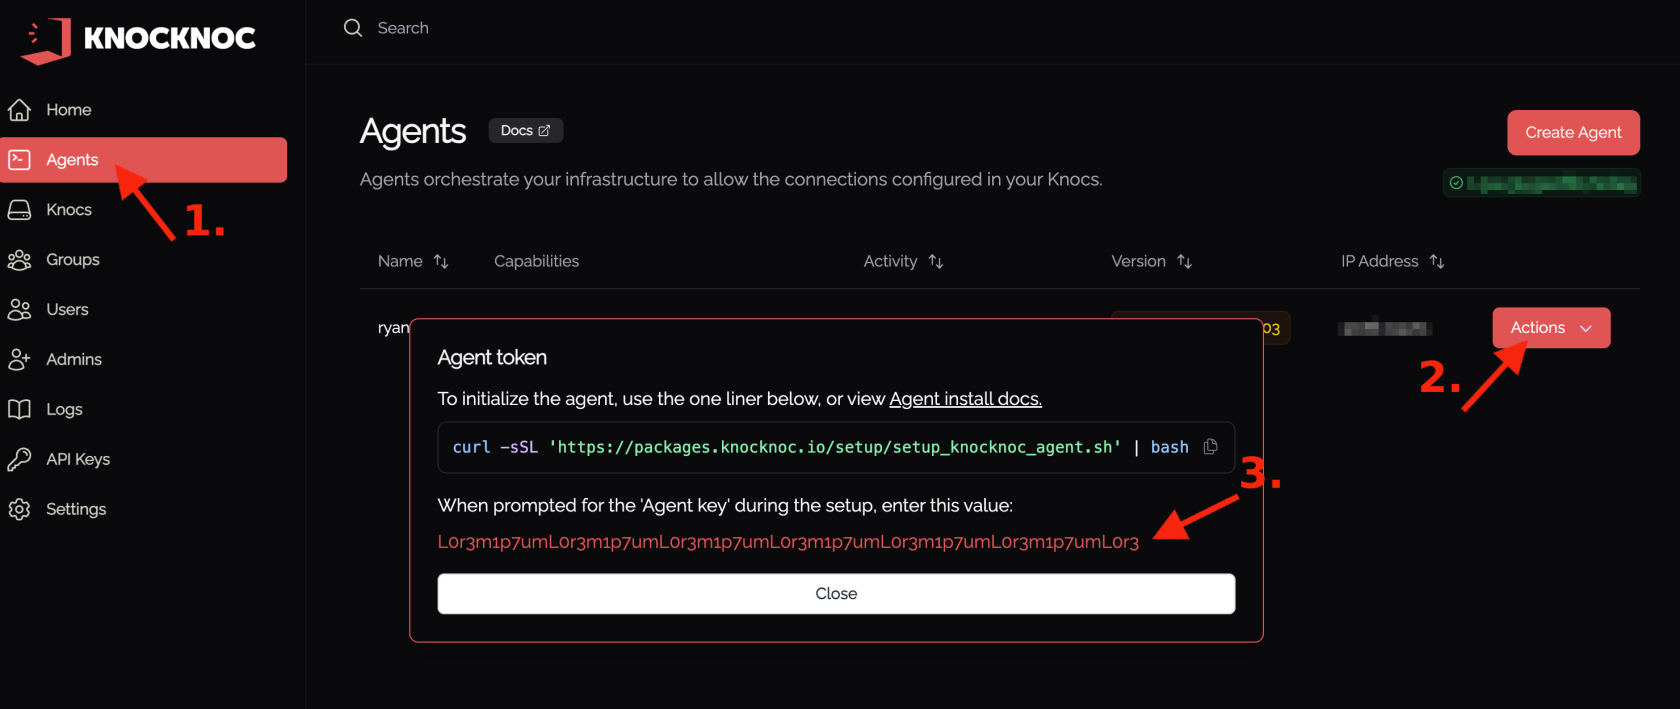
- Copy the token for the Windows Agent. You can obtain the token again as an Admin if needed.
- Copy the URL of your Knocknoc Server
- You are now ready to provide this to the Windows installer
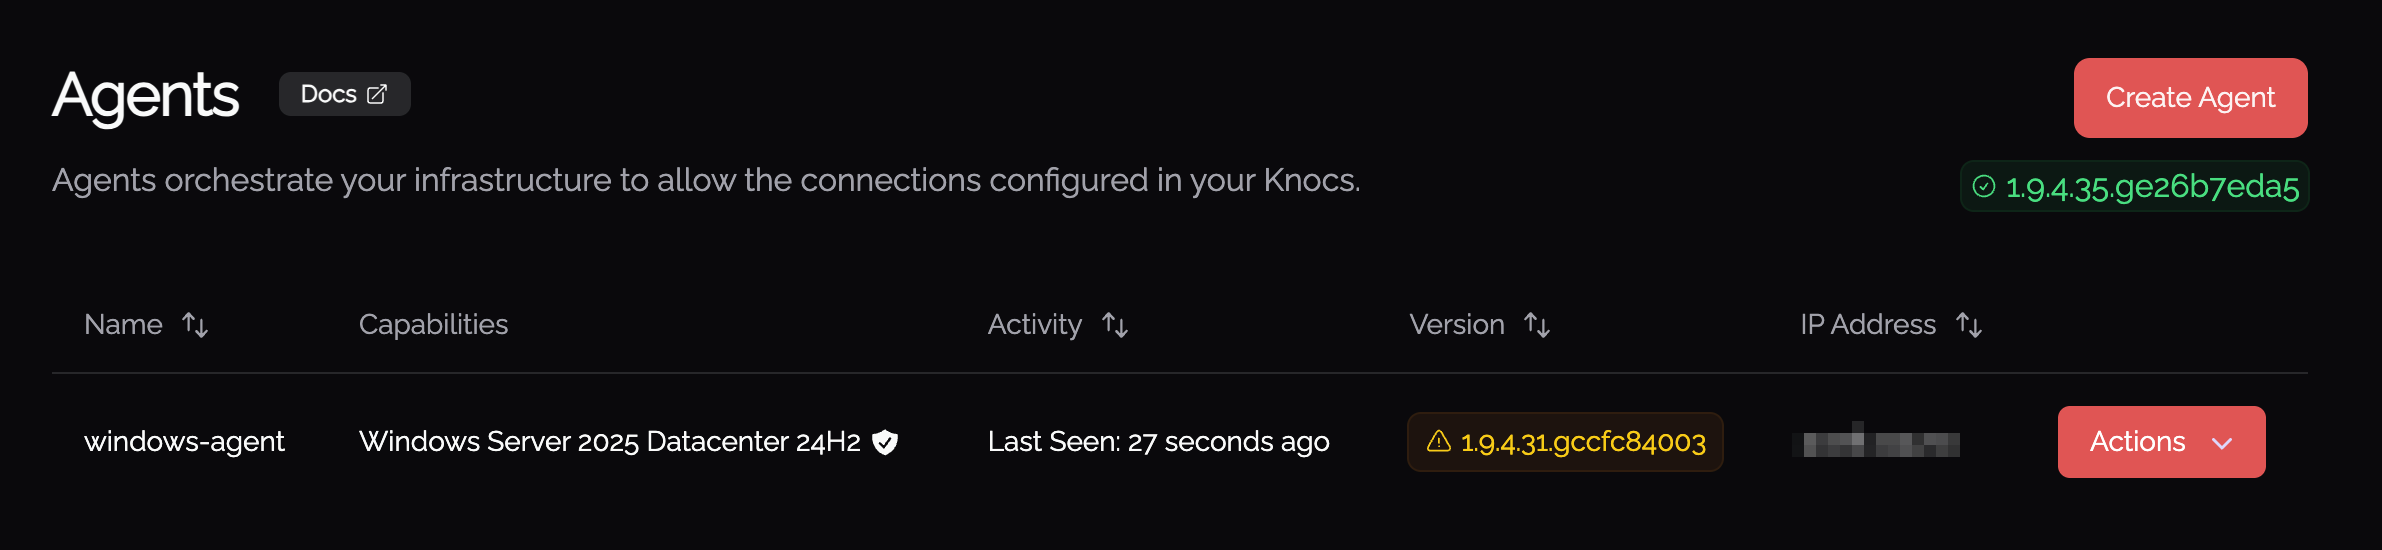
- Lastly, confirmation that it's up and running.


Silent / Unattended Installation
For scripted, MDM, or Group Policy deployments, the installer supports silent mode via the standard /S flag. In silent mode there is no wizard, so the required settings are supplied on the command line.
knocknoc-agent-installer.exe /S /HOST=gateway.example.com /TOKEN=abc123
Each agent needs a credential to identify itself. Supply either a /TOKEN (the standard per-agent token from the admin portal) or a /REGISTERKEY (a shared key for infrastructure-as-code self-registration). Exactly one is required, never both. When you use /REGISTERKEY, you must also supply /NAME for the agent's initial name.
Command-line flags
| Flag | Required | Values | Default | Description |
|---|---|---|---|---|
/S |
Yes | (none) | Runs the installer silently with no UI. Must be present for unattended installs. | |
/HOST= |
Yes | hostname | Knocknoc server hostname. Append :port if not 443. Must not contain spaces. |
|
/TOKEN= |
One of /TOKEN or /REGISTERKEY |
token | Per-agent token from the admin portal. Quote the value if needed: /TOKEN="...". |
|
/REGISTERKEY= |
One of /TOKEN or /REGISTERKEY |
shared key | Shared registration key for IaC self-registration. After the agent registers, a persistent token is written to the token file in the install directory. Requires /NAME. |
|
/NAME= |
With /REGISTERKEY |
agent name | The agent's initial name on registration. Quote the value if it contains spaces: /NAME="Web Tier 1". |
|
/INSECURE= |
No | true / false |
false |
false validates the server's TLS certificate (production). true skips validation (labs / self-signed only). |
/SERVICE= |
No | 1 / 0 |
1 |
1 installs and starts the Windows service. 0 installs files only. |
/D= |
No | path | C:\Program Files (x86)\Knocknoc-Agent |
Installation directory. This is a built-in NSIS flag: it must be the last argument and must not be quoted, even if the path contains spaces. |
Examples
Install and start the service against a production server with a valid certificate:
knocknoc-agent-installer.exe /S /HOST=knocknoc.example.com /TOKEN=eyJhbGci...
Install against a lab server that uses a self-signed certificate (/INSECURE=true skips TLS validation):
knocknoc-agent-installer.exe /S /HOST=knocknoc.lab.local /TOKEN=eyJhbGci... /INSECURE=true
Self-register with a shared key for infrastructure-as-code deployments (note the required /NAME):
knocknoc-agent-installer.exe /S /HOST=knocknoc.example.com /REGISTERKEY=rk_live_... /NAME="Web Tier 1"
Install to a custom directory:
knocknoc-agent-installer.exe /S /HOST=knocknoc.example.com /TOKEN=eyJhbGci... /D=D:\Knocknoc-Agent
Behaviour and exit codes
- If a previous installation is present, a silent run always performs an in-place upgrade, preserving the existing configuration file and any extra settings (such as
WindowsLogLocationandWindowsRulePrefix). - The installer reports its outcome through the process exit code, so scripts can check
%ERRORLEVEL%:
| Exit code | Meaning |
|---|---|
0 |
Success. |
2 |
Not run as administrator, or invalid arguments: /HOST missing, neither or both of /TOKEN and /REGISTERKEY supplied, or /REGISTERKEY without /NAME. |
3 |
Files installed, but the Windows service failed to create or start. Check the configuration file and the Windows Event Log. |
When you register with /REGISTERKEY, the installer writes the RegisterKey and Name into the configuration file. On first connection the agent exchanges the key for a persistent token, stored in the token file in the install directory (see Agent self-registration & IaC). The register key can then be deactivated or restricted.
You're now ready!
You have two major options with the Windows Orchestration Agent.
- Control the local Windows firewall. Enable just-in-time RDP access, or exposure of other ports/services on the LAN.
- Control third-party firewalls, like a Fortinet, Palo/Sonicwall/Cisco/Sophos, an AWS EC2 SG or an Azure asset.
Controlling the Windows firewall using Knocknoc creates internal micro-segmentation opportunities for just-in-time network allowlisting, without your Windows Servers exposing inbound WinRM to centralized controlling systems.
Configuration options
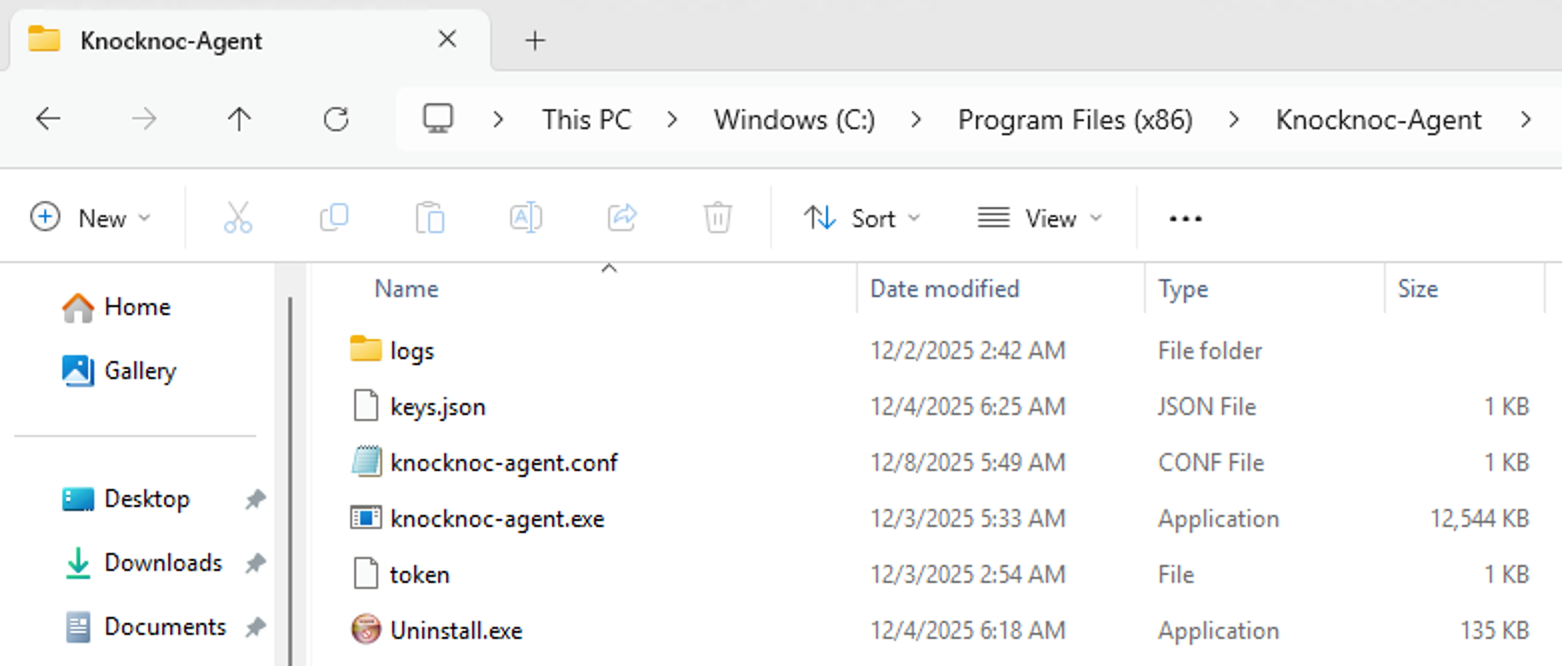
After installation, the Windows agent configuration lives at:
C:\Program Files (x86)\Knocknoc-Agent\knocknoc-agent.conf
A typical config looks like:
Host = 'your-knocknoc-server.example.org'
Token = '<your-agent-token>'
Insecure = true
WindowsLogLocation = 'C:\Program Files (x86)\Knocknoc-Agent\logs'
WindowsRulePrefix = 'kn_'
LogLevel = "trace"
Key settings
- Host
The hostname of your Knocknoc instance (cloud or self‑hosted). Append :port if you're not using 443. - Token
The agent token copied from the admin portal when registering the Windows host.
If rotated in the portal, update it here and restart the Knocknoc Agent service. - Insecure
Whentrue, the agent skips strict TLS validation (for example when using self‑signed certificates in a lab).
For production, set this tofalseand use a valid certificate wherever possible. - WindowsLogLocation
Folder where the agent writes its logs, default:C:\Program Files (x86)\Knocknoc-Agent\logs
Check this directory first when troubleshooting agent or firewall behavior. You can update this to any location on the machine that you like, possibly one that is friendlier for your log collection jobs.
The logs in this directory will rotate automatically daily, or if they reach 500 mb.
The rotated files will have format <logfilename>-2006-01-02-15-04-05-<reason>.log
The rotated files will be retained for 60 days. - WindowsRulePrefix
The windows agent will read the rules from the firewall and provide them to the server for the admin to choose from. By default it will get all rules for ports [3389, 22, 80, 443, 21] with protocol TCP.
The agent will also pass any rules that have the prefix as defined in the config file, enabling your own rules to surface for use automatically. This also makes it easy to search for and distinguish rules that you have created for Knocknoc, inside the Windows Defender Firewall console. - LogLevel
Controls verbosity of the agent logs (e.g."info","debug","trace").
Use"trace"when debugging; revert to"info"or"warn"in normal operation to reduce noise.
Service Management
The agent is registered as the Knocknoc Agent Windows service (service name KnocknocAgent), set to start automatically and run as LocalSystem. After editing knocknoc-agent.conf, restart the service for changes to take effect:
- Open Services (
services.msc) and restart the Knocknoc Agent service, or - Run
sc stop KnocknocAgentthensc start KnocknocAgentfrom an elevated prompt.
High-availability / multi-web configuration
The Agent should connect to each web node, to ensure no loss of responsiveness during a partial web/server outage event and to not miss an access grant.
Adjust your Agent configuration to point to both servers. Replace the single Host setting with a Hosts list:
# single web node configuration
#Host = "knocknoc.example.com:8756"
#Insecure = false

# multi-web node configuration
Hosts = [
     { Host = "knocknoc1.example.com", Insecure = false },
     { Host = "knocknoc2.example.com:8756", Insecure = false }
]
I've locked myself out of RDP!
Default deny is a wonderful thing, the best place to be - except when you lock yourself out. Thankfully Knocknoc has a break-glass control if you need. See more here.
Agent self-registration & IaC
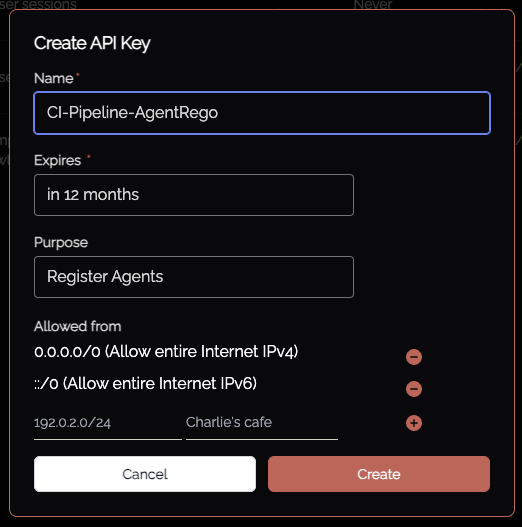
Agents can be deployed and initially integrated with the Knocknoc server using individual keys or shared keys.
Individual per-agent keys are created (as above) through the Admin UI just-in-time, whereas shared keys are created and managed via the API Keys Admin functionality. Selecting "Register Agents" allows the creation of an API key which allows multiple agents to be registered against using that key. IP address restrictions are managed per API key, as shown below.
Instead of specifying the Token (or using the basic installer), the C:\Program Files (x86)\Knocknoc-Agent\knocknoc-agent.conf file should specify RegisterKey and Name fields:
RegisterKey = "<api key>"
Name = "Agent's Initial Name"

# Do *NOT* set a value for Token. Comment it out or remove entirely.
#Token = "xxxxx"

# other settings
LogLevel = "info" #trace
Insecure = false # when set to true, SSL/TLS is not CA verified
After registering successfully a "token" value will be created and stored in C:\Program Files (x86)\Knocknoc-Agent\token for future connections. The RegisterKey can be deleted, disabled or otherwise restricted (e.g., IP address sources) and the Agent will use its own token for ongoing trust.
Troubleshooting
Installer exits immediately with no window: confirm it is being run as administrator. A silent run that is not elevated exits with code 2.
Silent install fails with exit code 2: a required flag is missing or invalid. Ensure /HOST is supplied with no spaces, and that exactly one of /TOKEN or /REGISTERKEY is present. If you use /REGISTERKEY, also supply /NAME.
Service installed but will not start (exit code 3): check knocknoc-agent.conf for a correct Host and Token, and review the agent log in WindowsLogLocation and the Windows Event Log.
Agent not appearing in the admin portal: verify the server hostname and token, confirm outbound connectivity to the server, and check that Insecure matches your certificate setup.