
OpenBSD Agent Installation
Overview
The Knocknoc OpenBSD Agent is orchestration software for managing just-in-time network access. It runs as the unprivileged _knocknoc-agent user, connects to your Knocknoc server over WebSocket, and enforces access locally through the configured integrations.
On OpenBSD the Knocknoc agent would typically be used to manage pf, however it can also drive remote integrations such as PAN-OS, Firepower, Sophos and AWS.
For more info in the ways the Knocknoc agent can be used, check out the Linux agent guide.
Requirements
- A supported OpenBSD release.
- Network egress to your Knocknoc server
- (Only for initial installation) Network egress to
packages.knocknoc.io. - (Only for initial installation) Root access on the host.
Installation
Log in to the server hosting the agent via the command line and become the root user.
Run this command as root to install and configure the agent:Agent.
ftp -o - https://packages.knocknoc.io/setup/setup_knocknoc_agent.sh | sh
This installsAccept the agent,License configures it, enables firewall access and starts it as a service.Agreement.
Process:
Enter the hostname of your Knocknoc server admin console.
127.0.0.1:8756
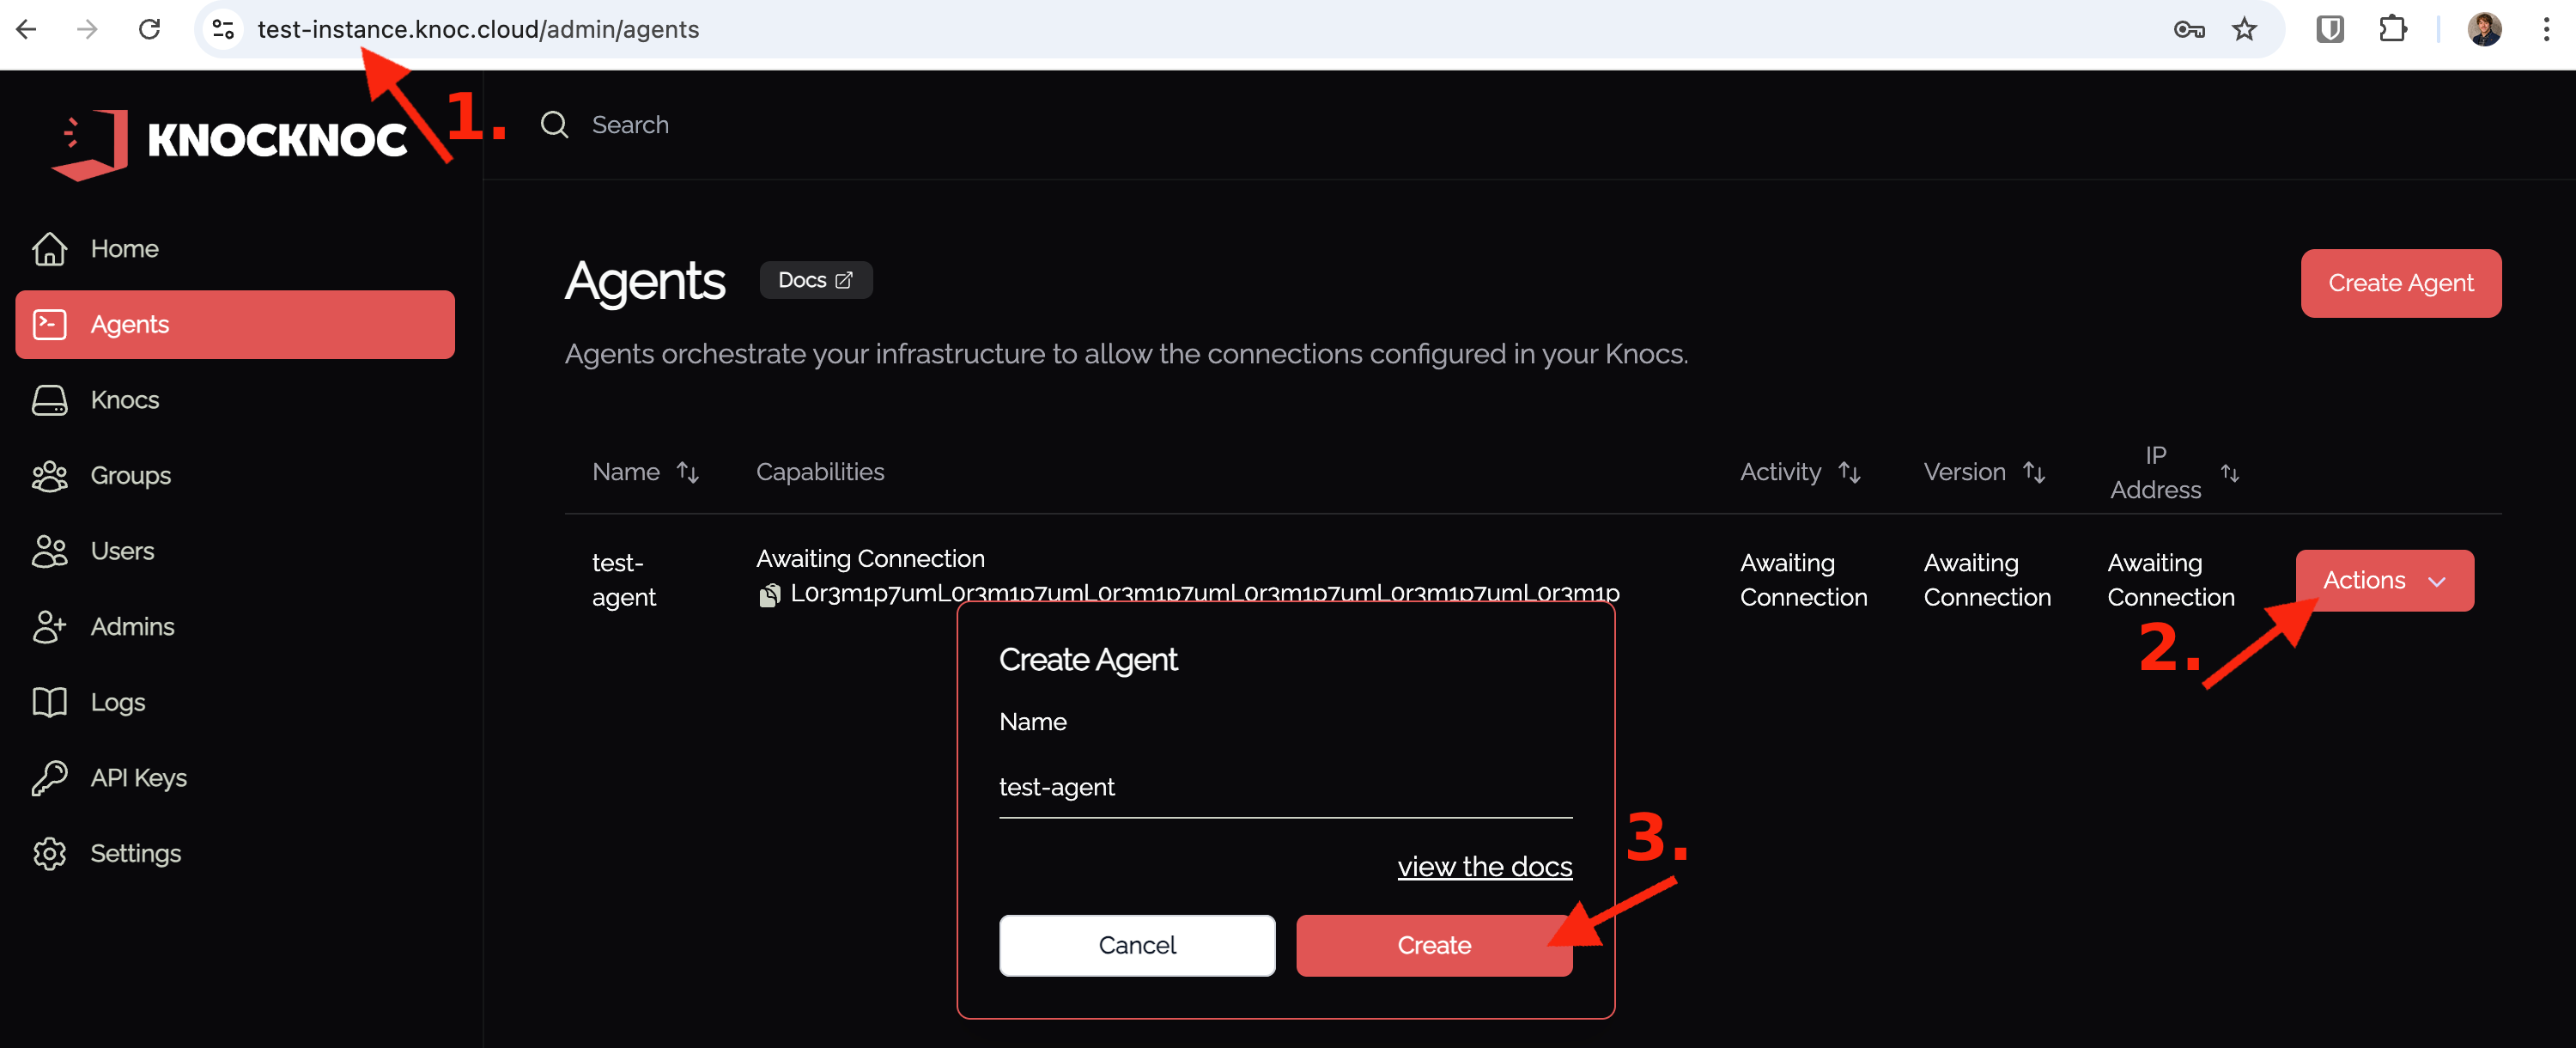
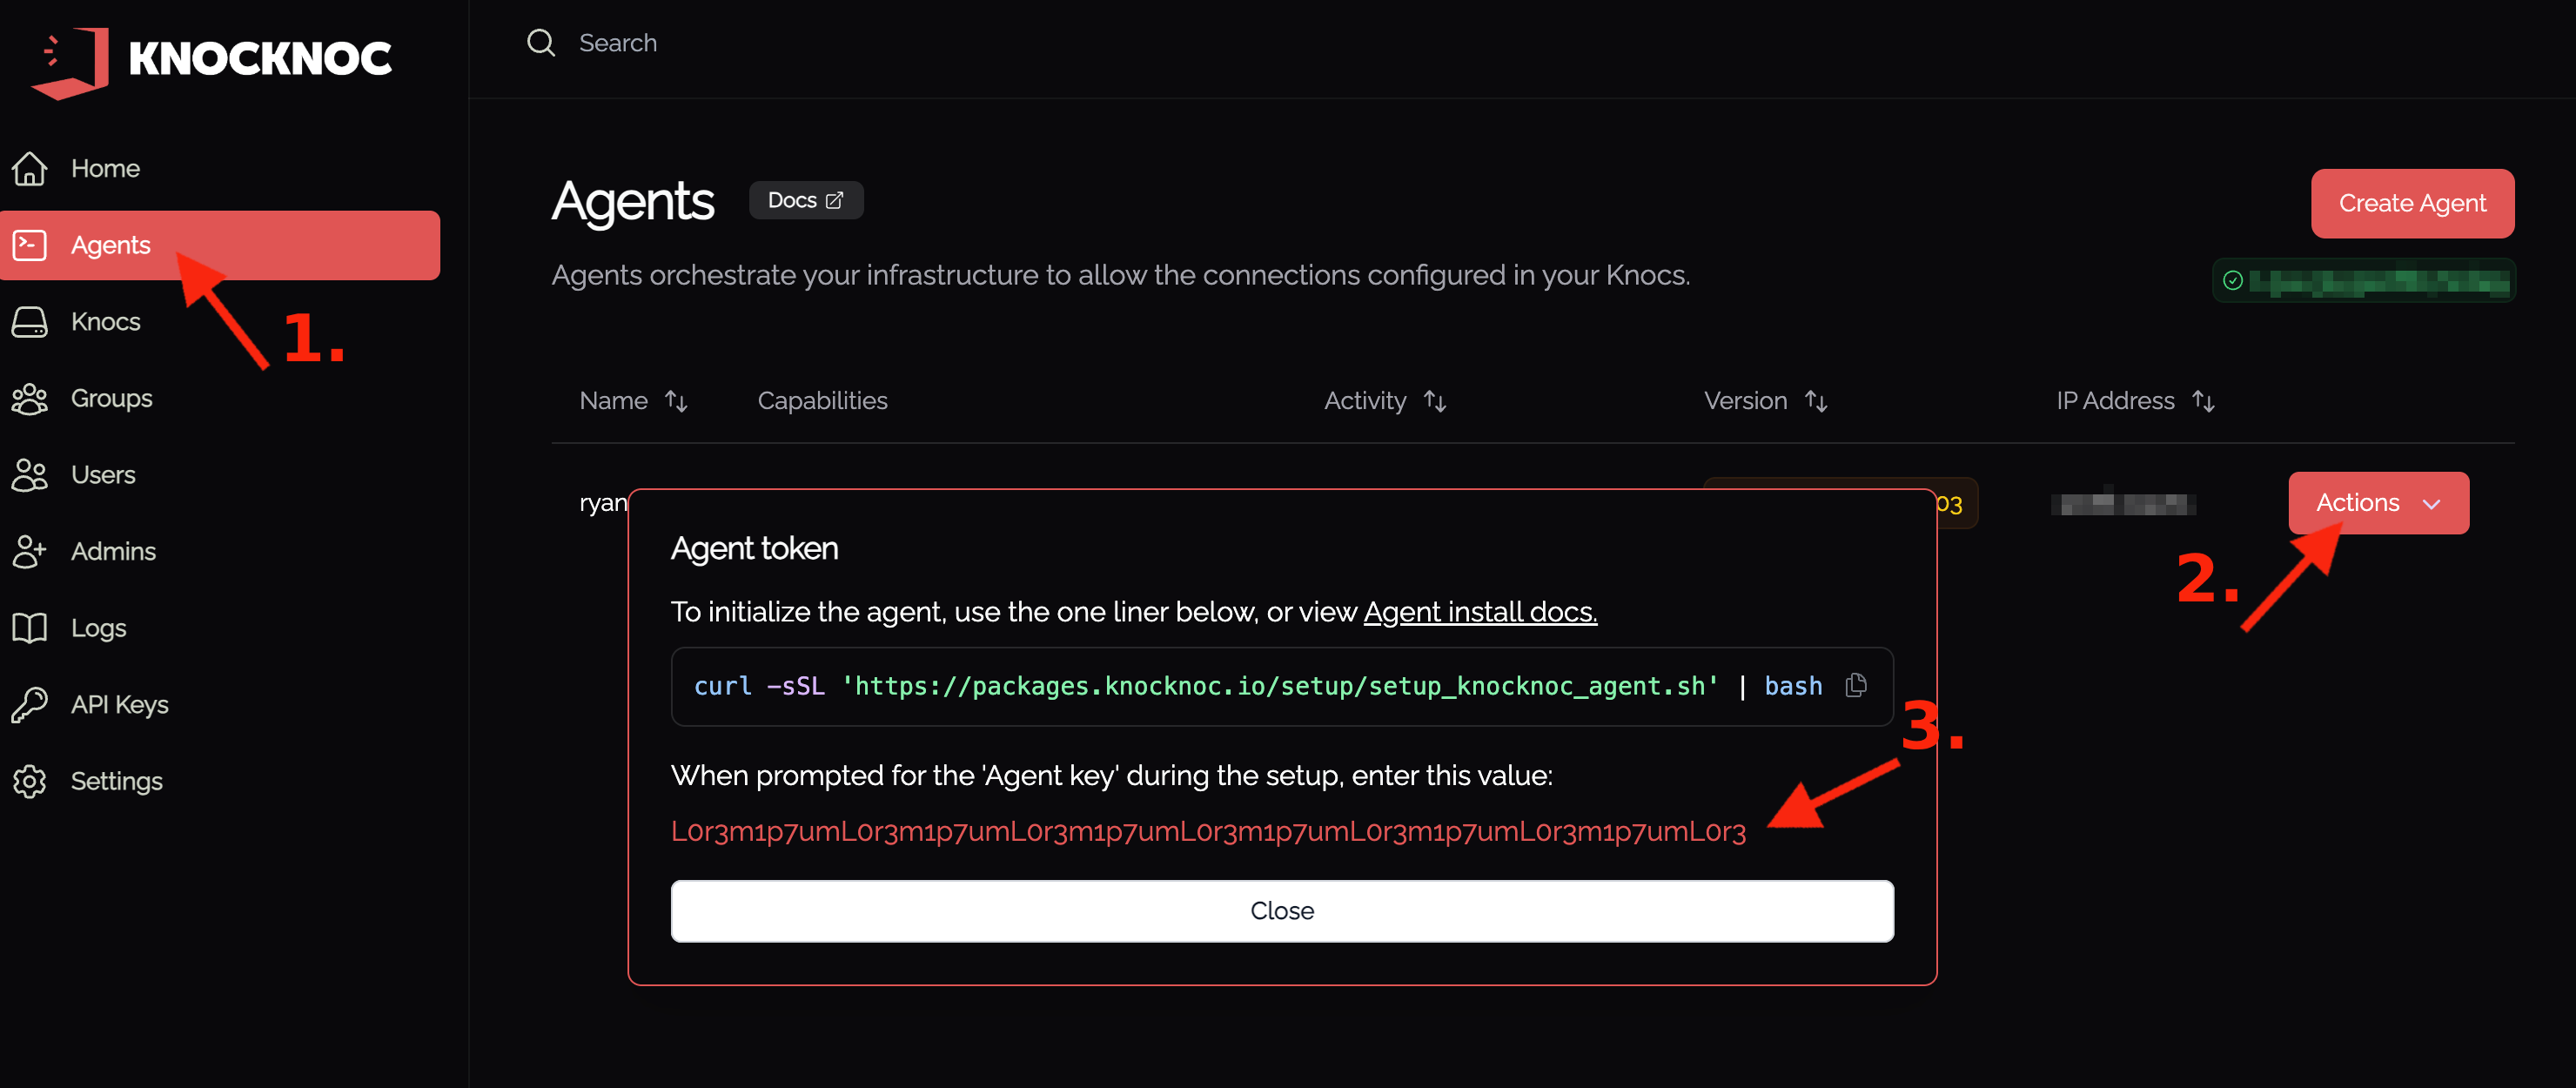
Enter the generatedhostname registration token.Paste the agent token from the Admin portal created earlier.
Confirm if you have a valid SSL certificate on your Knocknoc server. If you are using 127.0.0.1:8756, select No.
You can now start adding and configuring Knocs in the admin console.panel!
ToIf updateyou later,made re-runa mistake, you can edit the sameconfig command.file
/etc/knocknoc-agent/knocknoc-agent.conf
Then you will need to restart the Knocknoc agent service
rcctl restart knocknoc_agent
Service management
The agent runs as the knocknoc_agent service:
rcctl restart knocknoc_agent
rcctl stop knocknoc_agent
rcctl check knocknoc_agent      # is it running?
Logs go to syslog at /var/log/daemon.
Updating
Re-run the install command to update the agent to the latest version:
ftp -o - https://packages.knocknoc.io/setup/setup_knocknoc_agent.sh | sh
Your existing config is kept, and the service restarts on the new version.
Uninstalling
pkg_delete knocknoc-agent
Your config and the agent's data folder are left in place so a reinstall keeps working.