
Create users
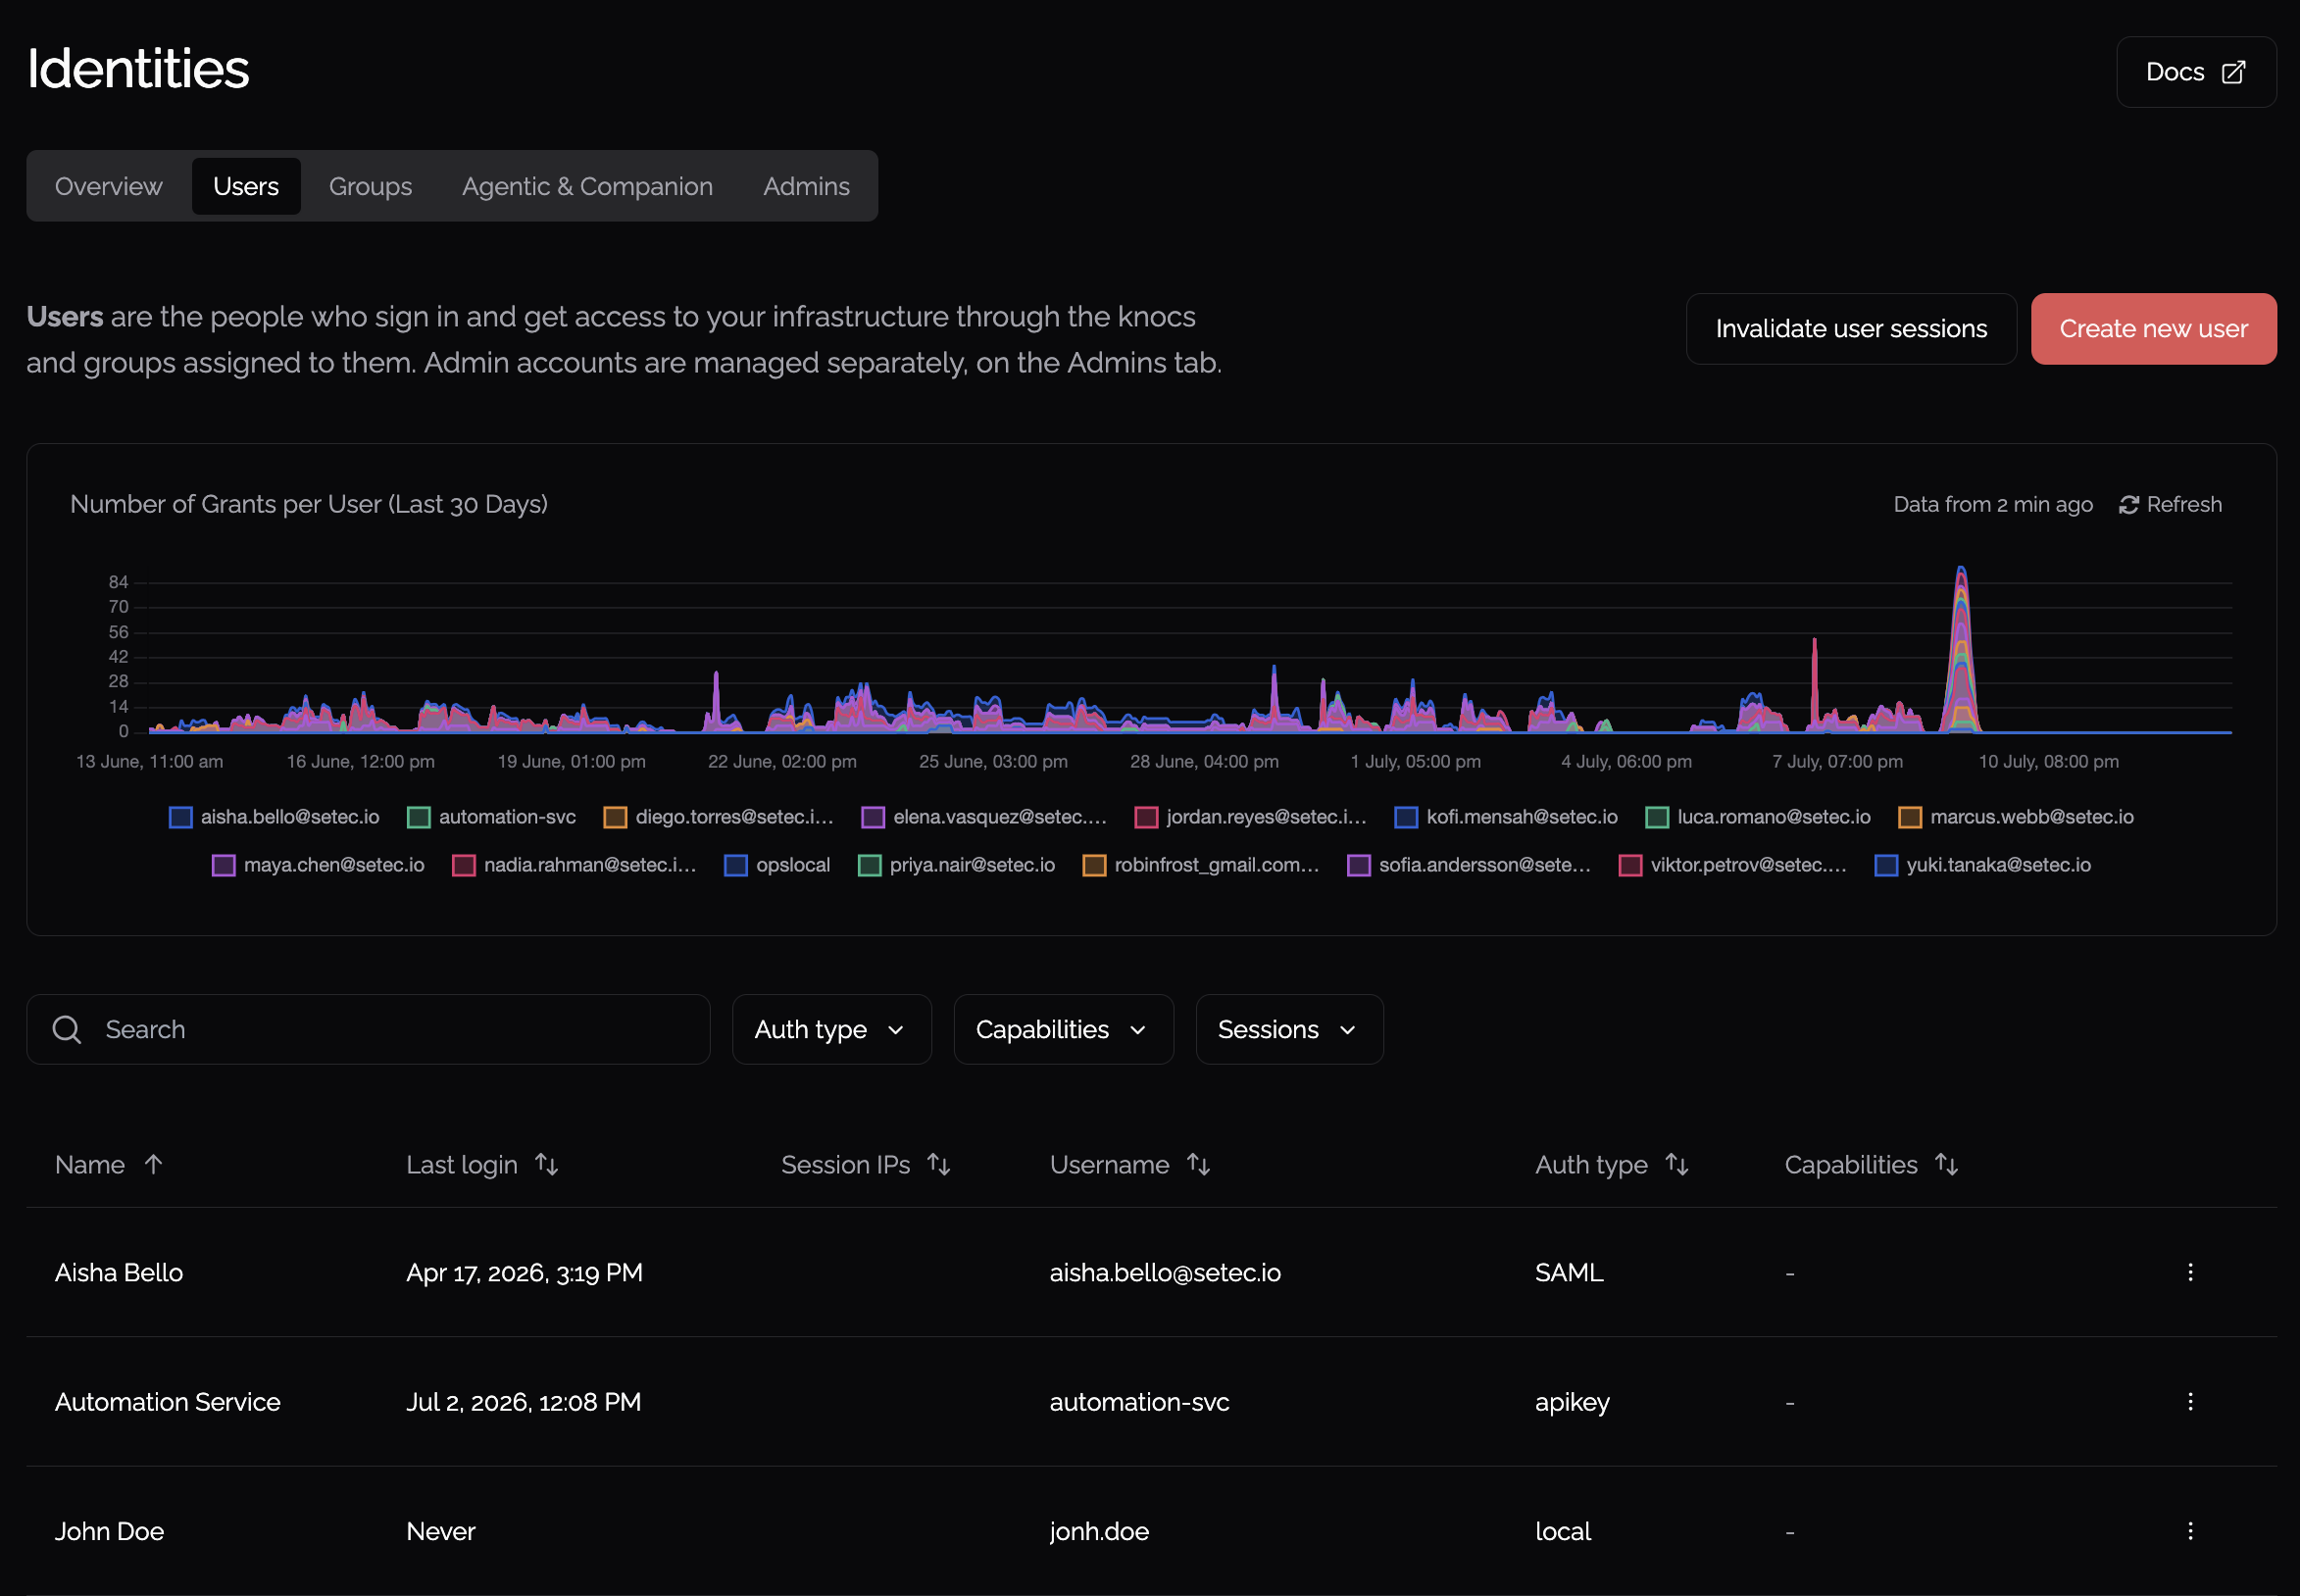
Users sign in and get access to your infrastructure through the Knocs and groups assigned to them. This page covers the types of user you can create, when to use each, and how to create them.
Admin accounts are managed separately, on the Admins tab. This page is about regular users.
Choosing an auth type
Every user has an auth type that decides how they sign in. It is set when you create the user and cannot be changed afterwards, so pick the right one up front.
Local username & password
The user's password is stored in Knocknoc. Choose this when you are not using a central identity provider, or for one-off accounts (contractors, break-glass access, small teams).
It is the only type where Knocknoc manages the password directly, so it is also the only type that supports a password reset from the admin portal, an account expiry date, and 2FA that you turn on and off yourself.
SAML
The user signs in through your identity provider (Okta, Entra ID, Google, etc.) using single sign-on. Choose this when you already run an identity provider and want it to be the source of truth: onboarding, offboarding, passwords, and MFA all stay with the provider.
You do not need to create SAML users here. They are created automatically the first time a user signs in. Their name and session length come from the identity provider, more info is available here.
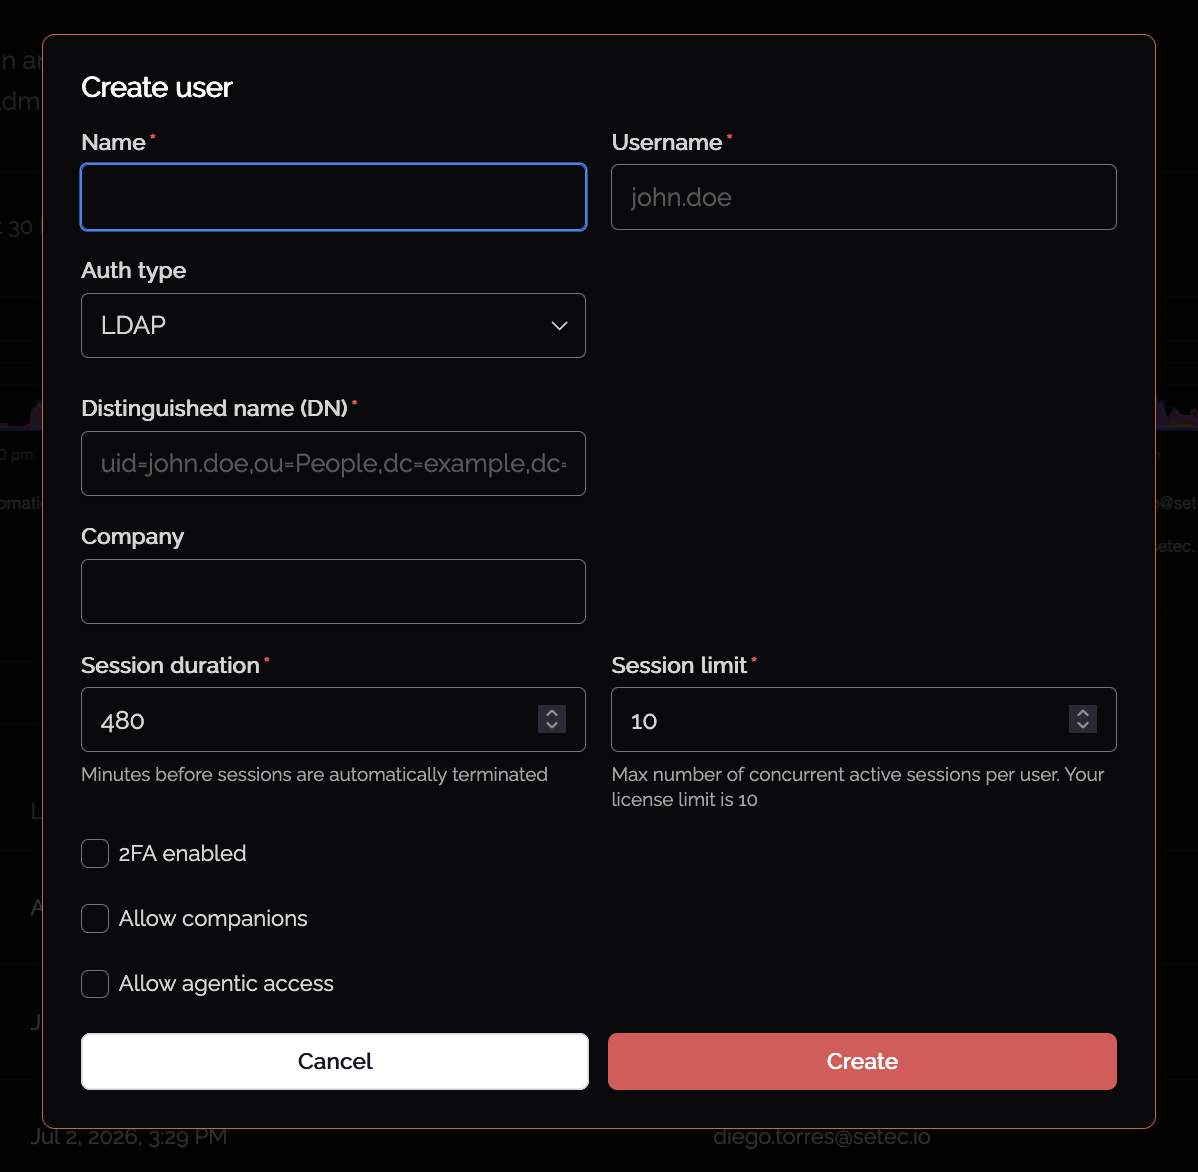
LDAP
The user is authenticated against your existing directory (for example Active Directory or OpenLDAP). Choose this when you want to reuse directory credentials but are not using SAML.
You provide each user's Distinguished Name (DN), for example uid=john.doe,ou=People,dc=example,dc=com. The directory holds the password. Knocknoc can still manage 2FA for these users.
API key
For automated access rather than a person signing in: scripts, CI pipelines, and integrations. The account authenticates with a scoped API key instead of a password, and has no interactive login or 2FA. Choose this only for machine access.
Create a user
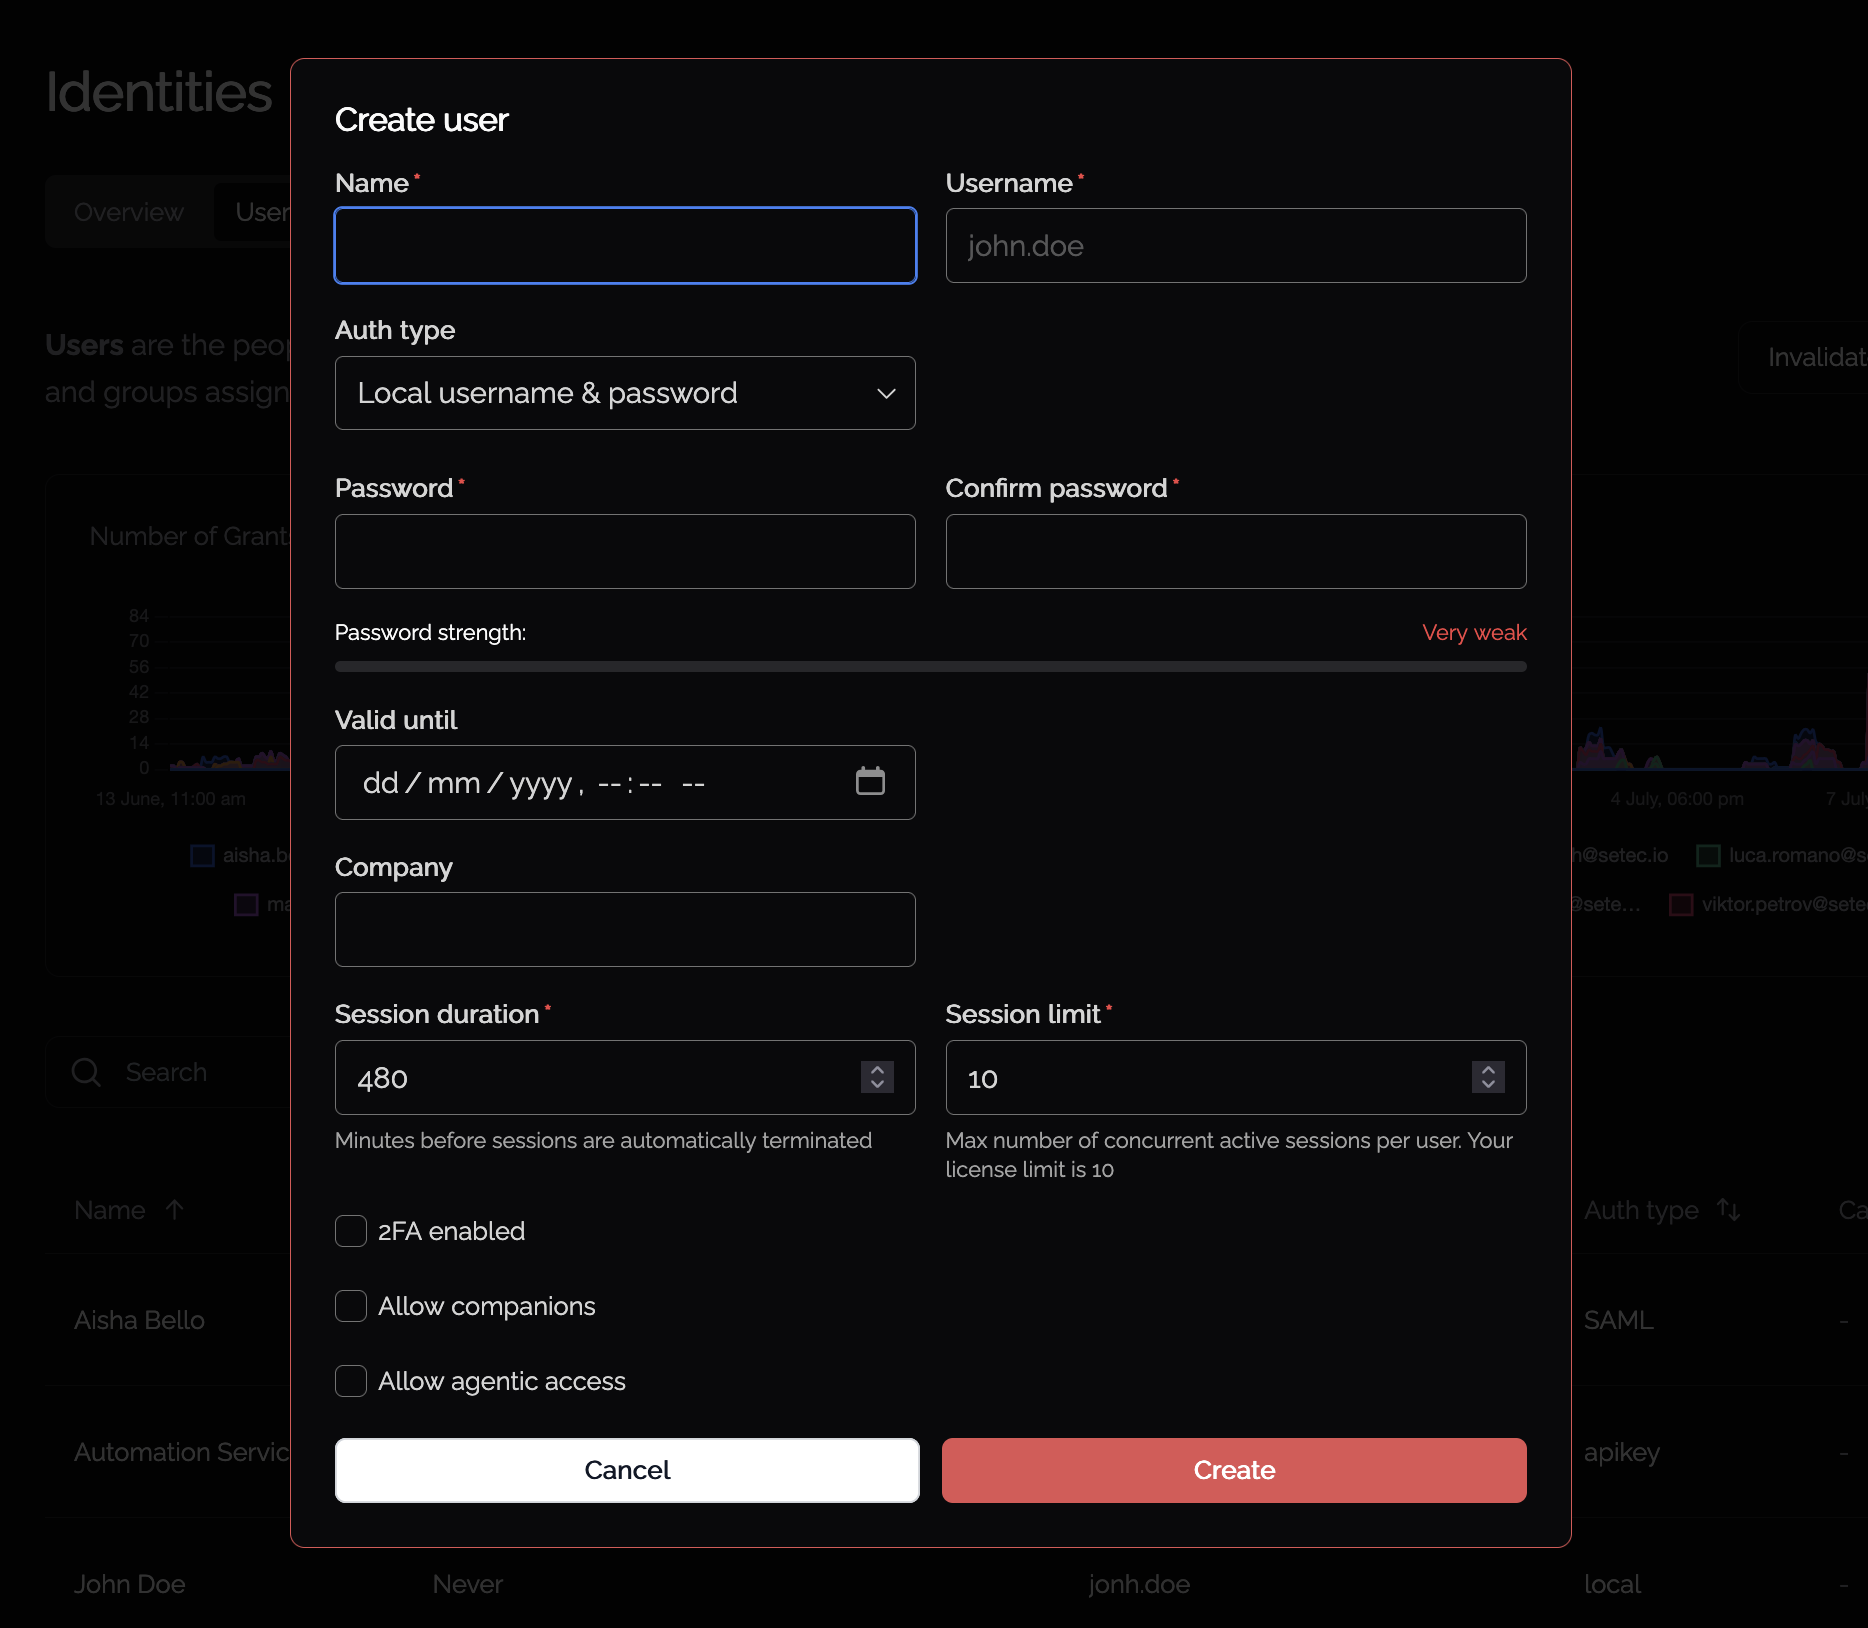
To create a local user, follow these steps:
- In the admin portal, open Identities from the sidebar.
- Select the Users tab.
- Click Create new user.
- Fill in the required fields:
- Name
- Username (suggested automatically from the name, e.g. "John Doe" becomes "john.doe")
- Auth type: leave as Local username & password, or pick another type (see above)
- Password and Confirm password (8 to 64 characters, local users only)
- Click Create.
The user appears in the table straight away. Click the row to view or edit their details.
Assigning access
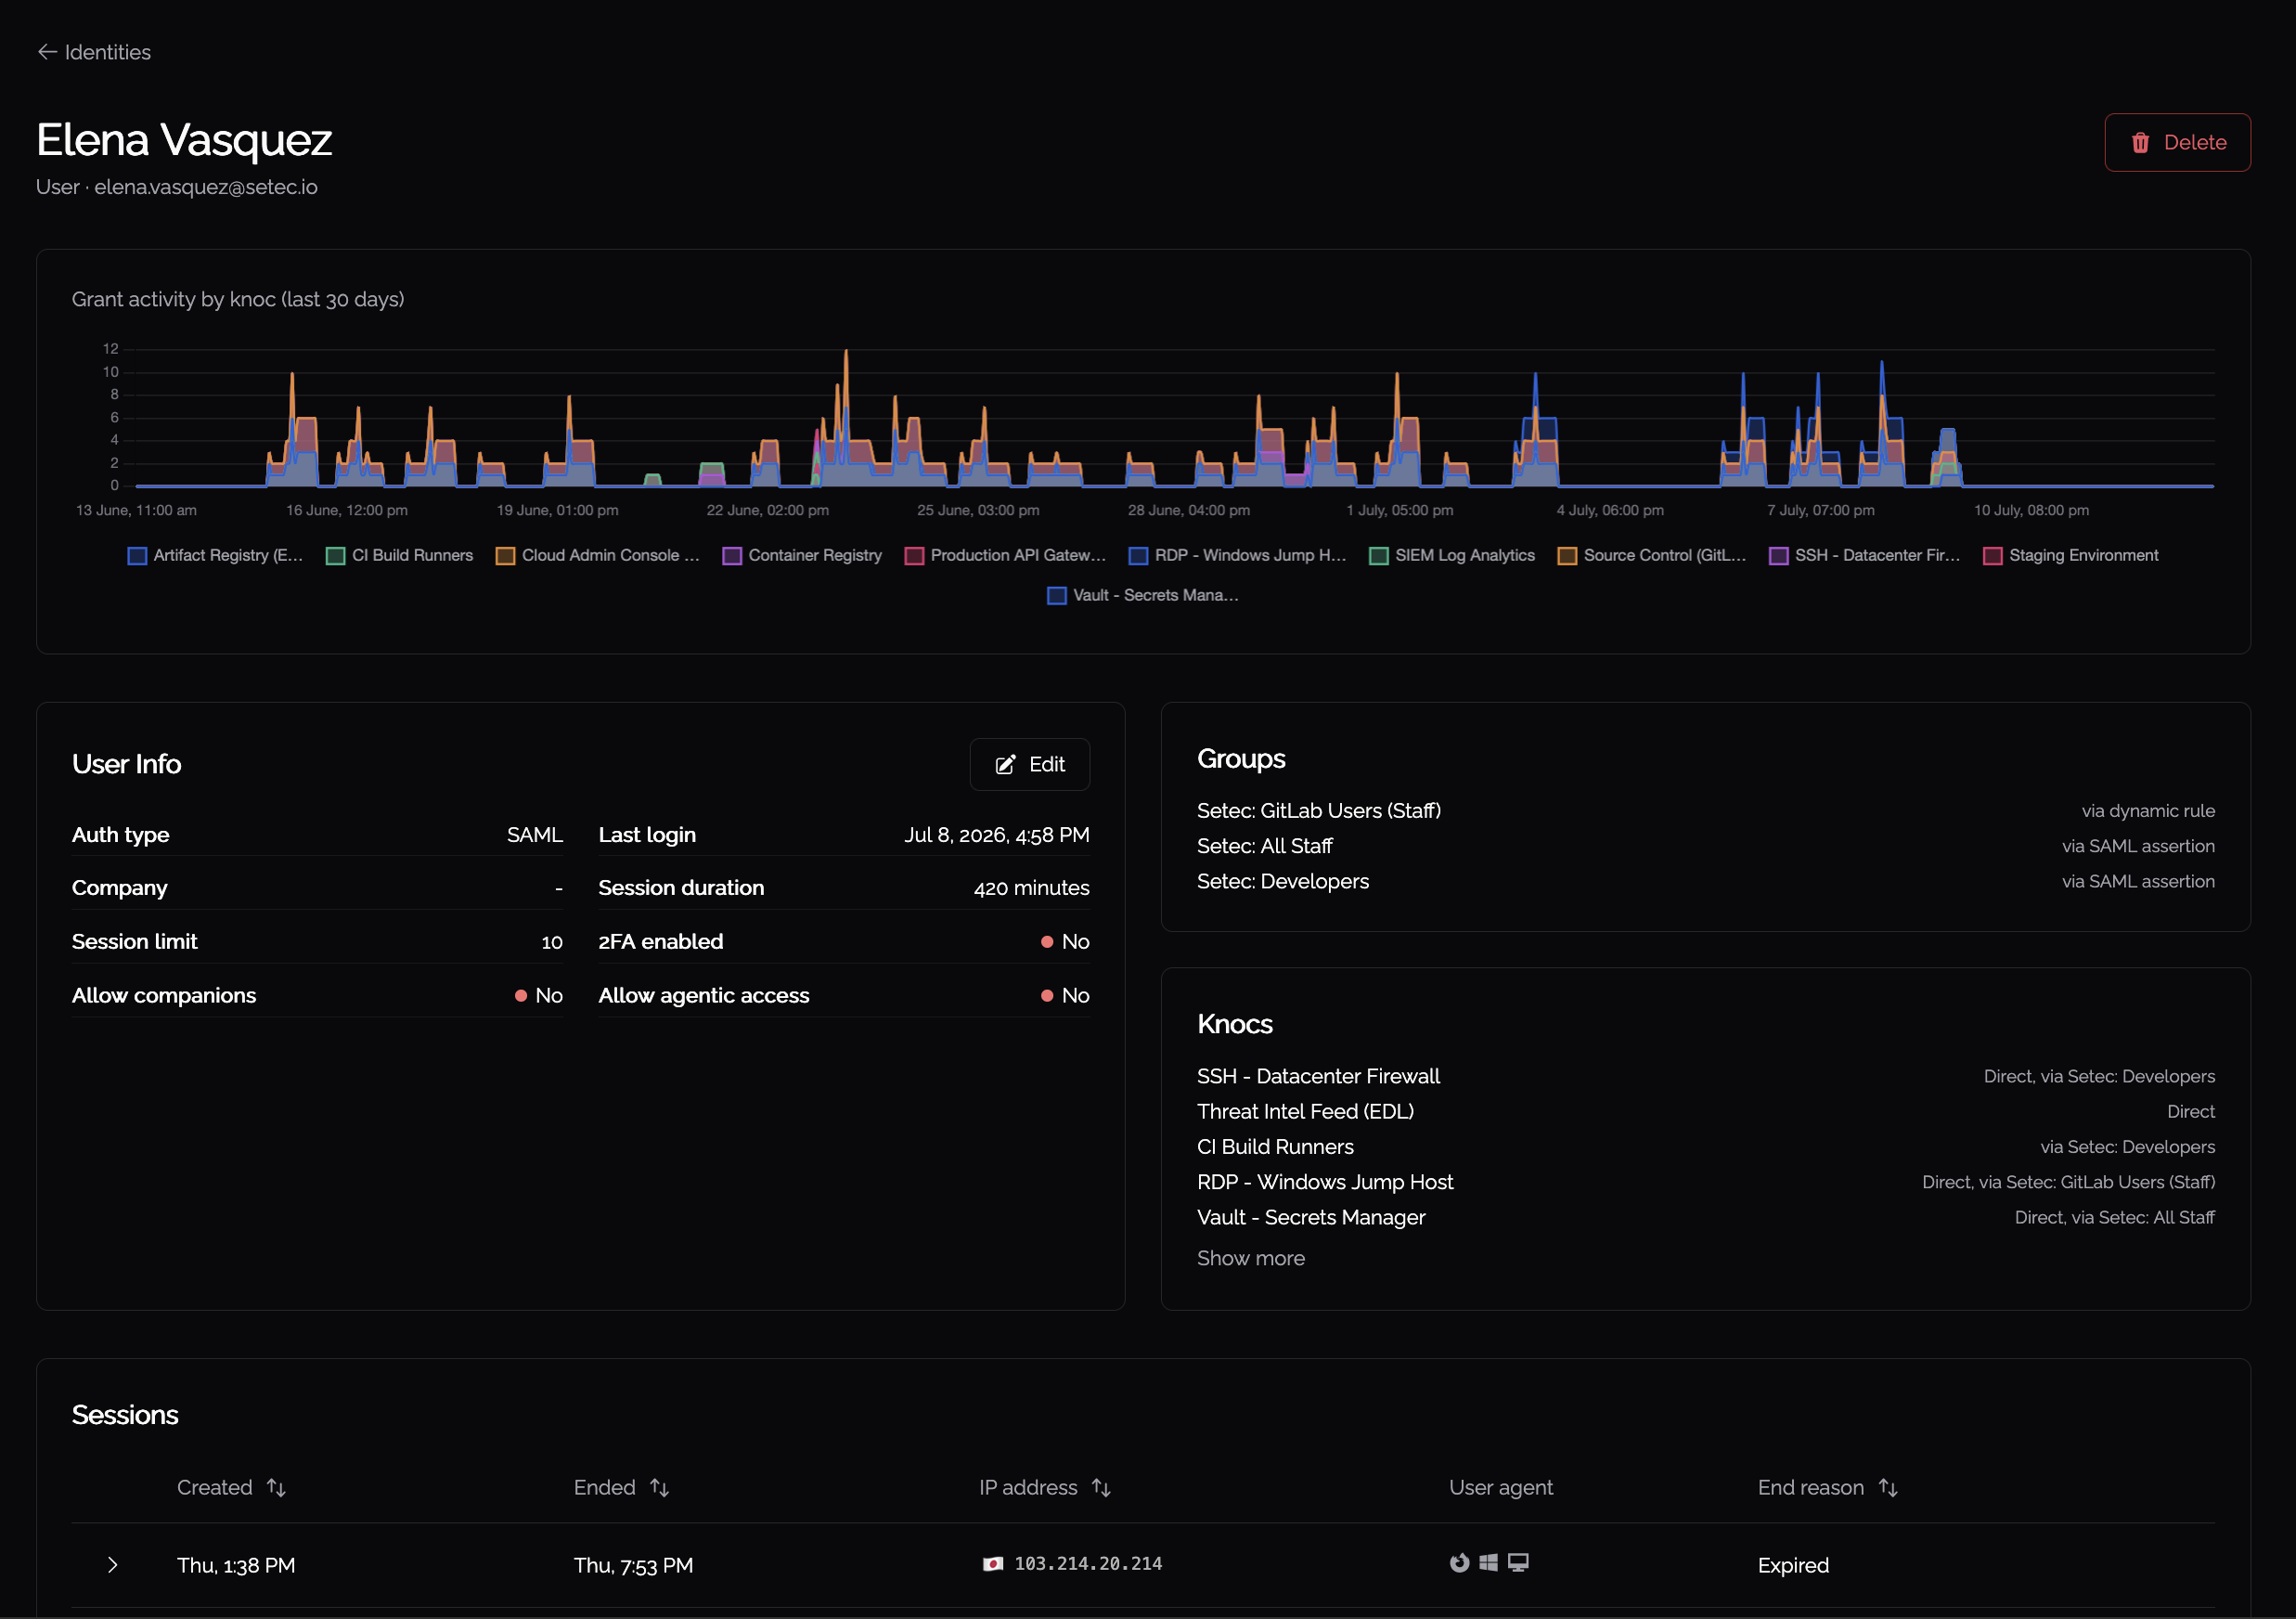
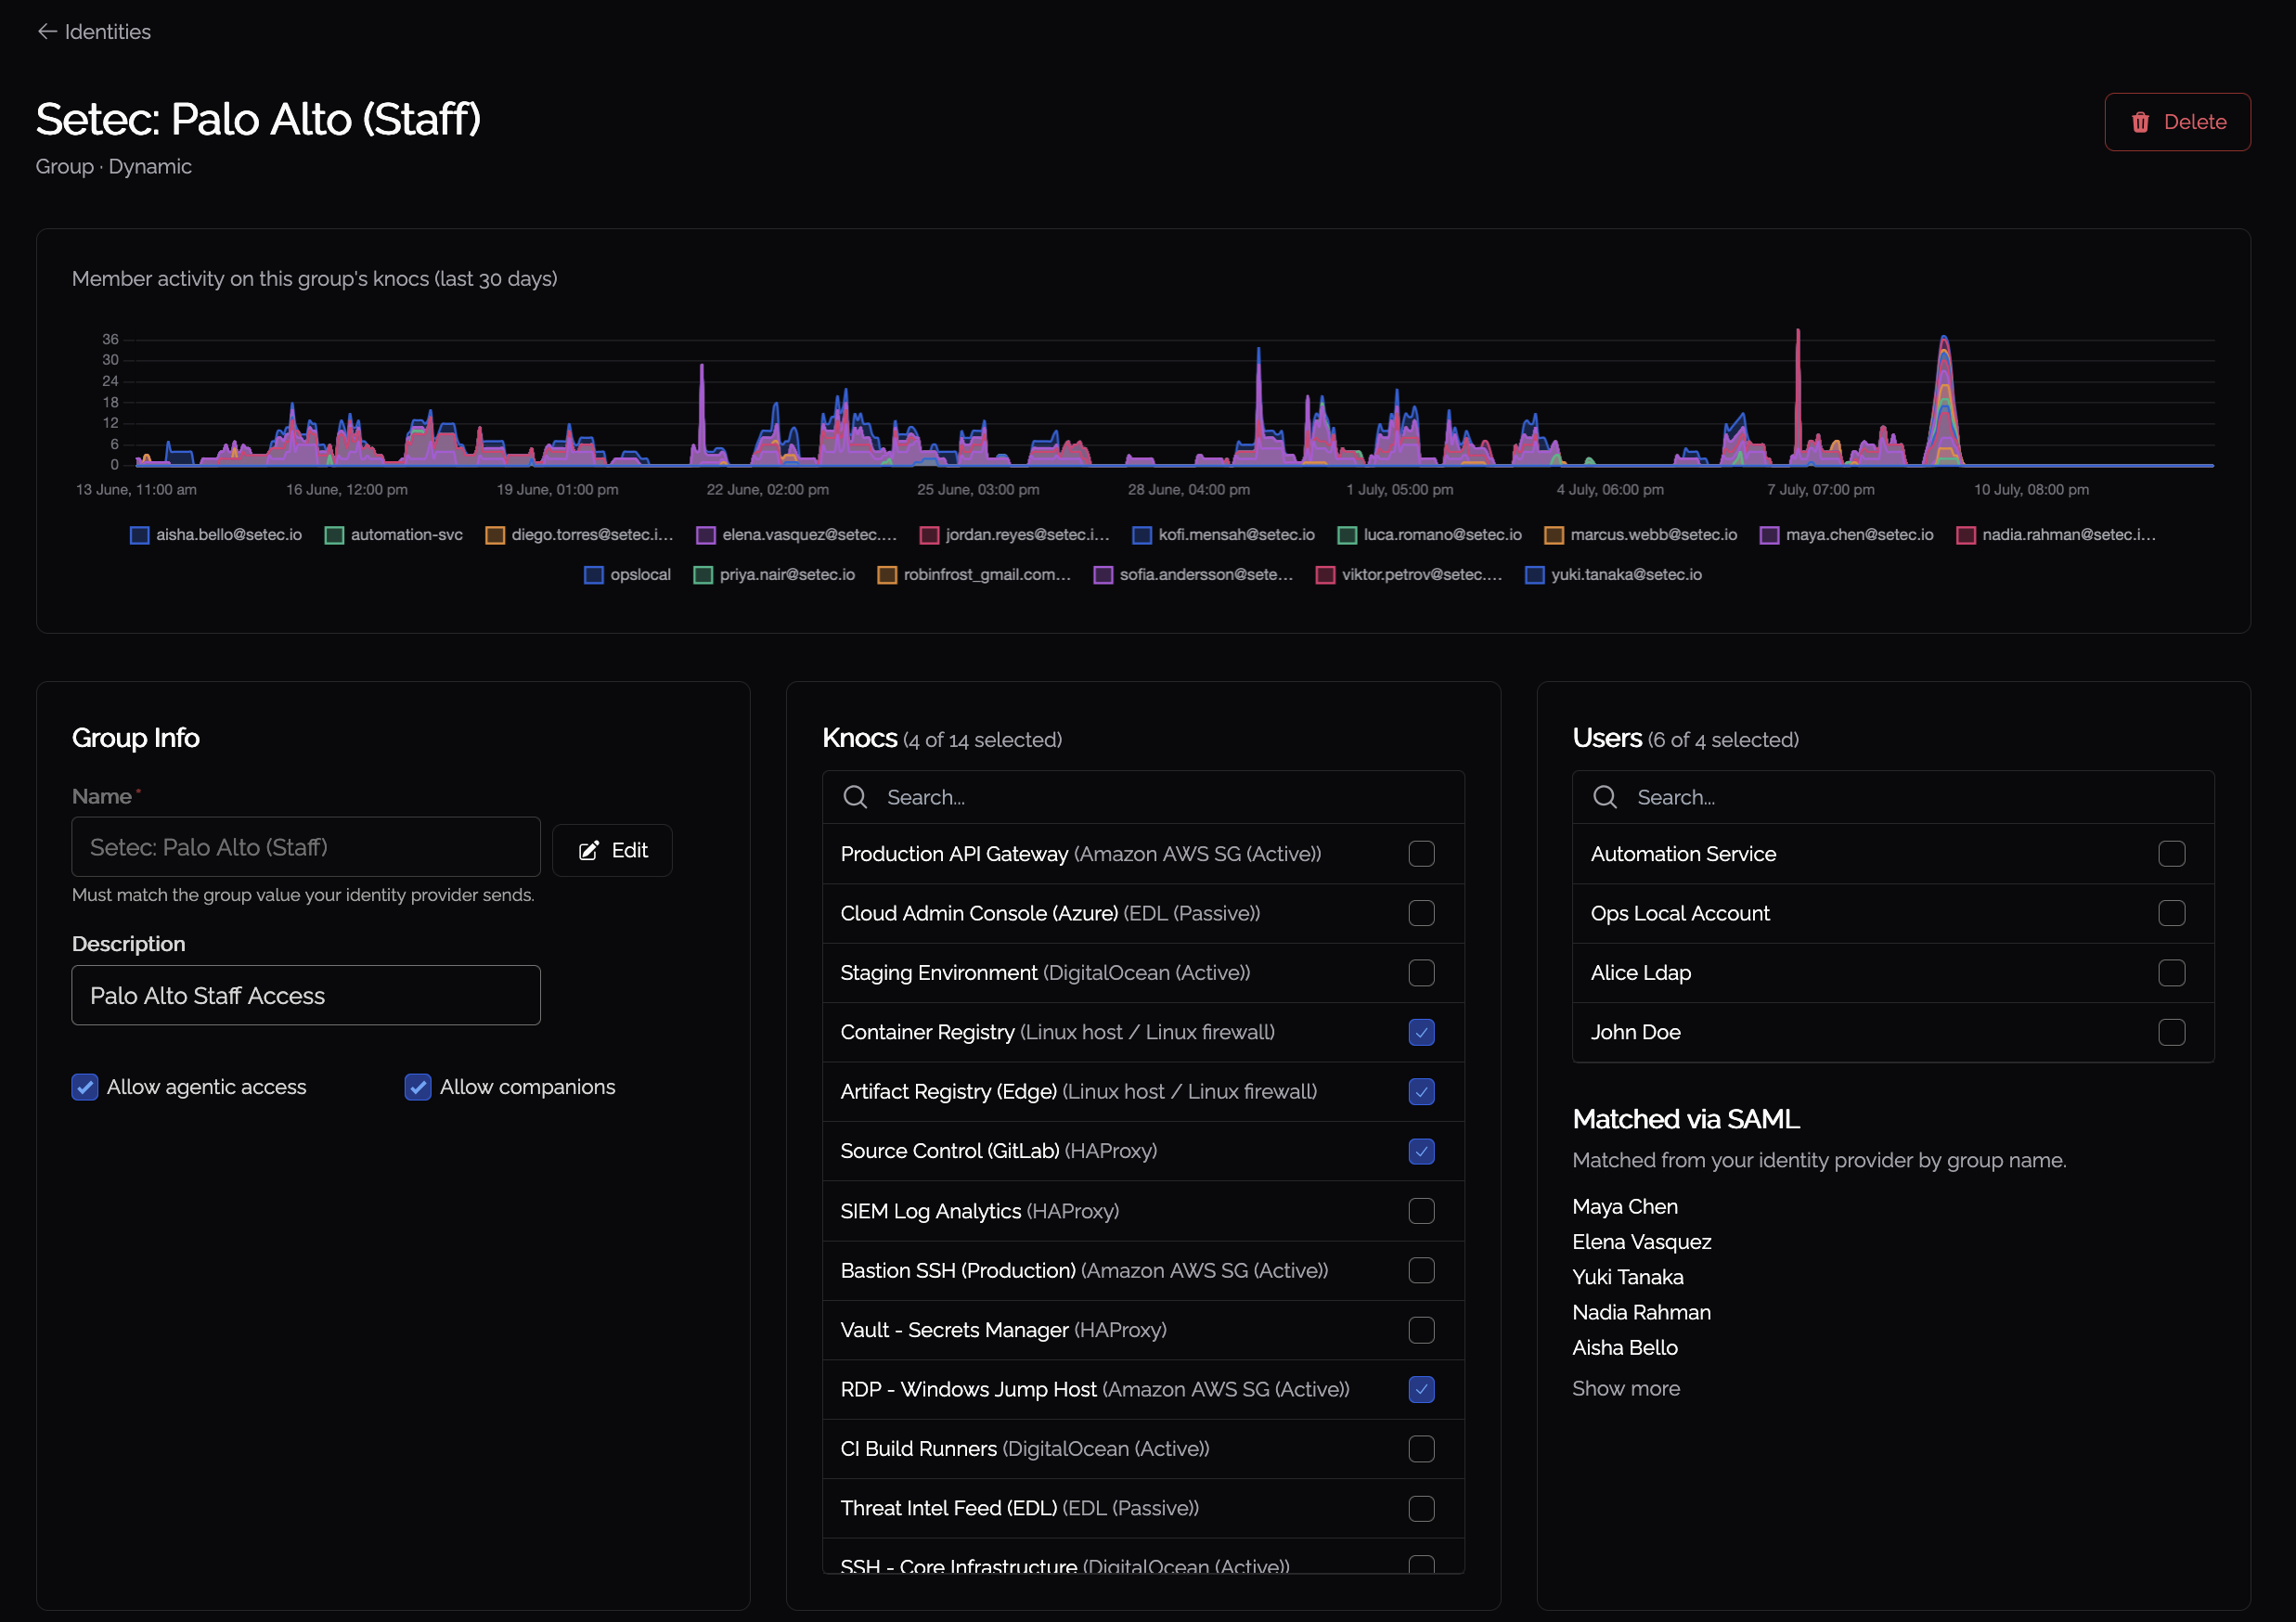
Creating a user does not give them access to anything on its own. Access comes from the Knocs and groups assigned to them:
- Knocs and groups are shown on the user's detail page and assigned from the Knoc creation's user and group steps.
- Group membership can be manual, from a SAML assertion, or from a dynamic rule.
- You can assign a user to a group from the "groups" tab on the identities page
Login sessions and agentic access
Open a user's detail page (click their row in the Users table) to see their recent activity below their assigned Knocs and groups.
Login Sessions
The Login Sessions table lists the user's active sessions. Each row shows when the session started and the User Agent it signed in with, so you can tell a browser login apart from a knocknoc-client or mobile session. Click a session's Active Grants count to expand it and see each grant that session holds: the Knoc, the IP address, its origin, and its status. Grants from an ordinary user login show an origin of "User".
Agentic Access
If agentic access is enabled for the user, the Agentic Access table lists the accesses created for them over the last 30 days, and you can revoke any of them here. See Agentic Access and Companions for what the feature does and how to turn it on.