
Server installation (on premise)
On a Linux host as Root, execute the below command to setup and install your Knocknoc server. You will be stepped through the process. The installer runs on Debian, Ubuntu, Redhat, Oracle and Amazon Linux.
sudo curl -sSL https://packages.knocknoc.io/setup/setup_knocknoc.sh | bash The installer runs on Debian, Ubuntu, Redhat, Oracle and Amazon Linux.
If you want to use our SaaS/Cloud offering to get started quickly, spin up an instance via the licensing portal here.
Requirements
Knocknoc server is the component that users will authenticate to, and agents will connect to over port 443. So the following is required to operate a self-hosted Knocknoc server:
- Linux machine running an up to date Debian or Redhat derivative
- Minimal system requirements (2G RAM, 1 CPU, 10G disk). A busy production server would benefit from >4G RAM, 2 CPUs and faster disk.
- Static IP address, ideally with DNS name. Note an internet-routable IP/DNS entry will allow Let's Encrypt to be used.
- Network ports:
- Inbound port 443/tcp to the Knocknoc server. No other inbound ports are required.
- Outbound port 443/tcp from the Knocknoc server to https://licensing.knocknoc.io for license verification.
- Optional: SSL key/certificate. Note that a self-signed or Let's Encrypt keypair is created during the install process.
If you meet these requirements, please proceed as below. If you are hosting Knocknoc internally, you can use a private IP of course, but ideally DNS and SSL work too. If you would prefer to use the SaaS Server initially, follow that guide.
Self-hosted ServerInstallation
Start by logging into the server you're going to run Knocknoc on, and become the root user. Then, run this script to set up Knocknoc:
curl -sSL https://packages.knocknoc.io/setup/setup_knocknoc.sh | bash Once the license agreement has been accepted, you will be presented with three installation paths:
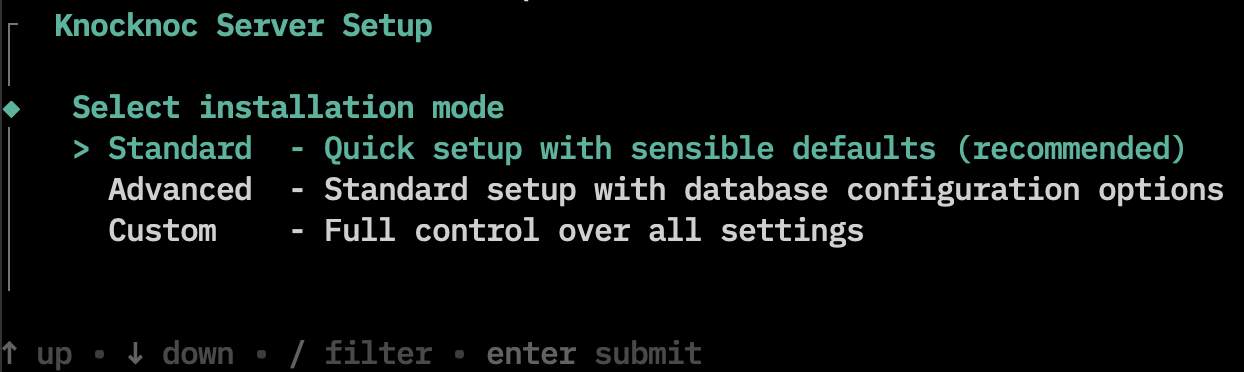
Standard
This is the recommend installation method for most people. This mode will:
- Set up Knocknoc with sensible defaults (which can be later edited in /opt/knocknoc/etc/knocknoc.conf)
- Install Postgres as the local (on machine) database for Knocknoc
InstallKnocknoc does not run as 'root', so we install an Application Delivery Controller (HAProxy) to expose Knocknoc on port 443 using a self signed certificate, meaning Knocknoc will be accessible, but will show users a warning.This certificate can be later upgraded by running/opt/knocknoc/bin/knocknoc --app-delivery-controller- Install and configure the Knocknoc Agent on the same machine
Browse to the machine and configure! https://your-server.com/
Advanced
This method is exactly the same as "Standard", except it allows more control over the database configuration of Knocknoc. You may choose between:
- Installing Postgres as the local (on machine) database for Knocknoc
- Providing an external Postgres database for Knocknoc to use
- Using Knocknoc as an additional web node in a high-availability setup
Custom
In custom mode, you have full control over every aspect of the installation.
Trusted forwarders: This controls which IP/port the Knocknoc web server will listen on. By default, this is set to 127.0.0.1:8756 because the application delivery controller will forward HTTPS connections to this address. However, if you want the Knocknoc server to listen for external connections directly without an intermediary, you can set this address to 0.0.0.0:8756 (please note this may require manually adjusting the machines firewall to expose this port).
Database Configuration: You will be presented with three options. Installing Postgres as the local (on machine) database for Knocknoc. Providing an external Postgres database for Knocknoc to use. Using Knocknoc as an additional web node in a high-availability setup. Most users should select the first option.
Expose Knocknoc on port 443: This indicates that you'd like to install and set up the Application Delivery Controller (HAProxy). Further configuration options will be collected if you select 'yes'.
Application Delivery Controller installation mode: You will be presented with two options. The first is labelled 'standard', which will use a self signed certificate for the Application Delivery Controller. The second option is for advanced users, who would like to set up a signed and trusted certificate with Let's Encrypt. See "Upgrading or Enabling HTTPS" below.
Install a local Knocknoc Agent on this server: Selecting 'yes' will install and configure a Knocknoc Agent on the server.
If you would like to see more configuration options for Knocknoc, check out the configuration file at /opt/knocknoc/etc/knocknoc.conf.
Accessing the Admin Portal
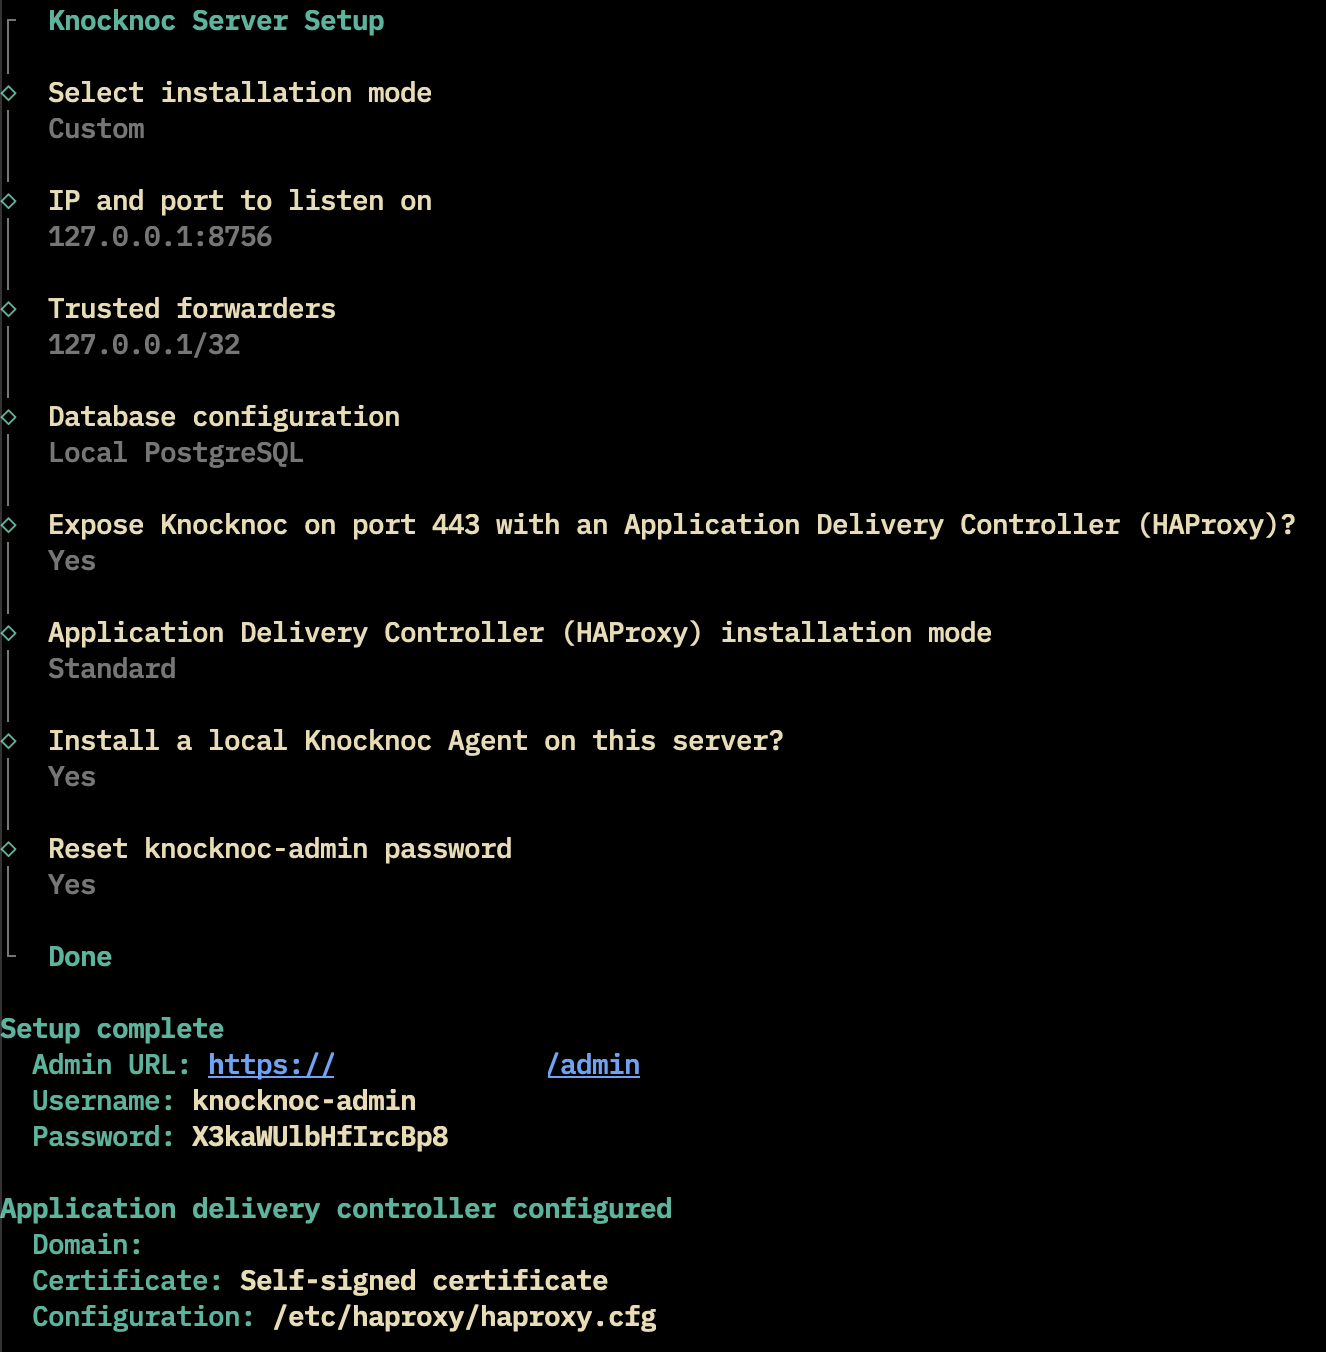
Upon completion of the Knocknoc server installation, a "Setup complete" section should be printed in the Summary, which will contain the URL for the Admin Portal, and the username and password.
If you selected a Custom install, and chose not to set up an Application Delivery Controller, it may be difficult to access the Admin Portal without additional changes to the machine. You can always retroactively enable the Application Delivery Controller with /opt/knocknoc/bin/knocknoc --app-delivery-controller.
UpgradingLets orEncrypt Enabling(trusted HTTPSCA/TLS)
During the Knocknoc installation, by default in Standard and Advanced mode, your Knocknoc server will be exposed using HTTPS with a self signed certificate. Using a self signed certificate is great for a proof of concept, but has some security concerns when dealing with real users, as your web browser will let you know when you try and connect to these pages:
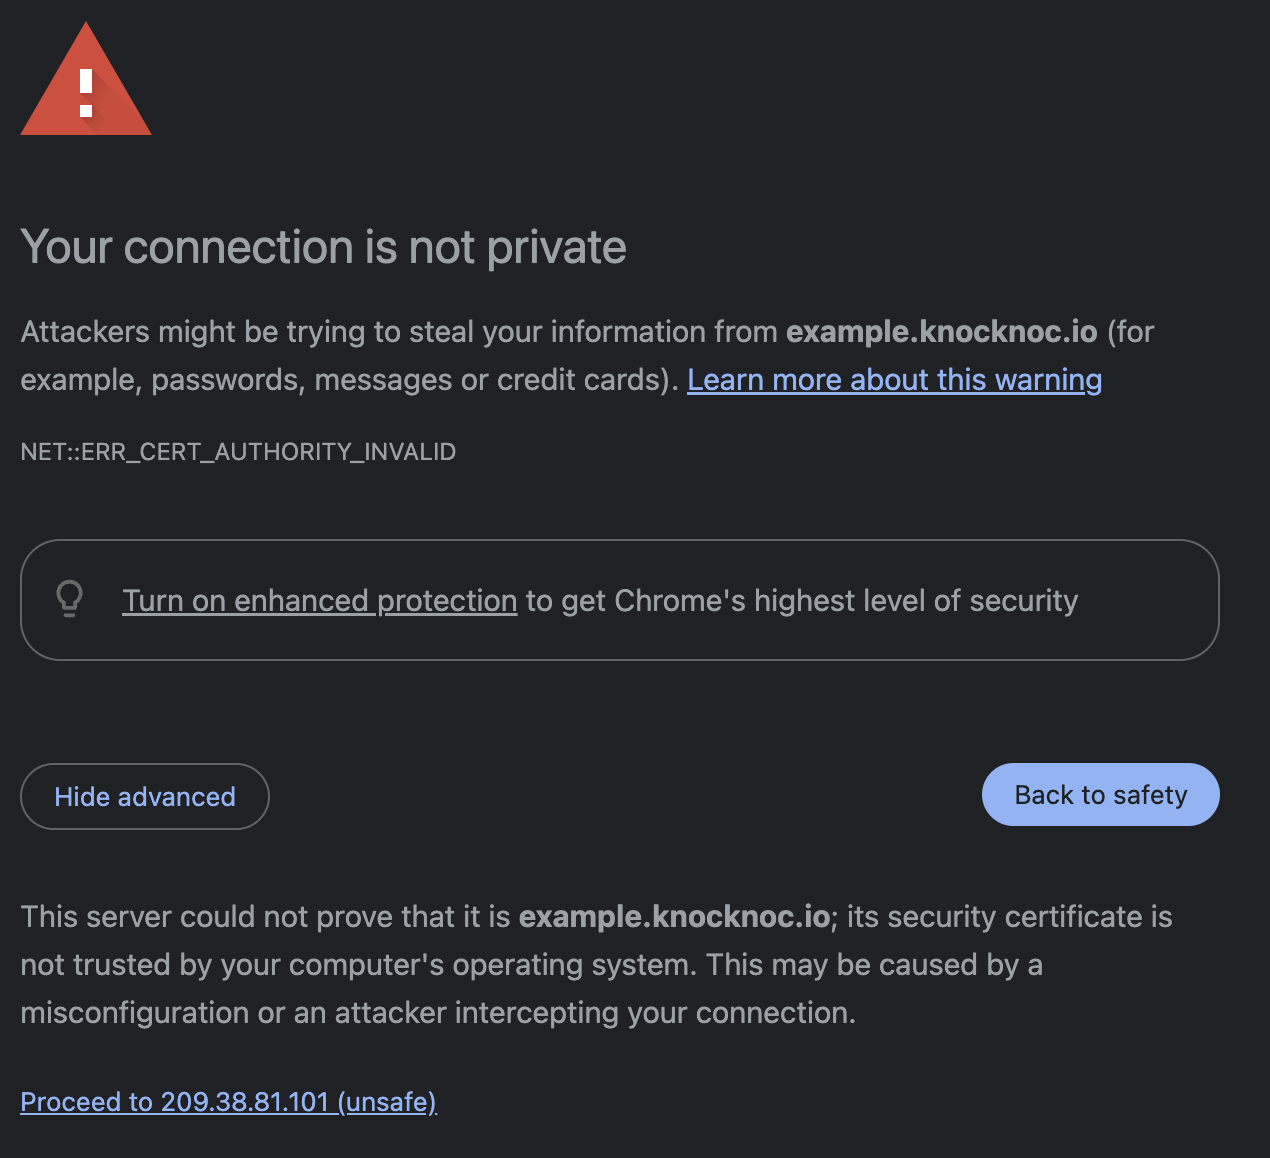
To fix this issue, you need to provide a certificate which is authenticated by a third party. Knocknoc provides an easy to use integration with Let's Encrypt to achieve this.
To get started, simply run /opt/knocknoc/bin/knocknoc --app-delivery-controller.
Then you will be prompted to selection a Let's Encrypt Validation method:
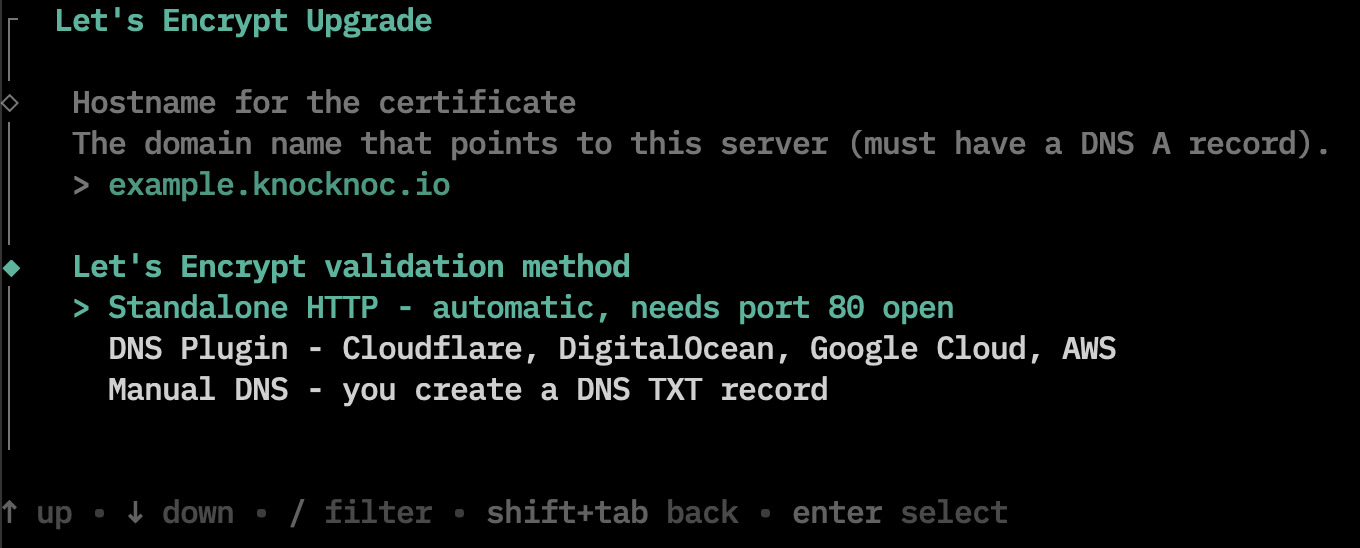
Standalone HTTP
Use this method when:
- Your server is directly reachable from the internet on port 80
- You want a simple setup, and your machine doesn't have any sophisticated networking
This is method requires the following:
- DNS must already point to this server via the A/AAAA record
- Port 80 must be open from the internet
- There must be nothing running on port 80
- You can check this by running
sudo lsof -i :80orsudo ss -tlnp sport = :80.
- You can check this by running
Note that this method will not work in a network behind NAT or with additional firewalls.
DNS Plugin
Usually, you would use this method when:
- The server is behind a firewall or NAT where port 80 can't be opened from the internet
- You already manage DNS with one of the four supported providers
- You want to issue a cert before DNS points to the server (DNS-01 only validates you control the zone, not that the domain resolves to the server)
Depending on which DNS provider you select, different authentication is required:
Cloudflare: Needs an API token with Zone:DNS:Edit permission.
Digital Ocean: Needs a personal access token with read+write scope.
Google Cloud DNS: Needs the path to a service account JSON key file with the DNS Administrator role.
AWS Route53: Needs no token (uses IAM instance role or AWS_ACCESS_KEY_ID/AWS_SECRET_ACCESS_KEY environment variables).
The final step to expose your HTTPS server with a valid certificate is to create a DNS A/AAAA record pointing to the server.
Manual DNS
Select Manual DNS when:
- Your DNS provider isn't one of the four supported plugins
- Your server can't be reached on port 80 (rules out Standalone HTTP)
For the manual DNS setup, specific instructions will be printed to the screen.
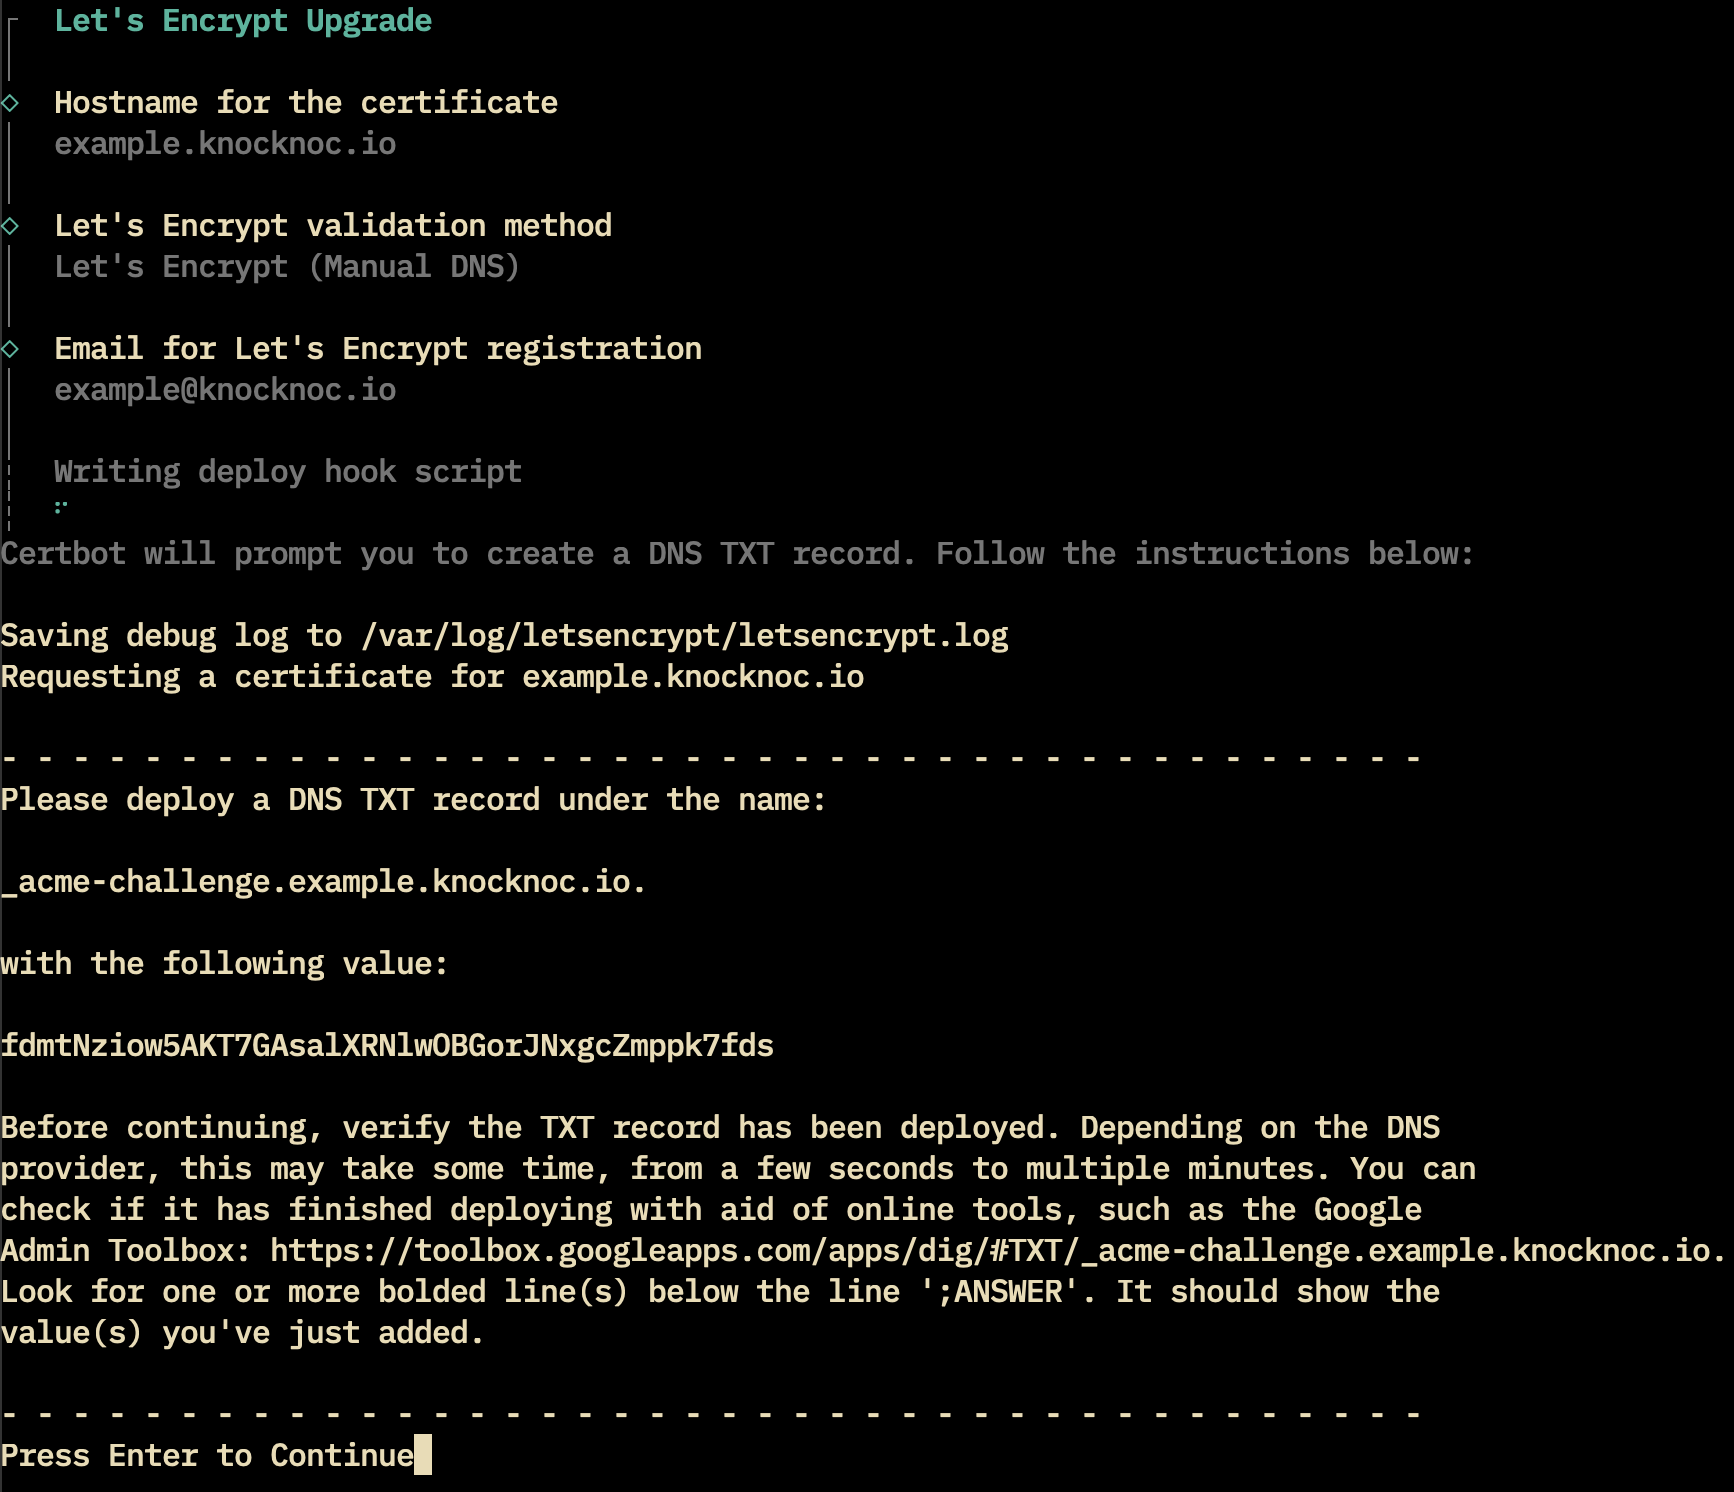
Follow the instructions provided in the setup to obtain a signed certificate for your domain.
Now you should be able to navigate to your URL without seeing any warnings!
SSL Certs - BYO
SSL/TLS keys/certs can be uploaded via the Admin Settings area. These are written to local disk on the Server along with being reloaded in memory for you. This is for the Knocknoc process itself (port 8756) not a load-balancer/local-LB in front of it.
Knocknoc TLS/SSL keys/certificates, individual files:
- Certificate: /opt/knocknoc/var/knocknoc.crt
- Key: /opt/knocknoc/var/knocknoc.key
If you enabled the Application Delivery Controller (HAProxy) during the installation, there is a second set of SSL/TLS certs which enabled in the previous steps. You can confirm the location by looking at your bind config line in /etc/haproxy/haproxy.cfg:
- /etc/ssl/private/myserver.example.pem
Server configuration file
The server configuration file (/opt/knocknoc/etc/knocknoc.conf) has a number of options, however the default is typically sufficient.
Knocknoc does not run as the "root" user, therefore cannot bind to ports below 1024. If you require it on port 443, you must use a reverse proxy. You can follow the guide above to use HAProxy locally, or use an existing one.
For IPv4 and IPv6 configurations, ensure you are binding to both or one. Currently this is managed by setting the below:
# knocknoc.conf

# v4 and v6
HTTPAddr = "[::]:8756"

# v6 only
#HTTPAddr = "[::1]:8756"

# v4 only
#HTTPAddr = "127.0.0.1:8756"
#HTTPAddr = "0.0.0.0:8756"
Reverse proxies (e.g., HAProxy, or F5/others) need to be trusted as sources of IP address information through the TrustedForwarders configuration option.
For a locally-run reverse proxy (e.g., you followed the HAProxy installer in Knocknoc server), the IPv6 and IPv4 configuration this is as below.
If you're using a remote/non-local reverse proxy, you need to configure the IP address to be a trusted supplier of the end-users IP address information, eg: 192.168.100.10/32 as below
The HttpForwardedHeaders can override the default header used to provide/capture the end users IP address information, you specify your own (e.g., X-Client-IP-Address) if you desire. Note the default is X-Forwarded-For (HAProxy default).
# Local reverse proxy
TrustedForwarders = [ "::1/64", "127.0.0.1/32" ]

# Remote reverse proxy
TrustedForwarders = [ "192.168.100.10/32" ]

# Header to trust for client IP address information
#HttpForwardedHeaders = [ "X-Forwarded-For", "Forwarded" ]
# You can replace this with a custom one if you choose
#HttpForwardedHeaders = [ "X-Client-IP-Address" ]
LogLevels can be set as "error" "warn" "info" "debug" "trace", increasing in verbosity.
LogLevel = "info"
#LogLevel = "debug"
#LogLevel = "trace"
Working with outbound proxies
Knocknoc server requires access out to the licensing portal to activate the license and report anonymous usage for license verification purposes. More information on the data transferred can be found here.
To get knocknoc working through a web proxy, add the proxy environment variable to the systemd unit file.
- Edit the systemd unit file.
sudo systemctl edit knocknoc.service - Add this line under the [Service] section
Environment="HTTPS_PROXY=http://proxyIPaddress:proxyport" - Reload the systemctl daemon
systemctl daemon-reload - Restart knocknoc
systemctl restart knocknoc
Note that the following URLs are required outbound from the knocknoc server software:
Supported operating systems
Debian, Ubuntu, Redhat and Oracle Linux are all supported.
If you have any issues or require another platform please contact support@knocknoc.io
Monitoring
We recommend monitoring the/_status route, as it reduces the log impact on your server/infrastructure and offers back-end checking benefits - for a more accurate server status.
Cloud servers (SaaS)
Your cloud instance is ready to go out of the box, with the license installed. You can jump straight to Agent Installation.
Your knocknoc-admin password should be available in the licensing portal, please change it on first login.