
Fortigate Address Groups (Fortinet)
The FortiOS integration allows Knocknoc to dynamically add and remove user's source IP from a named address group. This address group can then be used in whatever Firewall rule you like, opening up many possibilities for securing access to systems behind Fortigate firewalls or to services on the Fortigate firewalls themselves, such as remote-management or the VPN ports/services. Knocknoc can also provide external dynamic lists (EDLs), which allows for a Passive orchestration approach.
Knocknoc supports both FortiGate and FortiManager.
Active or Passive orchestration
Active - Knocknoc's Fortinet orchestration capability utilises the Forti API to actively manage the device, inserting and removing IP addresses as part of the Knocknoc Grant process. This is an active, near-real-time approach that provides the best user experience. Permissions are limited to address-groups edit only. Broad API access/permissions are not required. Knocknoc manages the IP lists and address groups, but not the policy, users/permissions nor other firewall settings, reducing exposure to inadvertent change or configuration errors.
Passive - Knocknoc's Allowlist feature provides a passive integration with firewalls that support External Dynamic Lists or EDLs. This feature pulls from the Knocknoc server a list of IPs of authenticated users, in the correct group/for the assigned firewall policy. The drawback of this feature is that the list can only be fetched every 1 minute in the case of a Fortinet.
Active (via Forti API)
Requirements
- FortisOS 7+
- An API key, along with the relevant rules to allow your agent to connect to the Fortigate api for that key (see below).
- VDOM name if you are using vdoms
- Agent version 1.6.0+ (April 2025)
Knoc configuration
Select the "Firewalls / Appliances" Knoc configuration, selecting "Active"
 .
.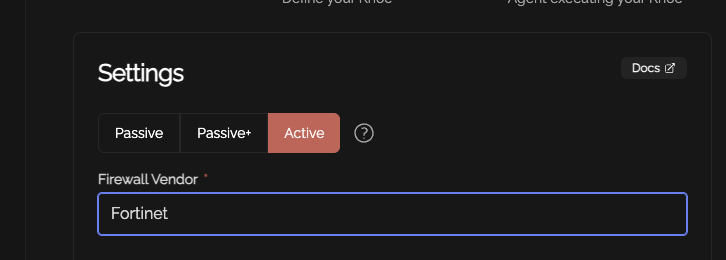
Follow the prompts, as below:
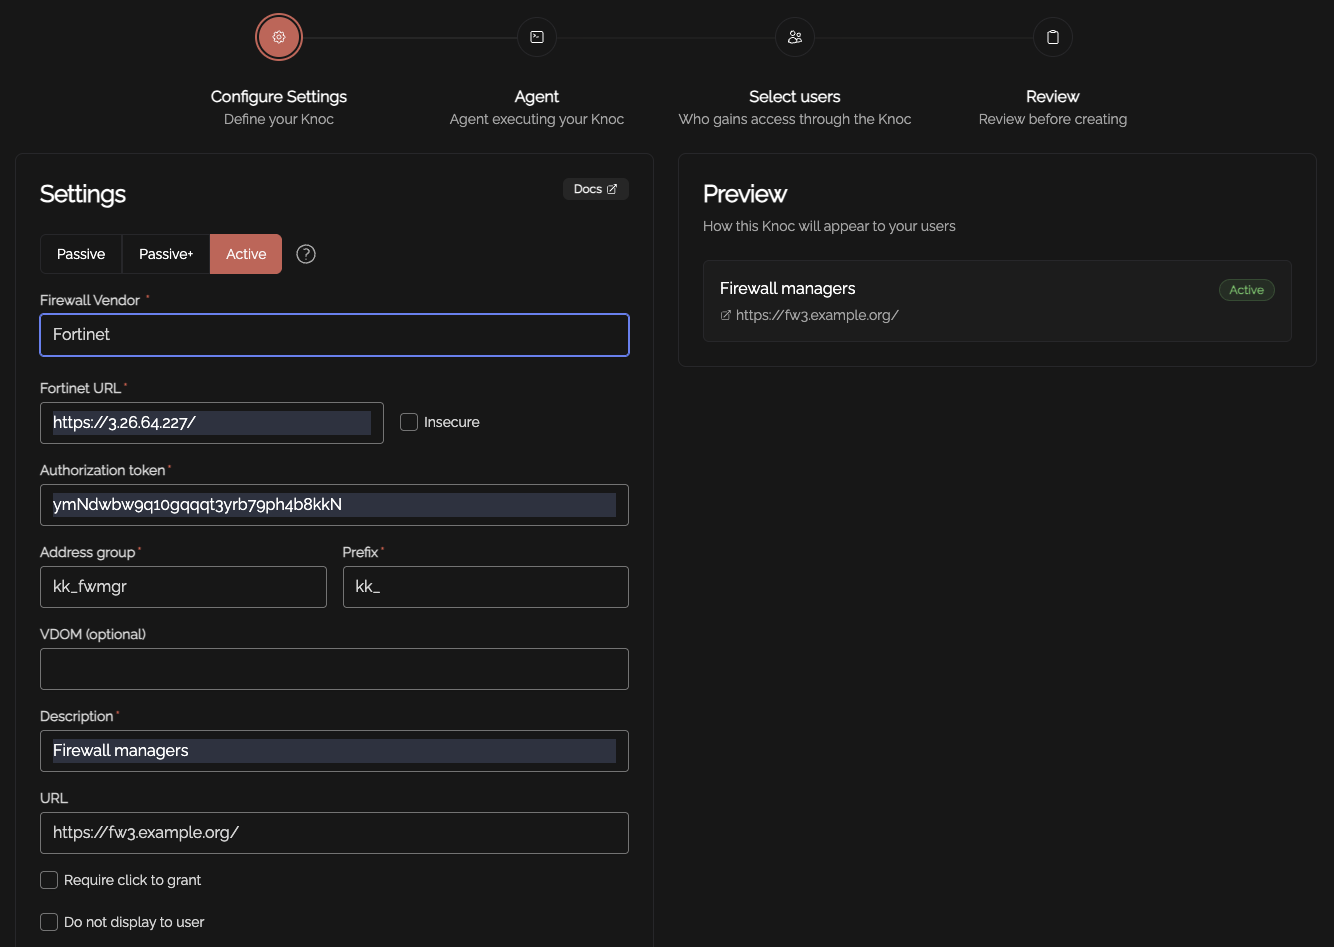
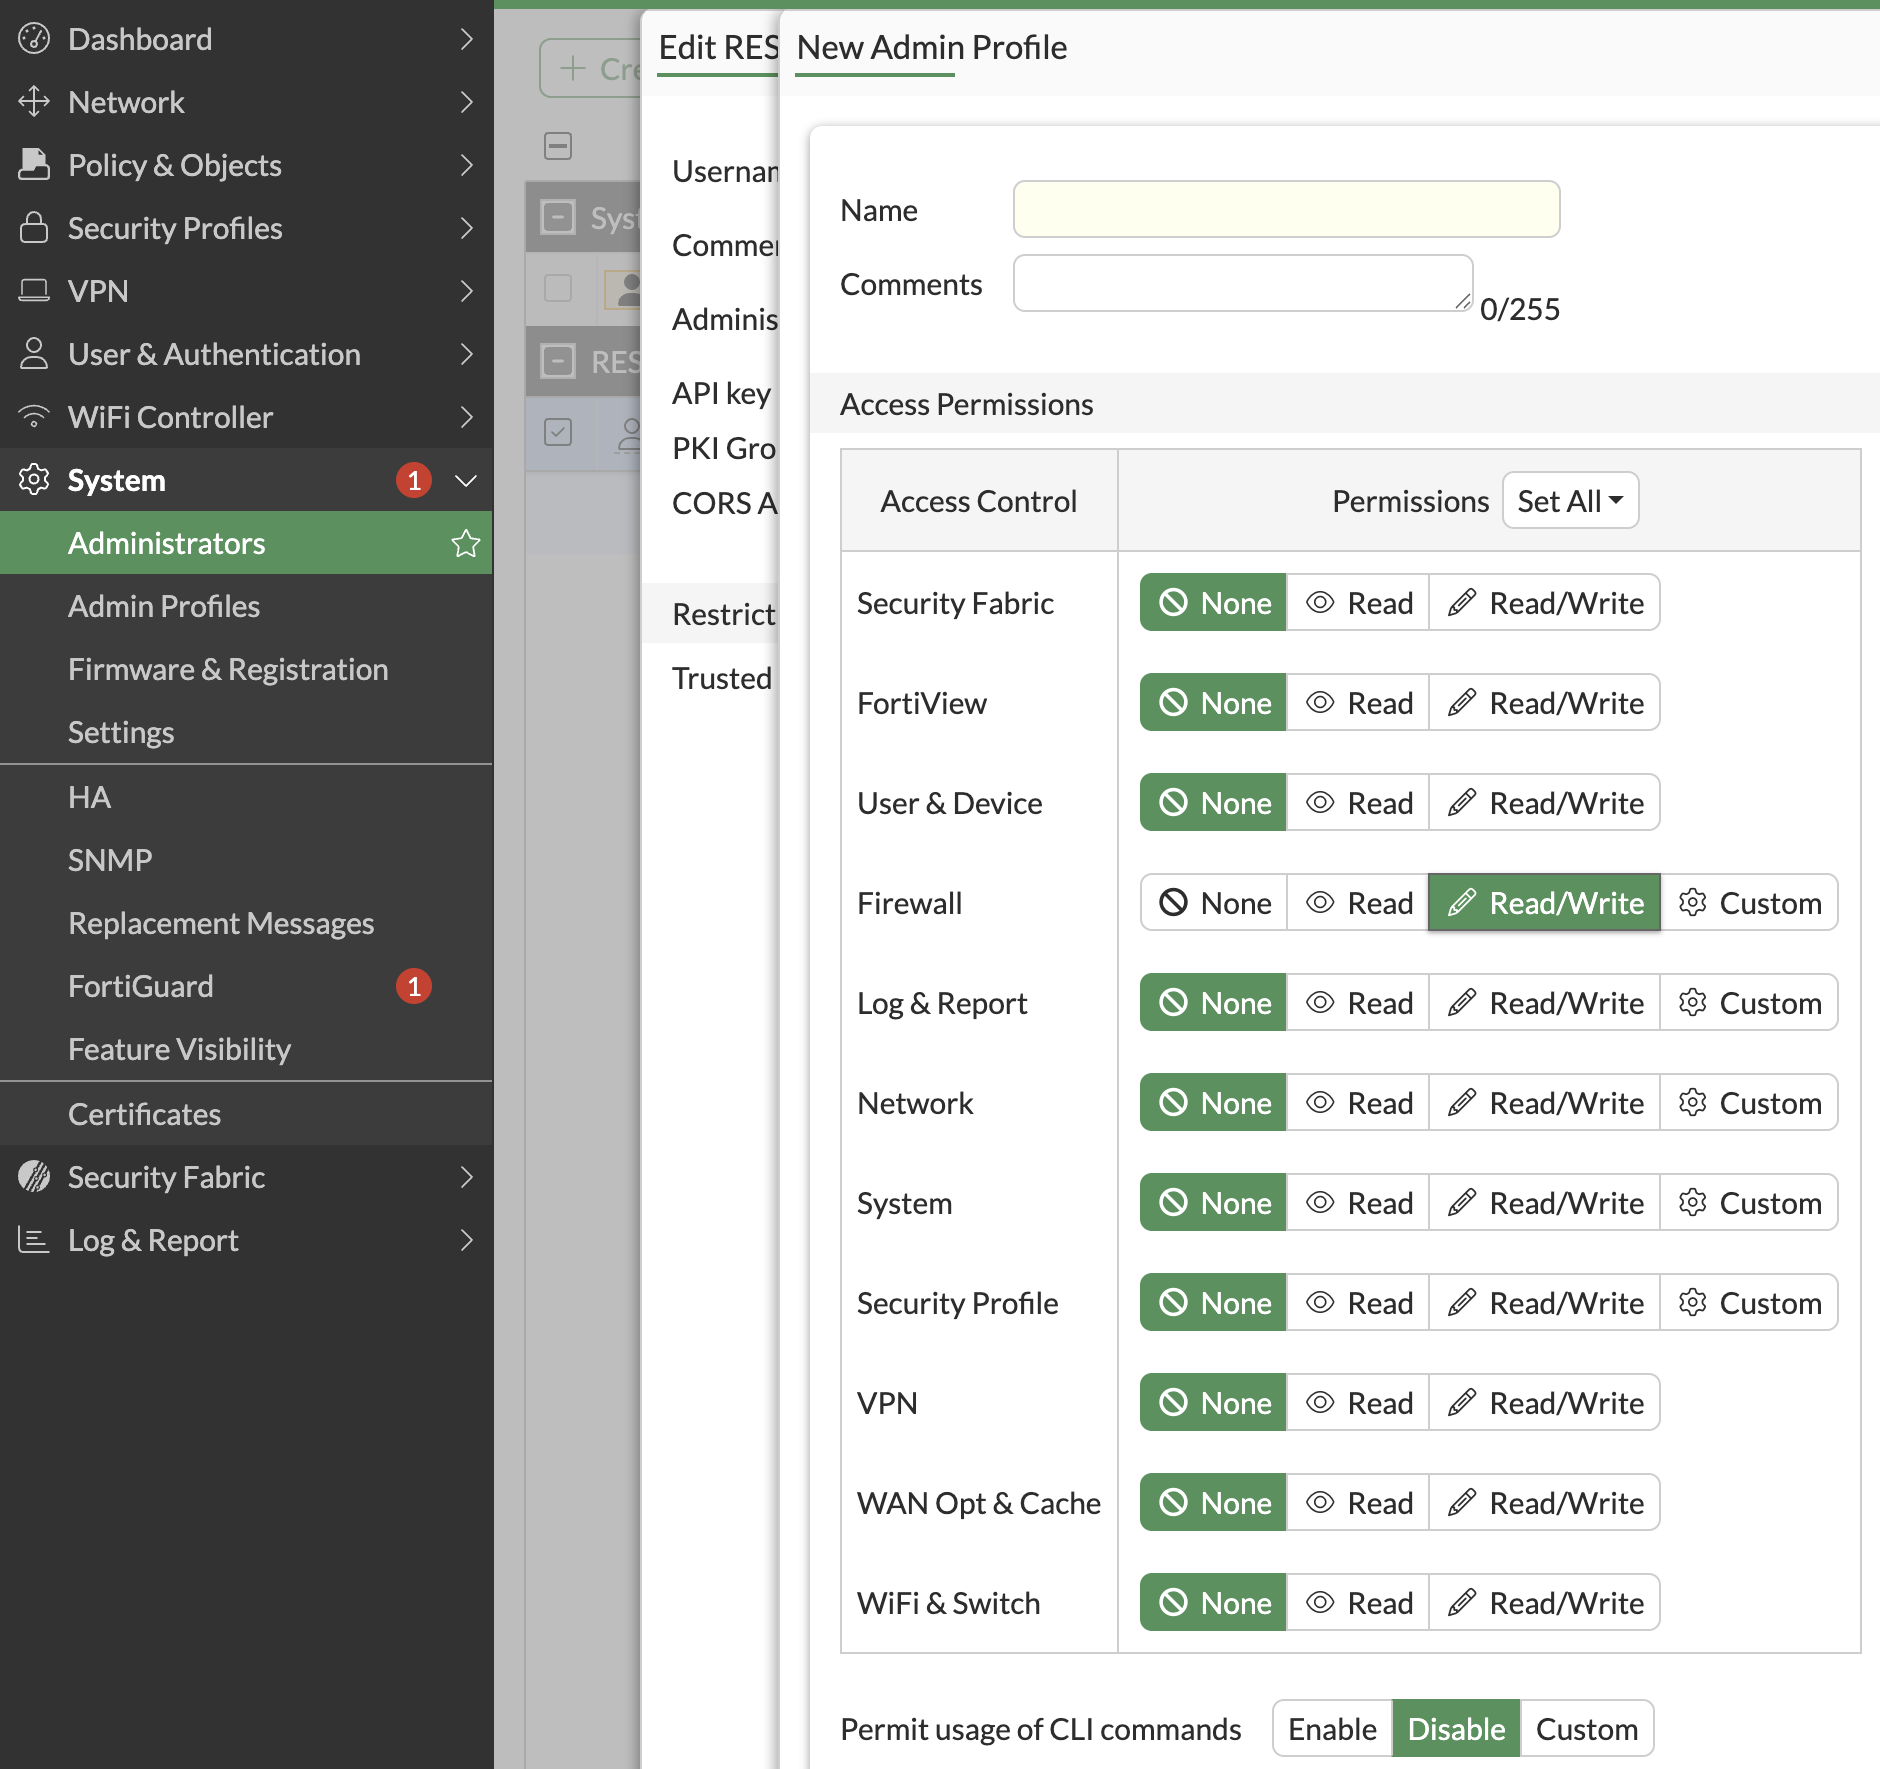
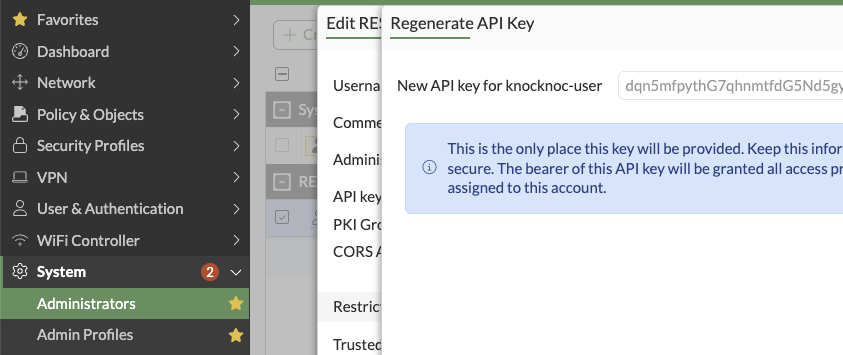
The authorisation token is obtained by creating a user with read/write Firewall permissions, as below. Note that no other permissions are required.
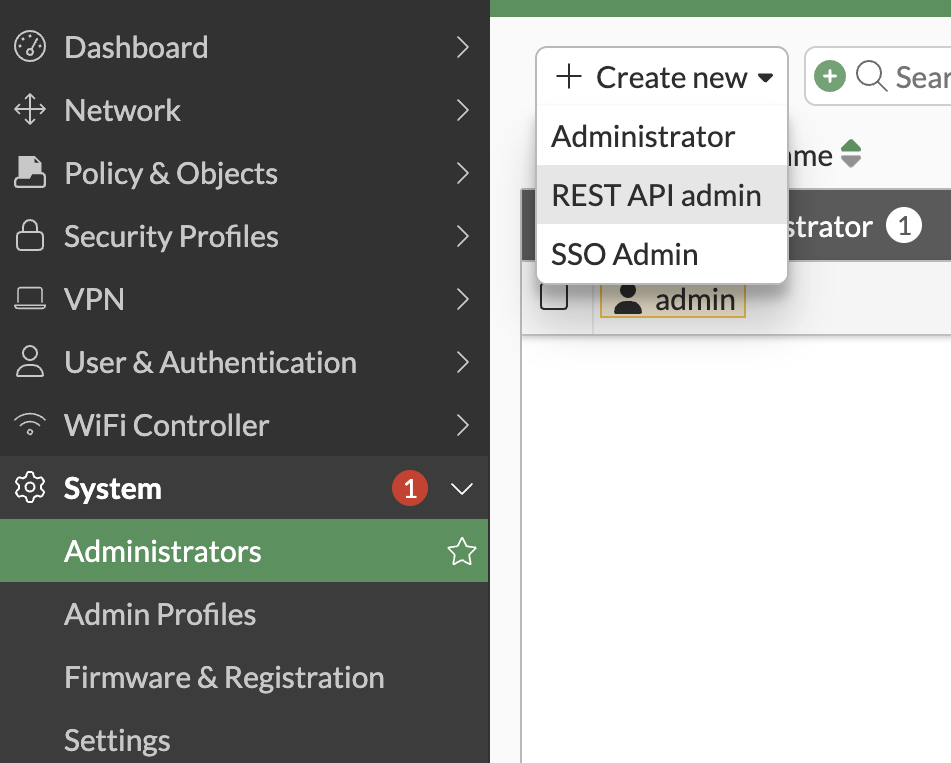
- System -> Administrators -> Create new "Rest API Admin"

- Create a New Admin Profile -> Enable Firewall Read/Write
- Disable "Permit usage of CLI commands"
- Note that "Trusted Hosts" allows you to restrict the API user access. This is optional, but needs to be the source IP address of the Knocknoc "Agent" you intend to deploy to actively manage the Fortinet. This is typically deployed within a local management network.
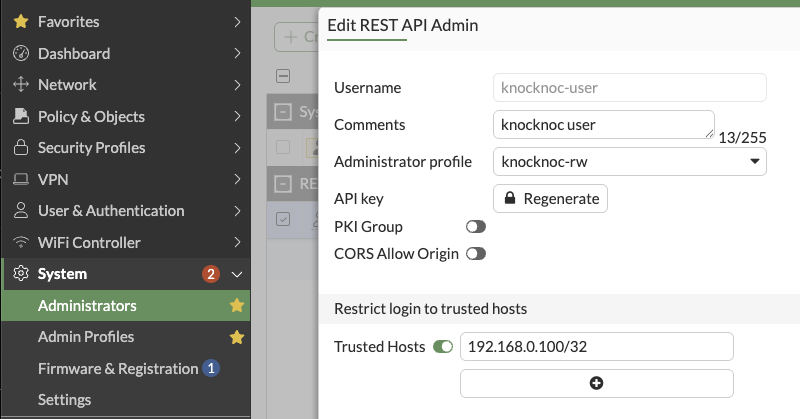
- Generate the API key and save it for the Knocknoc configuration. This can be re-generated later if needed


That's it!
This can be edited - shown below the "knocknoc-user" has been created with the "knocknoc-rw profile, of type API Key, within the REST API Administrator section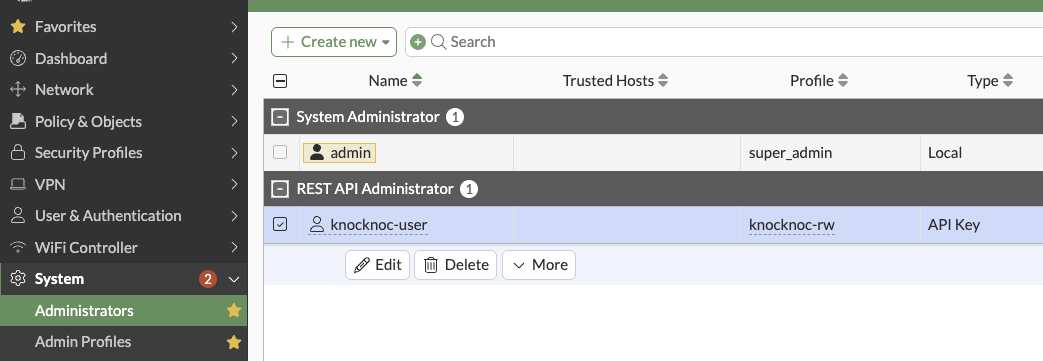
Testing it out
If you allocate this Knoc to a user/group of users, they will be added to the Fortinet address-group on login. And be removed again on logout. Addresses are saved for reuse.
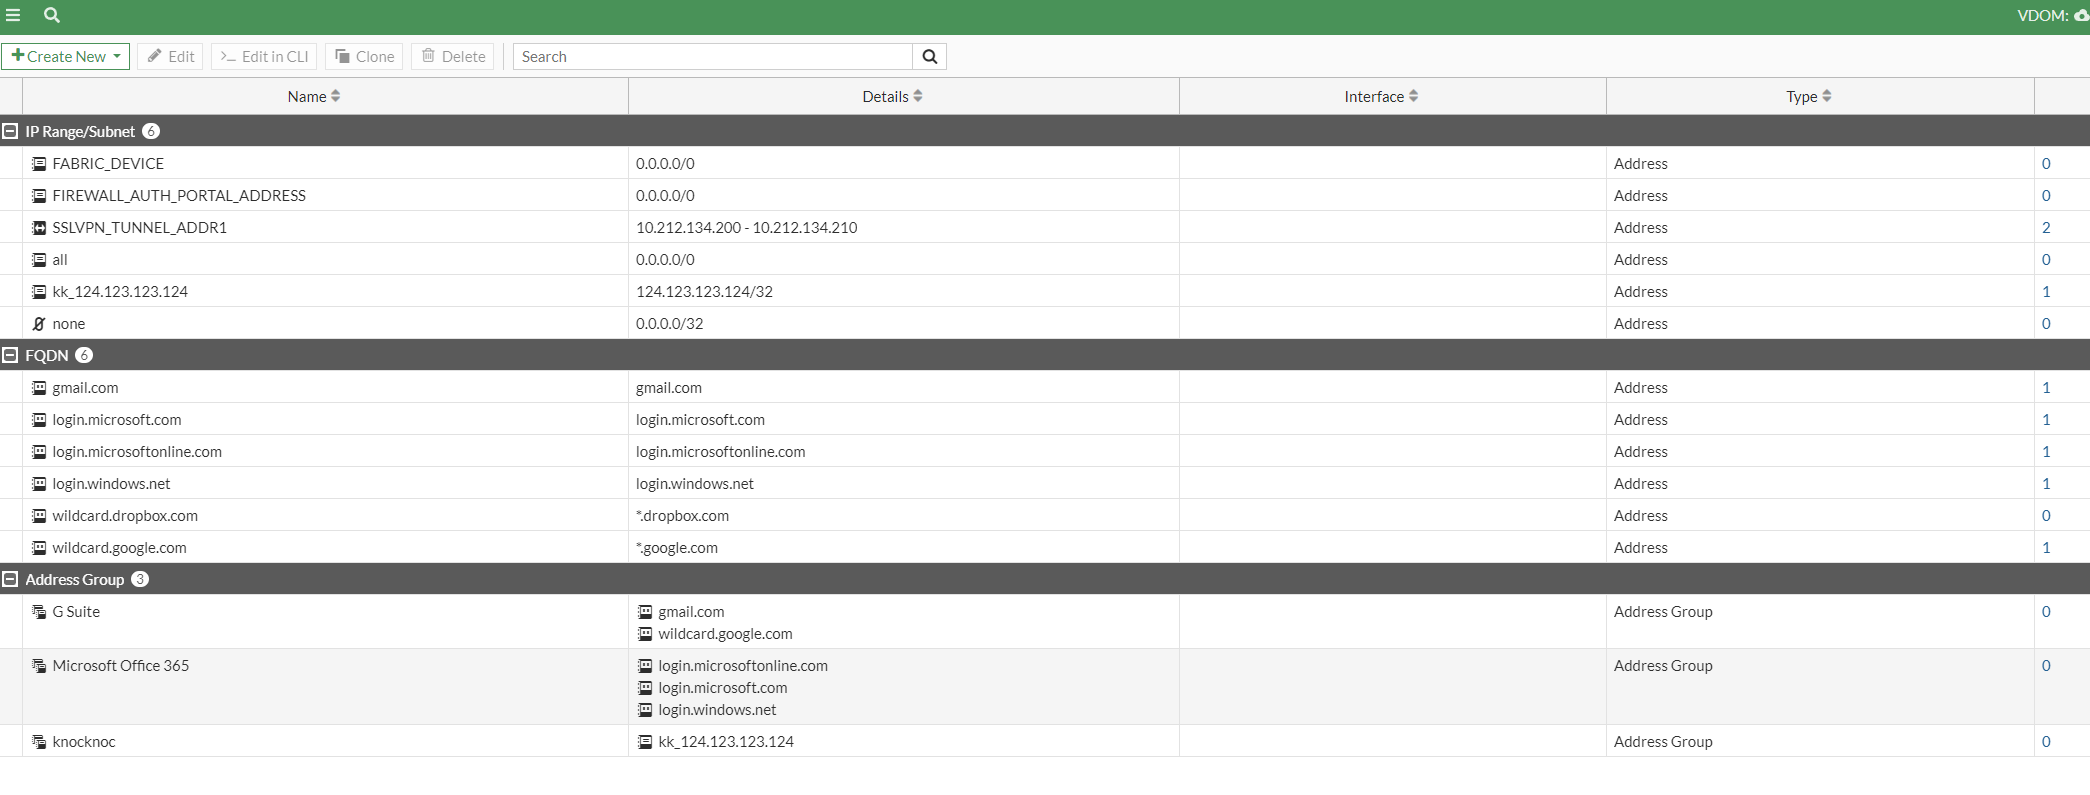
You can see at the top the kk_ address is added, and at the bottom the knocknoc address group contains this address.
Note that the Address Group names can be case sensitive!
Active Checklist
✅ Your Knoc has the correct settings;
- ✅ Your URL matches correctly to what you've entered into the Knoc's settings
- ✅ If you're using an insecure URL, you've ticked 'insecure'
✅ You've made a RESTAPI Admin with read/write on the Firewall
✅ If using 'Trusted Hosts' then you've selected the correct IP range
✅ Generated and copy pasted the correct API key into the Knoc
✅ Made the address group you'd like the addresses attached to and the name matches what's in the Knoc settings
Passive (EDL or AllowList)
Requirements
- FortisOS 7+ Admin login
- HTTPS access from the Fortinet to the relevant Knocknoc Server publishing the AllowList
Knoc configuration
Select Passive in the Knoc configuration. Note that no Agent is required for this configuration as the Server is publishing/hosting the Allowlist.
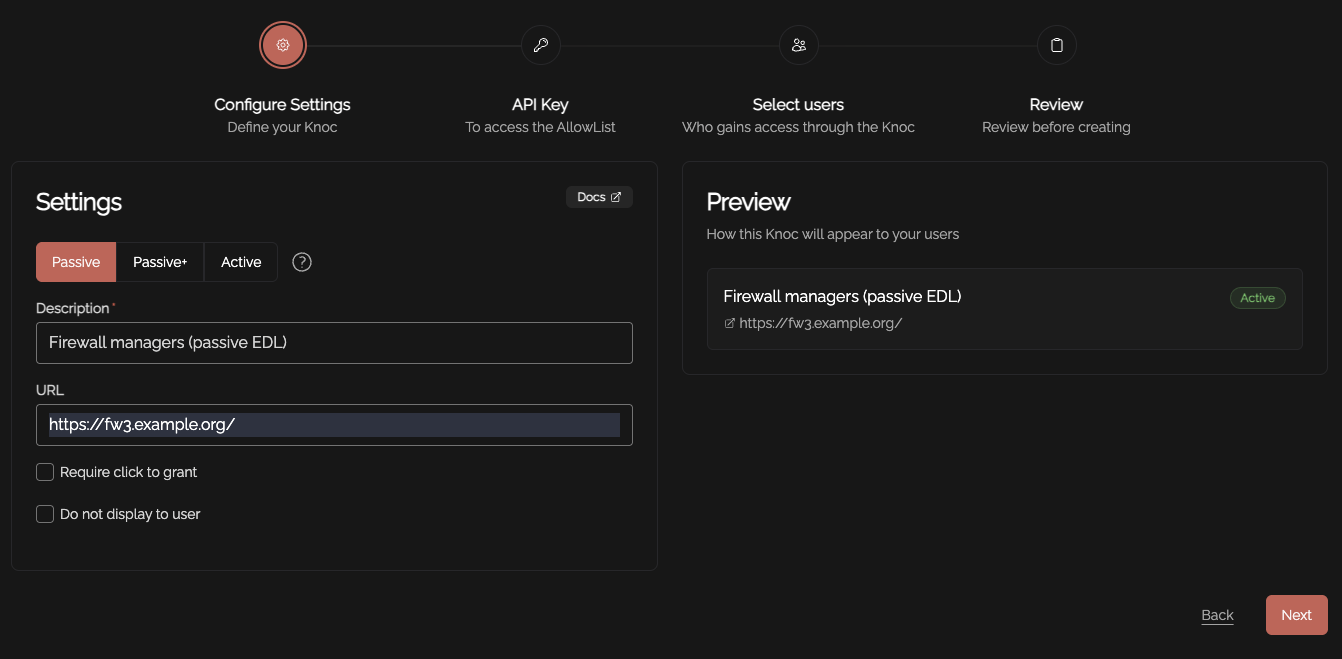
Set an API key name, and define any IP allowlisting restrictions on the API key-use. Naturally we recommend removing the "entire Internet" rules.
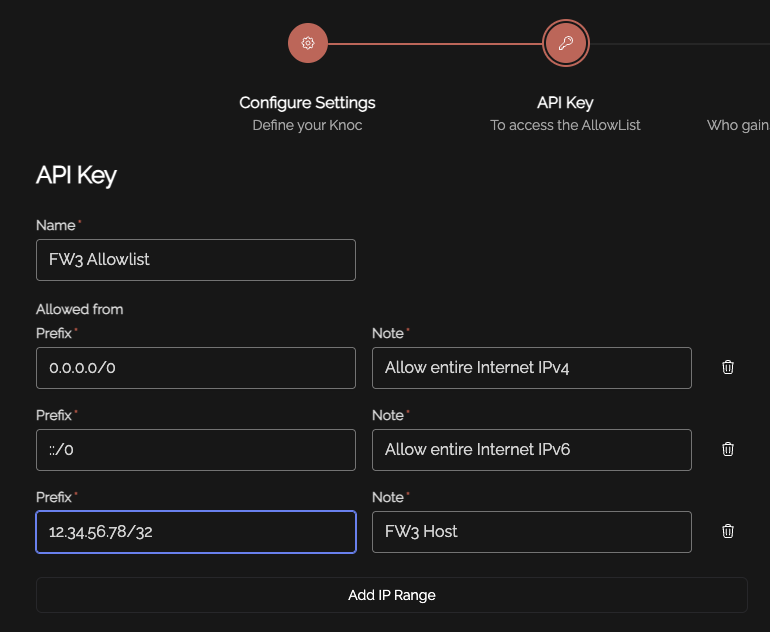
Be mindful of the IP address restrictions, by default it will allow the entire v4/v6 Internet.
Copy the API key/token that is displayed, you will not be able to recover this after it has been shown.
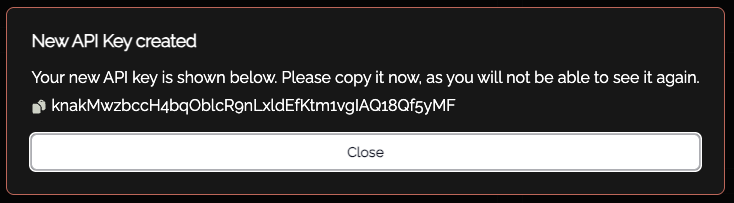
Copy the API key and store this for future use.
Fortinet config
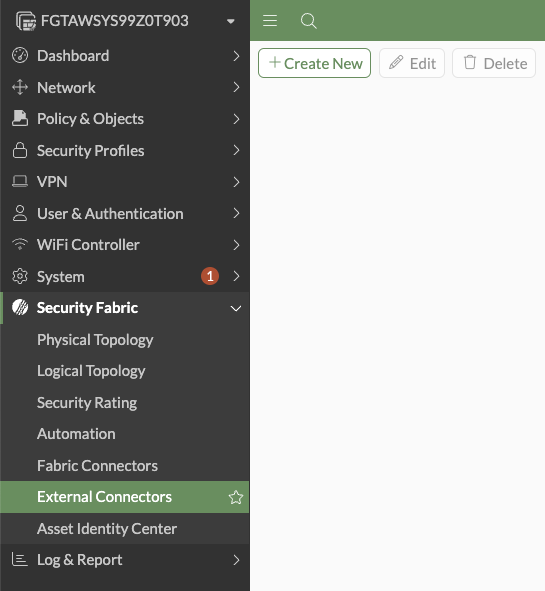
Log in to the Fortinet web ui.
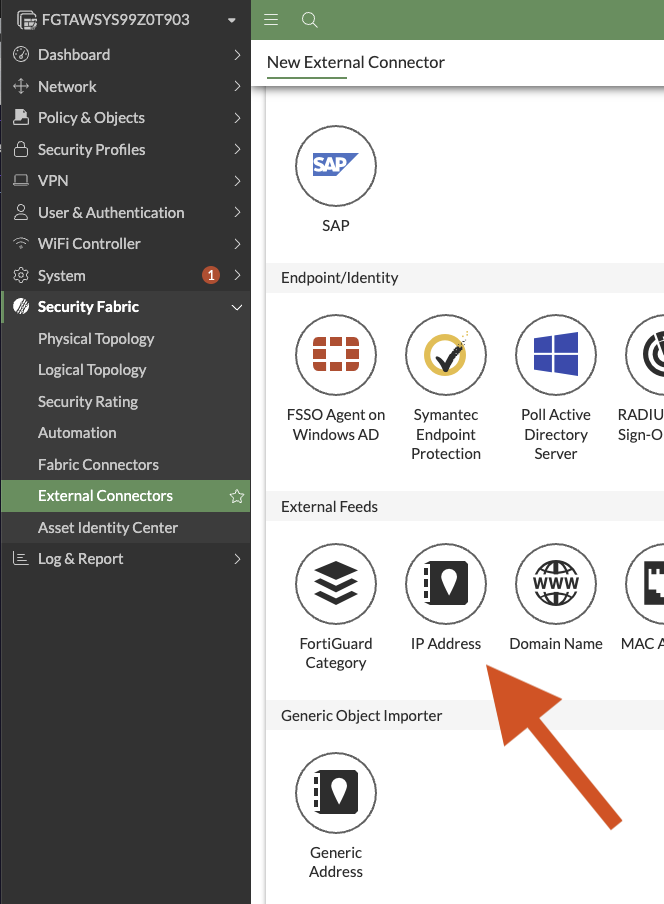
Visit the Security Fabric -> External Connectors page. Select +Create New
Select "IP Address"
Type in a meaningful name and choose "External feed" for the update method:
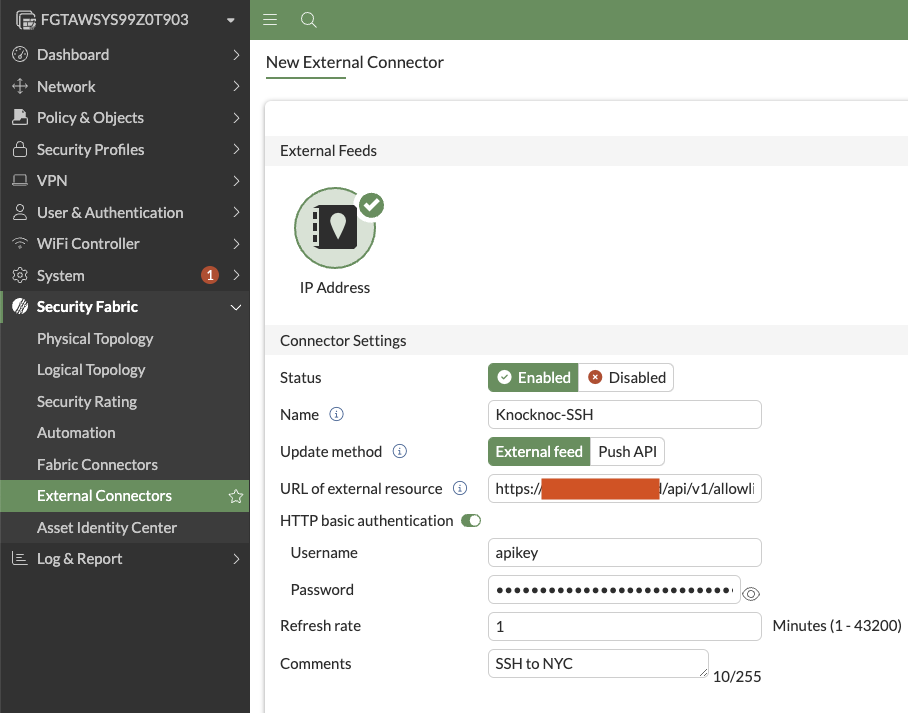
Copy/paste the URL of external resource from Knocknoc->ACL
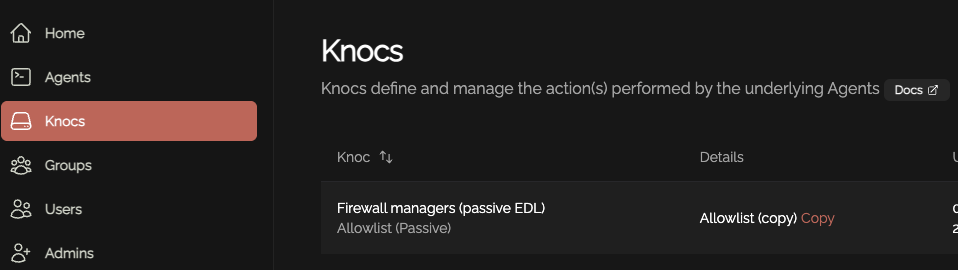
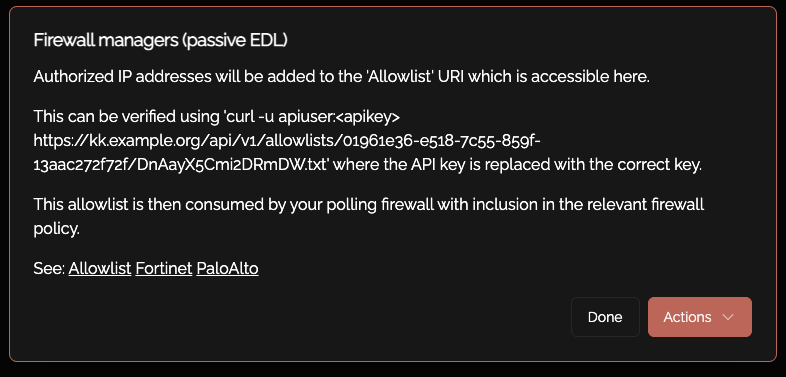
You can also see the URI for this Passive Allowlist/EDL by clicking on the Knoc:
Paste the API key you copied earlier in to the Password field. The username can be "apikey".
Set the refresh rate to 1 minute, or as suited.
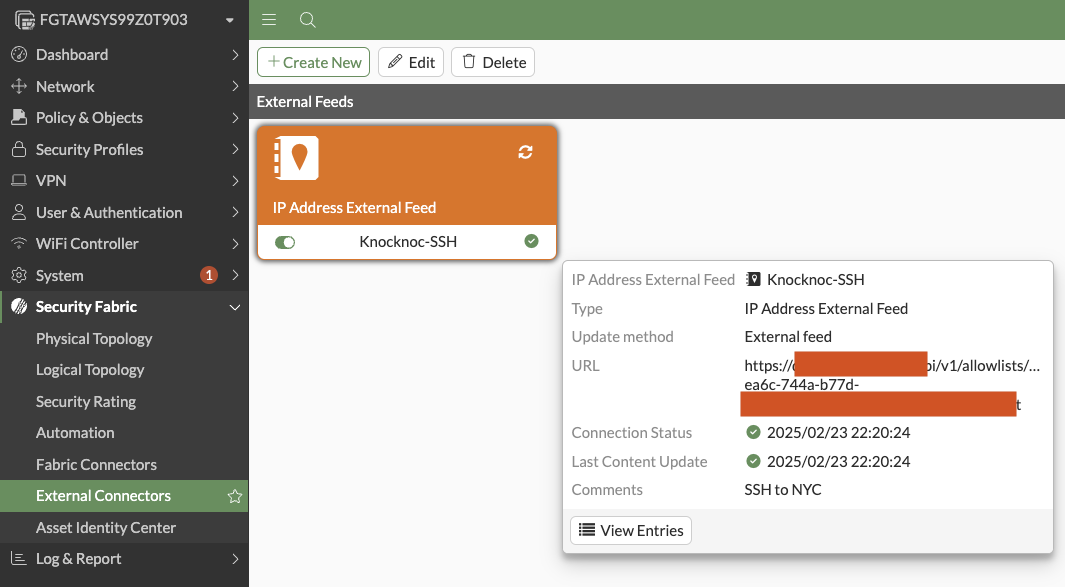
Clicking "View Entries" will show the current IP addresses in the list, which are managed by Knocknoc.
Firewall Policy
Select Policy & Objects -> Firewall Policy
Create New Policy, then choose Accept and change the Source to be the Imported & Dynamic Address

Final step
To complete the process, assign the ACL to the relevant Users or Groups, and your users are ready to log in and receive their access.
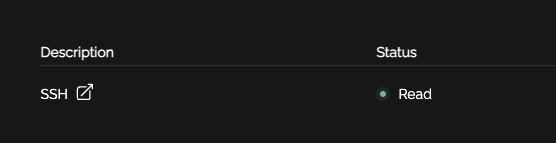
When your user logs in they will see "Published". Once the Fortinet polls the EDL it will update to "Read"

You now have dynamic IP addresses being read in by the Fortinet without active orchestration.
Passive Checklist
✅ Your Knoc has the correct settings;
- ✅ Your URL matches correctly to what you've entered into the Knoc's settings
✅ You've selected IP Address in External Connectors and chosen External Feed
- ✅ You've added the external API address from the ACL of the Knoc
✅ The username matches 'apikey' and the password is the apikey
✅ You've added the Firewall Policy with the Imported and Dynamic Address included
For MSP/MSSPs or the team with Admin access
Knocknoc requires relatively low-level access to the Fortinet firewall ecosystem, to add/remove IP addresses from address-groups. These address groups are then used within pre-defined firewall rules, allowing the Knocknoc technology to provide just-in-time access at the network layer, letting you remove attack surface and create a dynamic network-allowlisting environment.
A "Rest API Admin" user needs to be created, with only the "Firewall Read/Write" access. It does not need System, Admin nor CLI command access.
- System -> Administrators -> Create new "Rest API Admin"
- Create a New Admin Profile -> Enable Firewall Read/Write (only)
- Disable "Permit usage of CLI commands"
- Note that "Trusted Hosts" allows you to restrict the API user access. This is optional and you're likely restricting management-interface access already If utilized, it needs to be the source IP address of the Knocknoc "Agent" which is typically deployed within a localized network.
- Generate the API key and save it for the Knocknoc configuration. This can be re-generated later if needed
Provide this token (securely) to your customer seeking to integrate Knocknoc.
Knocknoc can also integrate with Fortinet via the "EDL" method, which is outlined earlier in this document.