IPSet (Linux Netfilter/IPTables)
IPsets are a powerful and highly efficient way of making a dynamic firewall on a normal Linux machine. A native feature of the Netfilter code, an IPset is an in-memory list of IPs, that can be referenced in any fireawall rules.
Knocknoc can add and remove IPs from an IPset, thereby allowing an arbitrary application of dynamic allow-listing to any linux box.
IPsets need to exist before you can update them, so the overall process is:
- Install the Knocknoc agent on the Linux machine requiring access control and enrol it into the Knocknoc server.
- By default, the Agent will create a number of IPSets for use, including: knoc_ssh, knoc_http, knoc_https. These can be adjusted by editing
/opt/knocknoc-agent/etc/ipset.list- and then restarting withsystemctl restart create-ipsetsnote that IPSet sudo-permissions are now enabled during the Agent installation. If you are migrating from an older version, Knocker can help verify IPSets readiness or update your Agent. - Configure a Knoc in the Knocknoc Server, eg: allowing certain user-logins to access knoc_http.
- Make use of the IPSets in your firewall. An example for UFW is here, and Shorewall is here. A raw iptables example is at the bottom of this page.
Configure the Knoc
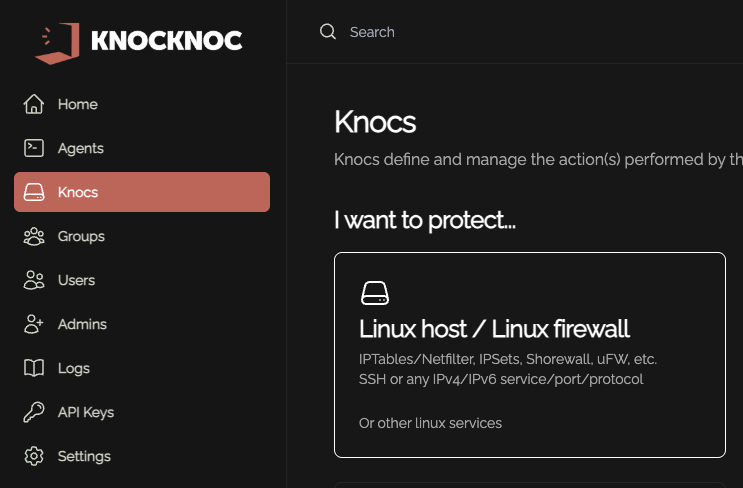
Select Knocs and then the Linux / Host firewall
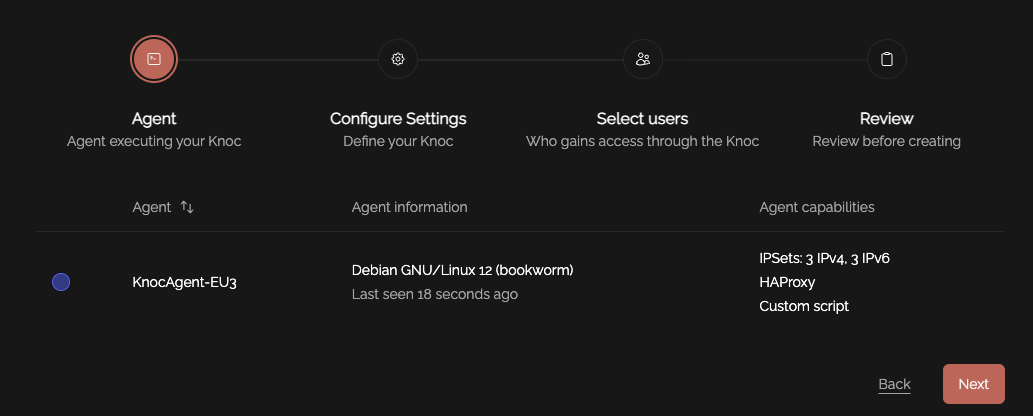
Select the Agent you want to execute the Knoc on:
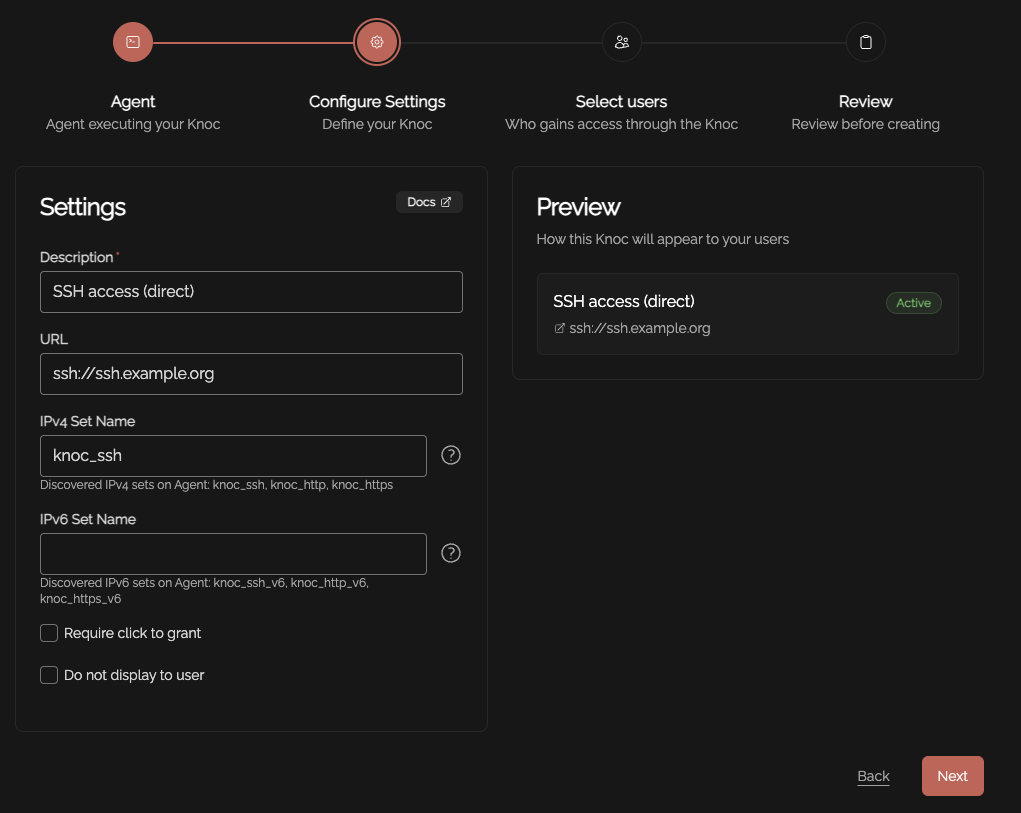
Configure any relevant settings, noting the existing IPSet names are populated. A new IPSet can be defined but must later be created on the relevant Agent server.
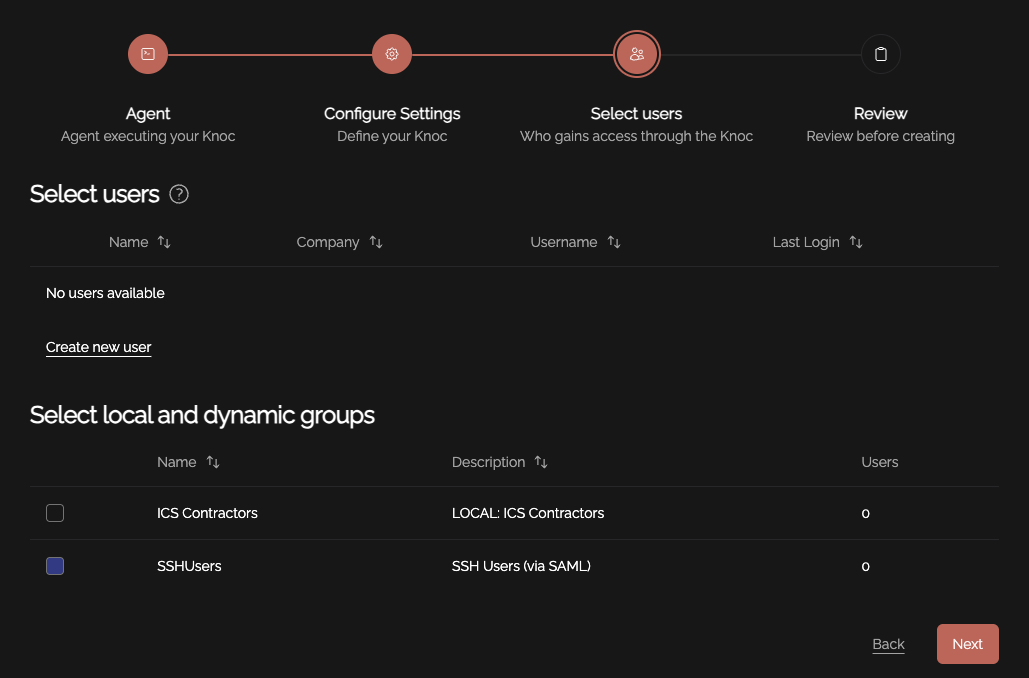
Select the users and/or groups that should be assigned to this Knoc, effectively granting them access on login:
Using the IPSet name in your Firewall
If you have configured an IPSet to be "knoc_ssh", this is then defined as the "ACL name" on the Knocknoc server, which effectively passes the logged-in users IP address through to this IPSet - which is ultimately then used by your netfilter/iptables firewall.
iptables -A INPUT -i eth0 -p tcp --dport 22 -m set --match-set knoc_ssh src -j ACCEPT
See Shorewall for other examples.
Example deployment - adding MFA to SSH
You can quickly add MFA to SSH by utilizing Knocknoc's built-in TOTP/MFA functionality for local users, or by integrating with your existing IdP. This adds the users IP address to IPTables (via IPSets) as below:
Doing things manually
If you prefer to manage sudoers, systemd/startup and the IPSet name creation manually, follow the below steps. Alternatively use Knocker to establish these automatically or choose this option as part of the Agent installation.
Sudoers:
Copy the example sudoers file in to place
cp /opt/knocknoc-agent/scripts/sudoers_knocknoc-agent /etc/sudoers.d/
IPSet definitions in the create_ipsets script should be edited to match any ACLs you intend to pass through to the agent for granting/revoking access. An example would be adding "ssh_allowed" which is then entered as the ACL later on.
mv /opt/knocknoc-agent/scripts/create_ipsets.sh /usr/local/sbin/
vi /opt/knocknoc-agent/scripts/create_ipsets.sh
The IPSet must be created on startup or otherwise exist prior to being added/removed from. An example systemd script is packaged with the agent at /opt/knocknoc-agent/scripts/systemd_create-ipset.service, which can be moved to /etc/systemd/system/create-ipset.service and the service started.
vi /opt/knocknoc-agent/scripts/systemd_create-ipset.service
mv /opt/knocknoc-agent/scripts/systemd_create-ipset.service /etc/systemd/system/create-ipset.servicesystemctl start create-ipset
The IPSets can then be listed and verified using: ipset -L
Example custom-script managing IPSets (IPv4 and v6)
Some applications work better if you also add the user to a second blocklist IPset once the access is revoked. This can be used to actively drop established TCP connections where streams or other connections are intentionally actively terminated.
Paste this script into /usr/local/bin/ipset_block.sh, make it executable and update your Knocknoc server backend config to have this path. Note this script assumes you have given the knocknoc-agent sudo rights to run the ipset command.
This script supports IPv4 and IPv6 automatically - note however your IPSet name will automatically have _v4 and _v6 appended as part of the Knocknoc-agent grant process. Therefore the "ACL Name" only needs to be "ssh_allowed" (in these examples) and the script takes care of the rest.
Note that the benefit of the 'blocking' script is that it will effectively terminate any pre-established connections by allowing you to DROP based on the blocked IPSet.
#!/bin/bash
# Wrapper script to allow safe parsing of an ipset command line from sudo
# sudo is run in this script itself, so you need to enable the ipset command in sudoers
# like so:
# make a file in /etc/sudoers.d/knocknoc-agent with this contents:
# knocknoc-agent ALL=(ALL:ALL) NOPASSWD: /usr/sbin/ipset *
set -e -o pipefail
# Define the general_blocked ipset names
general_blocked_v4="knocknoc_blocked"
general_blocked_v6="knocknoc_blocked_v6"
# Validate IPv4 address
function validate_ip() {
    local ip=$1
    if [[ $ip =~ ^[0-9]{1,3}(\.[0-9]{1,3}){3}$ ]]; then
        return 0
    else
        echo "Invalid IPv4 address"
        exit 1
    fi
}
# Validate IPv6 address
function validate_ipv6() {
    local ip=$1
    if getent ahosts "$ip" | grep -q ':'; then
        return 0
    else
        echo "Invalid IPv6 address"
        exit 1
    fi
}
# Validate setname
function validate_setname() {
    local setname=$1
    if [[ $setname =~ ^[A-Za-z0-9_]+$ ]]; then
        return 0
    else
        echo "Invalid setname"
        exit 1
    fi
}
# Validate operation
function validate_op() {
    local op=$1
    if [[ $op =~ ^(add|del|flush)$ ]]; then
        return 0
    else
        echo "Invalid operation"
        exit 1
    fi
}
# Validate and assign operation
validate_op "$1"
op="$1"
# Validate and assign setname
validate_setname "$2"
setname="$2"
# Determine if it's an IPv4 or IPv6 address
ip="$3"
if [[ -n "$ip" ]]; then
    if [[ $ip =~ ":" ]]; then
        validate_ipv6 "$ip"
        ip_version="v6"
    else
        validate_ip "$ip"
        ip_version="v4"
    fi
fi
# Adjust setname based on IP version
if [[ $ip_version == "v6" ]]; then
    setname="${setname}_v6"
    general_blocked=$general_blocked_v6
else
    general_blocked=$general_blocked_v4
fi
# Execute ipset commands
if [[ "$op" = "flush" ]]; then
    # Flush the appropriate set
    sudo /usr/sbin/ipset "$op" "$setname"
elif [[ "$op" = "add" ]]; then
    # Add IP to the appropriate set
    sudo /usr/sbin/ipset "$op" "$setname" "$ip"
    # Remove IP from the general blocked set to ensure no conflicts
    sudo /usr/sbin/ipset del "$general_blocked" "$ip" || true
elif [[ "$op" = "del" ]]; then
    # Remove IP from the appropriate set
    sudo /usr/sbin/ipset "$op" "$setname" "$ip"
    # Add IP to the general blocked set for tracking purposes
    sudo /usr/sbin/ipset add "$general_blocked" "$ip" || true
else
    echo "Unknown operation: $op"
    exit 1
fi
Example IPSet startup/creation script
This needs to run on startup to ensure the IPSets are in place on the host ready for the IP addresses to be added. Note this appends _v4 and _v6 to ensure either IPv4/IPv6 are appropriately granted/revoked.
This can be configured automatically using Knocker, or during Agent installation.
#!/bin/bash
IPSET_CONFIG="/opt/knocknoc-agent/etc/ipset.list"

# Read IPSET names from config
if [[ ! -f "$IPSET_CONFIG" ]]; then
    echo "Error: IPSET configuration file not found at $IPSET_CONFIG."
    exit 1
fi

IPSET_NAMES=$(grep -v '^#' "$IPSET_CONFIG" | grep -v '^\s*$')

for IPSET_NAME in $IPSET_NAMES; do
    # Flush and create the IPv4 ipset
    ipset -exist flush "$IPSET_NAME" || true
    ipset -exist create "$IPSET_NAME" hash:ip
    # Flush and create the IPv6 ipset
    IPSET_NAME_V6="${IPSET_NAME}_v6"
    ipset -exist flush "$IPSET_NAME_V6" || true
    ipset -exist create "$IPSET_NAME_V6" hash:ip family inet6
done
See more on IPset at the Netfilter project: https://ipset.netfilter.org/


