
SAML with OKTA
SAML is a complicated topic, with many variables, so please take the time to read through the documentation and check all the settings are correct.
First we need a new Application in Okta: Create App Integration, and then select SAML 2.0
Set an App name, EG Knocknoc
Upload a logo if you like:

Then Next
OK the Single sign-on URL is: https://demo.knoc.cloud/api/saml/acs and leave Use this for Recipient URL and Destination URL ticked
The Audience URL (SP Entity ID) is: https://demo.knoc.cloud/api/saml/metadata
Leave Default Relay State blankc
Name ID Format : Persistent
Application user: Okta Username
Show advanced Settings
Upload your own certificate created like so:
On your own PC or similar:
Make a new cert and key:
openssl req -new -x509 -days 3650 -nodes -subj /CN=Knocknoc/ -out user-demo-knoc-cloud.crt -keyout user-demo-knoc-cloud.key
Leave other options default
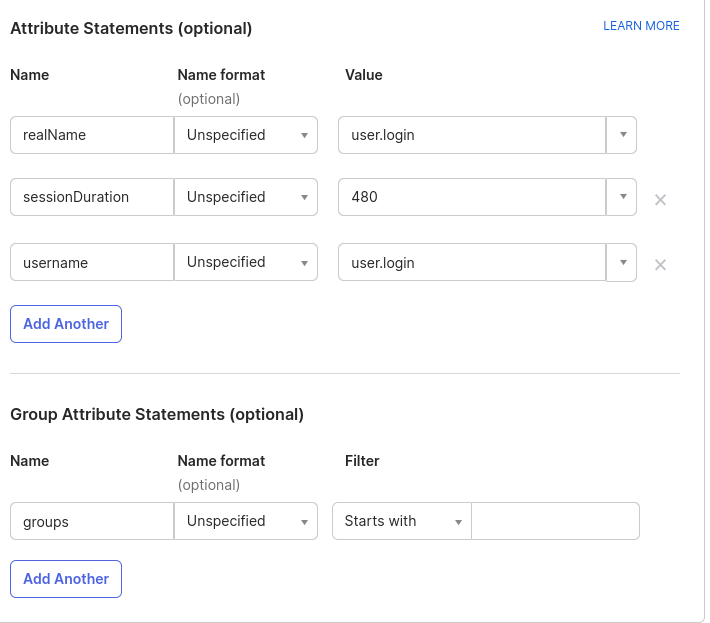
Attribute statements
SAML Signing Certificates
In SAML signing certificates, delete the original one there (its probably SHA1 and your new one is SHA2).
You then need to View the IDP metadata, save it
Knocknoc Settings
Upload the saved IDP metadata to Knocknoc as SAMLMetadataFile
Set the Public URL to your Knocknoc instance URL (without the / at the end!)
Set the SAMLMetadataURL to the Metadata Details Metadata URL from the Okta control panel
Upload your certificate and key you made earlier.
Assignments
You also need to assign the Application to your users, and make sure you send Groups, so the Groups can map to Knocknoc groups and have ACLs assigned to them.