
SAML with EntraID (Azure AD)
The following assumes your knocknoc instance is located at https://demo.knoc.cloud. Wherever you see that, please substitute it for your own instance URL.
Setting Up the IdP
Create Application
- Navigate to the Microsoft Entra admin center and login with administrator credentials.
- Go to Identity and select Applications than Enterprise Applications

- Click New Application
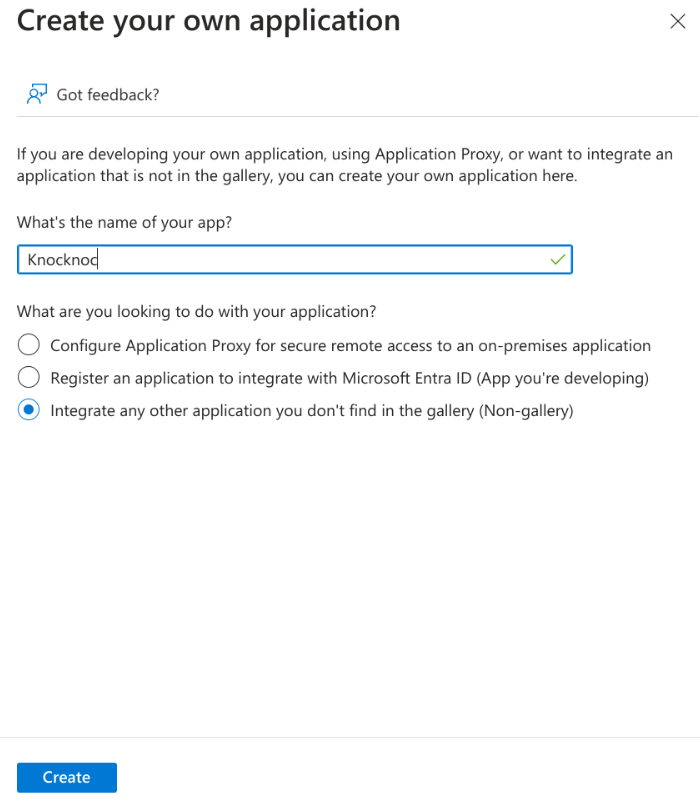
- Click Create your own application.
- Type a name for your application (e.g knocknoc)
- Check "Integrate any other application you don't find in the gallery (Non-gallery)"
- Click Create.

Assign Groups
- Click "Assign users and groups"
- Click "None Selected" under groups.
- Add the user groups you wish to access Knocknoc protected services.
Note: Knocknoc and EntraID group names need to match for automatic user assignment. Best practice is to have at least one group per Knocknoc protected service.
SAML Configuration
- Click Set up single sign on.
- Click SAML.
- In the Basic SAML section, add the links to your Knocknoc instance.
- Set the Indentifier (Entity ID) to https://demo.knoc.cloud/api/saml/metadata
- Set the Reply URL (Assertion Consumer Service URL) to https://demo.knoc.cloud/api/saml/acs
- Leave the Optional Basic SAML Configuration options blank at this stage and click Save.
- Set the Indentifier (Entity ID) to https://demo.knoc.cloud/api/saml/metadata
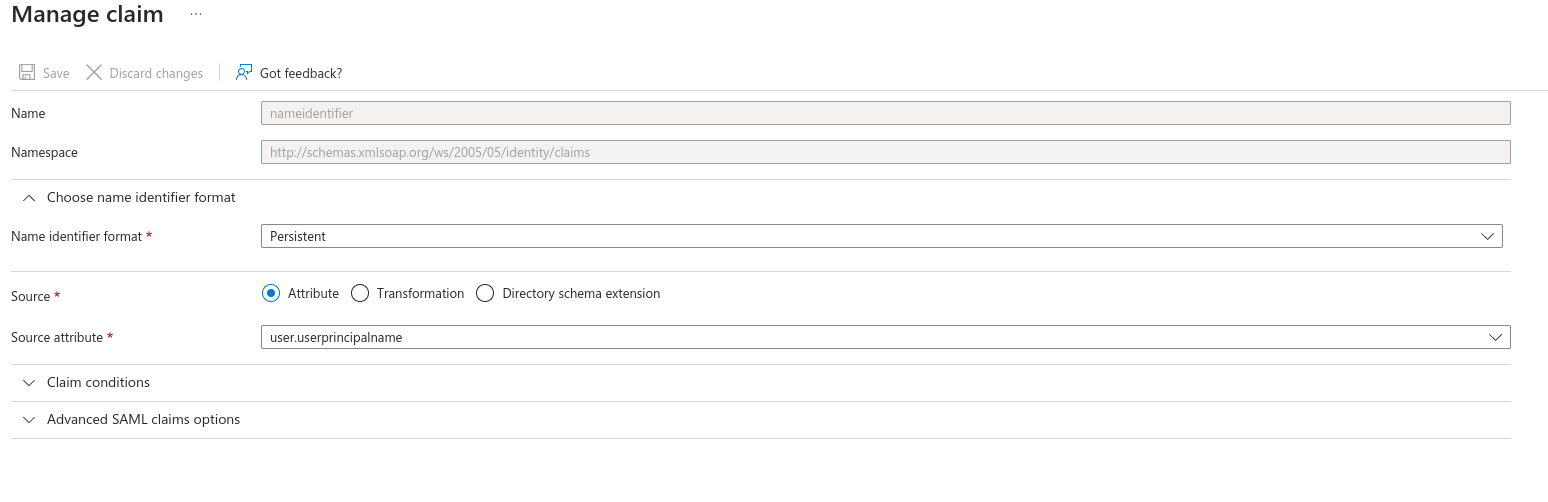
- In the Attributes & Claims section
- Update the Required Claim, changing the Name Identifier Format to Persistent

- Remove all other Claims.
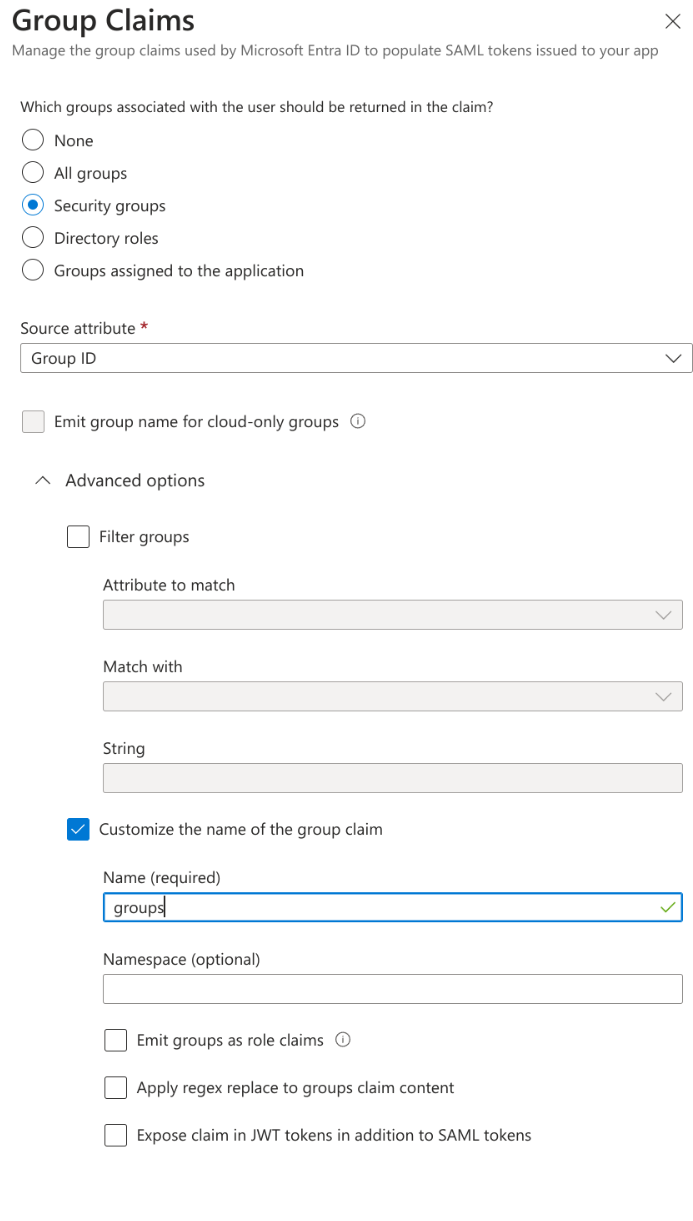
- Add a group Claim.
- Select Security Groups
- Select Group ID for the Source Attribute.
- Check "Customize the name of the group claim"
- Add the Name as, groups.
- Click save when done.

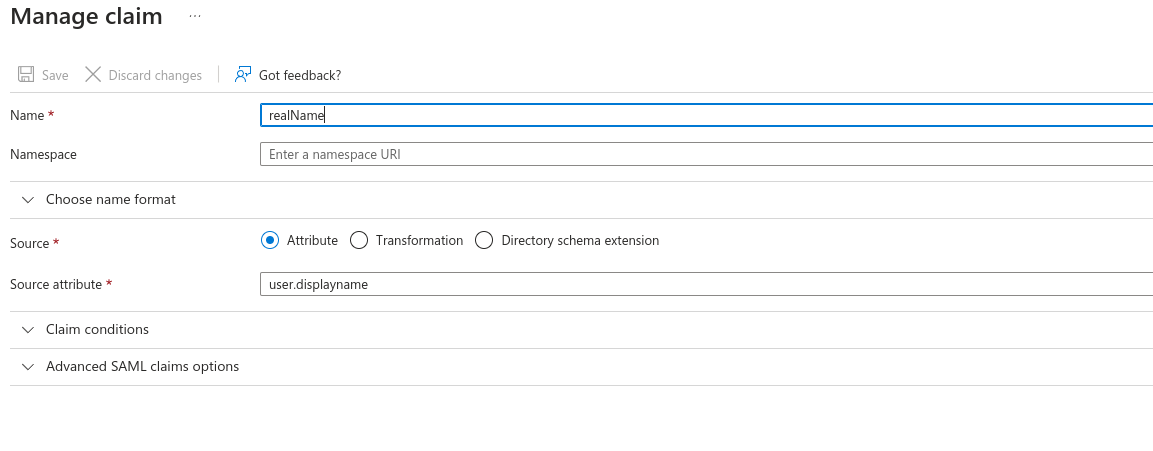
- Add in a New Claim
- Set the Name as "realName".
- Leave Source as Attribute.
- Set Source Attribute to "user.displayname".
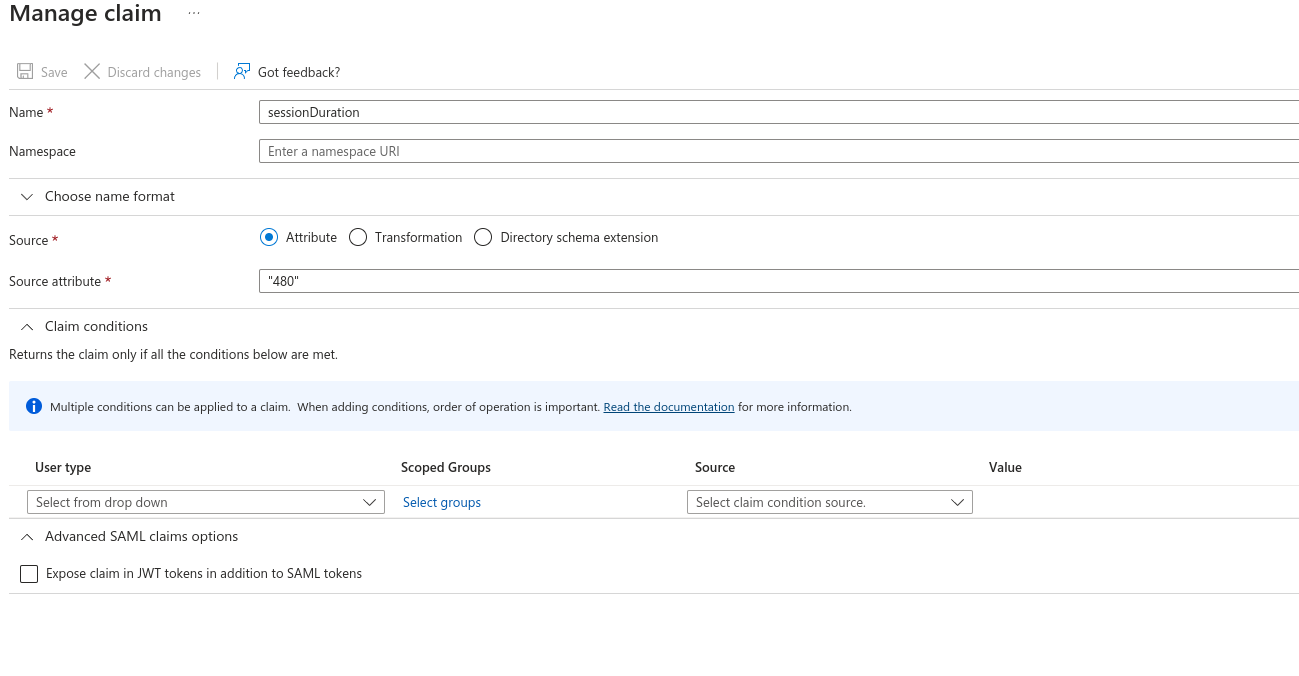
- Add another New Claim
- Set the Name as "SessionDuration"
- Leave Source as Attribute.
- Set Source Attribute to the default login duration in seconds for users logging in to Knocknoc. You can manually override this with a user attribute later for specific users.
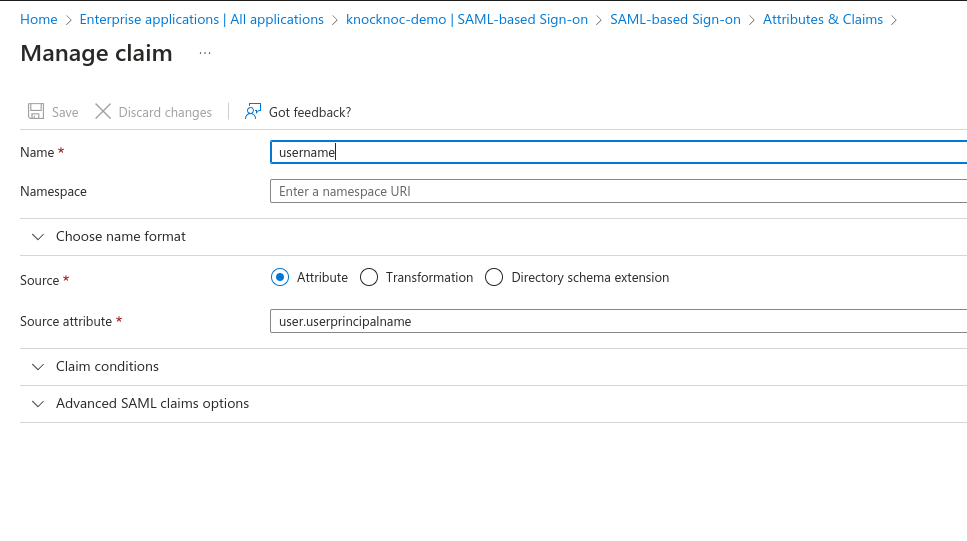
- Add a third New Claim
- Set the Name as "username"
- Leave Source as Attribute.
- Set Source Attribute "user.userprincipalname"
- Update the Required Claim, changing the Name Identifier Format to Persistent
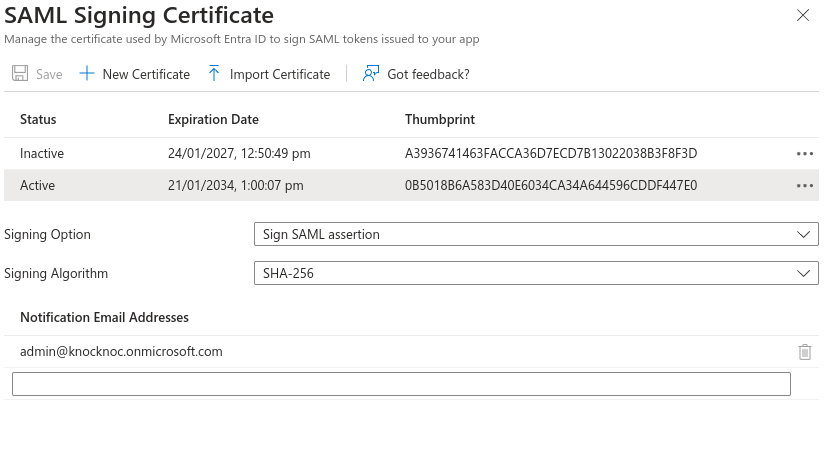
- SAML Certificates
- Generate a new certificate and key, this can be done on a Linux host using the below command.
openssl req -new -x509 -days 3650 -nodes -subj /CN=Knocknoc/ -out user-demo-knoc-cloud.crt -keyout user-demo-knoc-cloud.key - Convert the certificate to pfx using the following command.
openssl pkcs12 -export -out user-demo-knoc-cloud.pfx -inkey user-demo-knoc-cloud.key -in user-demo-knoc-cloud.crt - Enter a password and note it down.
- Import Certificate, select the pfx certificate you just created and enter the password.
- Then make the new certificate Active by clicking the dots on the right and choosing Make Certificate Active.
- Download the federation Metadata XML.
- Generate a new certificate and key, this can be done on a Linux host using the below command.
- Set Up Knocknoc
- Copy the Login URL, this will be required for the Knocknoc SAML config.


Knocknoc SAML Config
- Login In the Knocknoc admin interface.
- Click on Settings on the left.
- Under Public URL enter you knocknoc url. Note: do not add a / at the end of the URL.
- For the SAMLMetaDataFile, upload the xml file you downloaded from EntraID.
- For the SAMLCertFile, upload the certificate (.crt) file you created in during the SAML Configuration.
- For the SAMLKeyFile, upload the key (.key) file you created in during the SAML Configuration.
- For the SAMLMetadataUrl, paste the Login URL copied in Step 6 of the previous section.
- Click Save.