SAML with EntraID (Azure AD)
The following example assumes your Knocknoc instance is located at https://demo.knoc.cloud. Wherever you see that, please substitute it for your own instance URL.
Setting Up the IdP
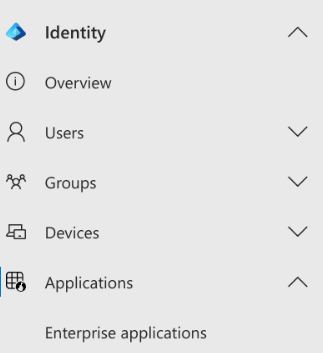
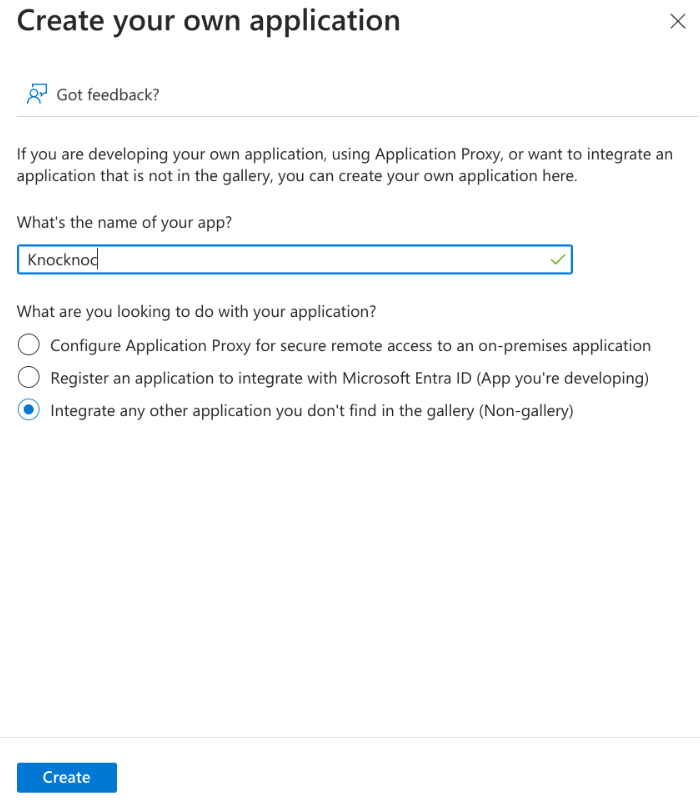
Create an Application
Assign Groups
- Click "Assign users and groups"
- Click "None Selected" under groups.
- Add the user groups you wish to access Knocknoc protected services.
Note: for automatic user assignment, you must add groups into Knocknoc admin using matching Entra object IDs (e.g. 6a696eec-482f-4b40-97c8-9ea3dba8ac3a) as their names. We recommend you add a friendly name in the description field. Best practice is to have at least one group per Knocknoc protected service.
SAML Configuration
- Click Set up single sign on.
- Click SAML.
- In the Basic SAML section, add the links to your Knocknoc instance.
- Set the Indentifier (Entity ID) to https://demo.knoc.cloud/api/saml/metadata
- Set the Reply URL (Assertion Consumer Service URL) to https://demo.knoc.cloud/api/saml/acs
- Leave the Optional Basic SAML Configuration options blank at this stage and click Save.
- Set the Indentifier (Entity ID) to https://demo.knoc.cloud/api/saml/metadata
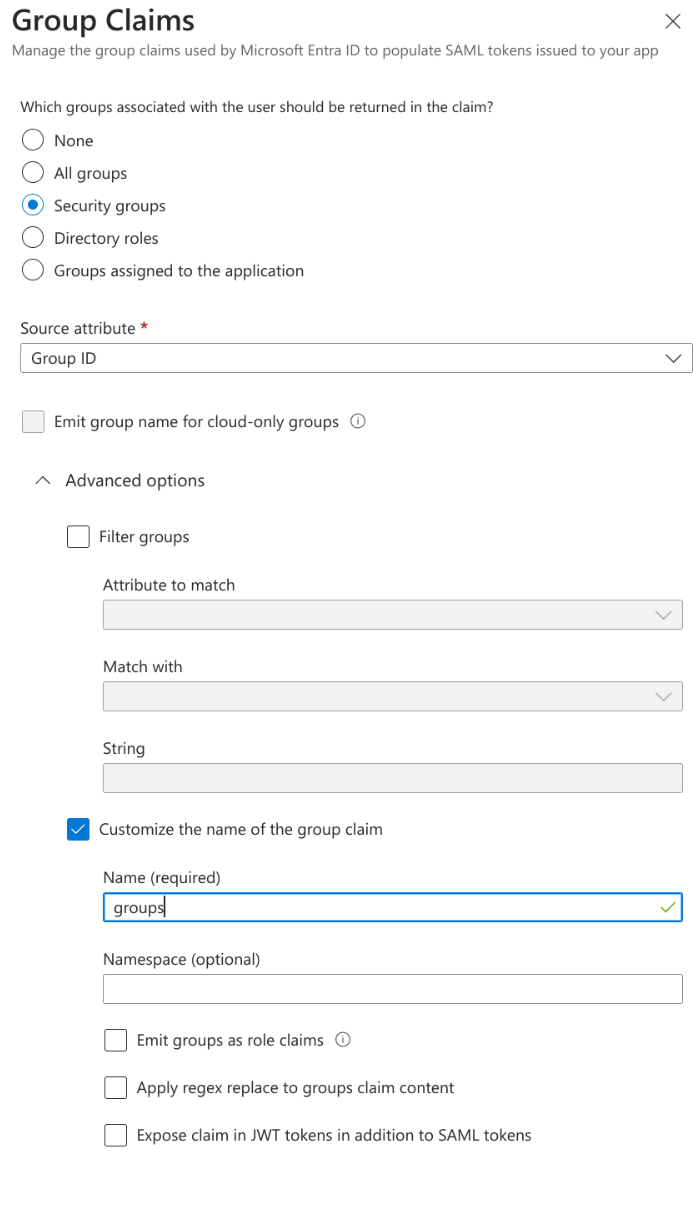
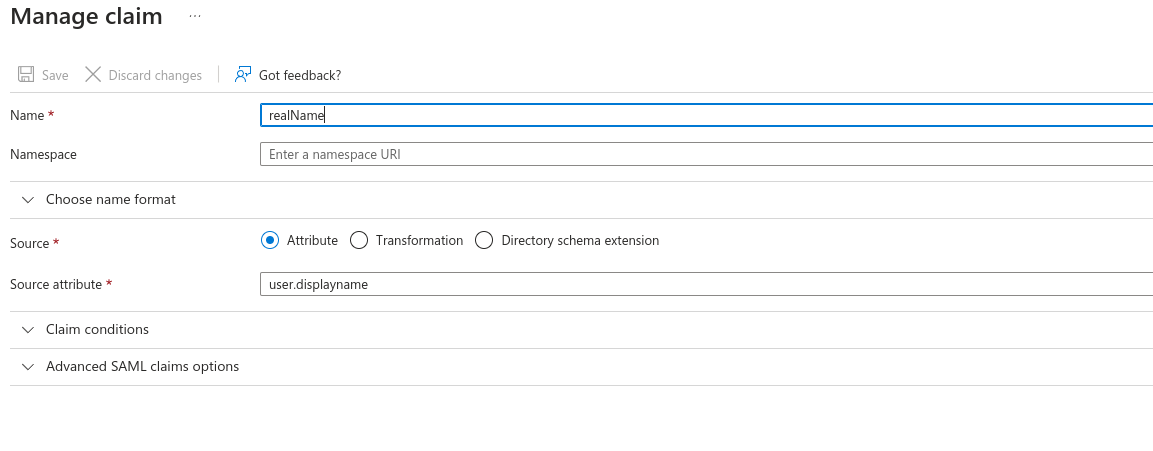
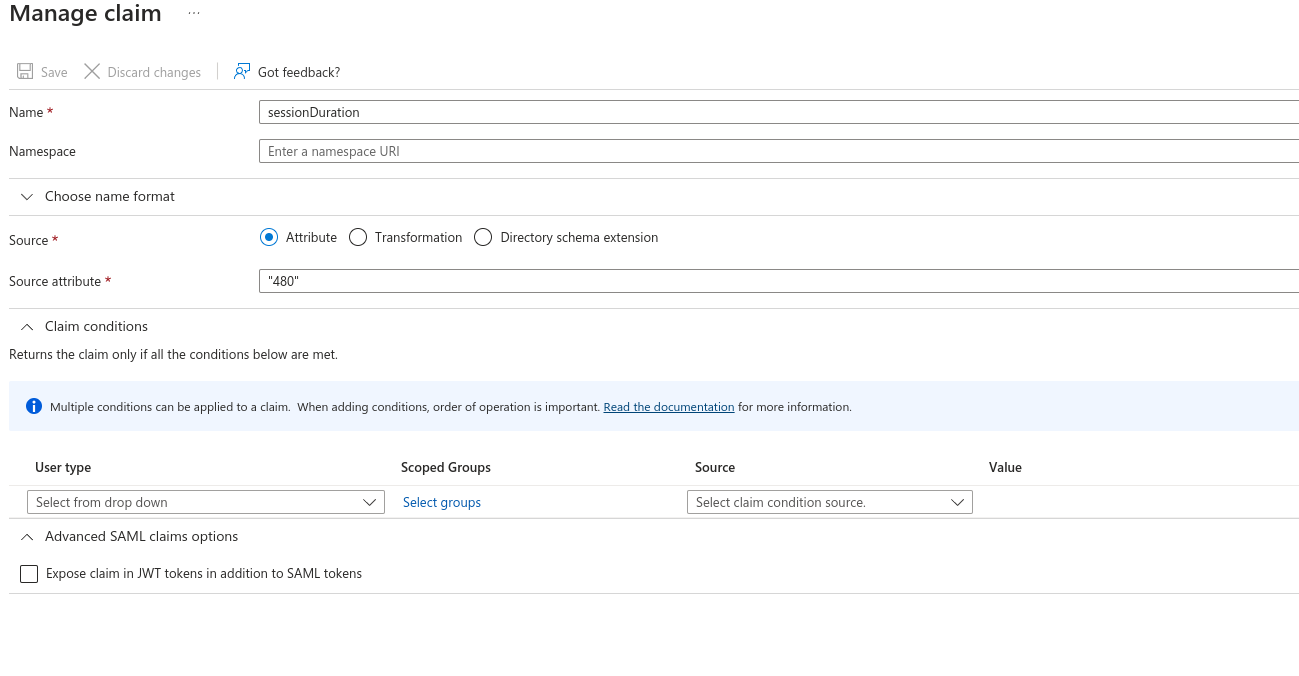
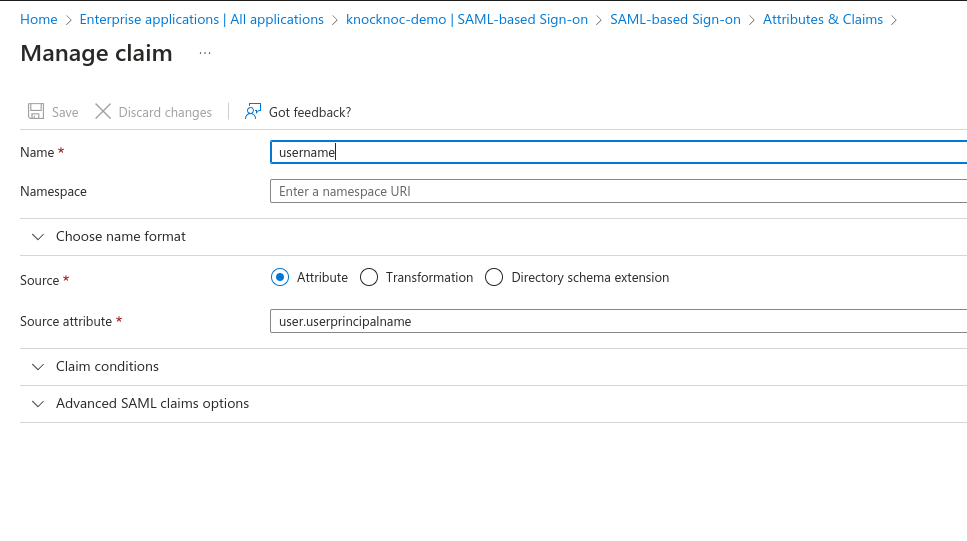
- In the Attributes & Claims section
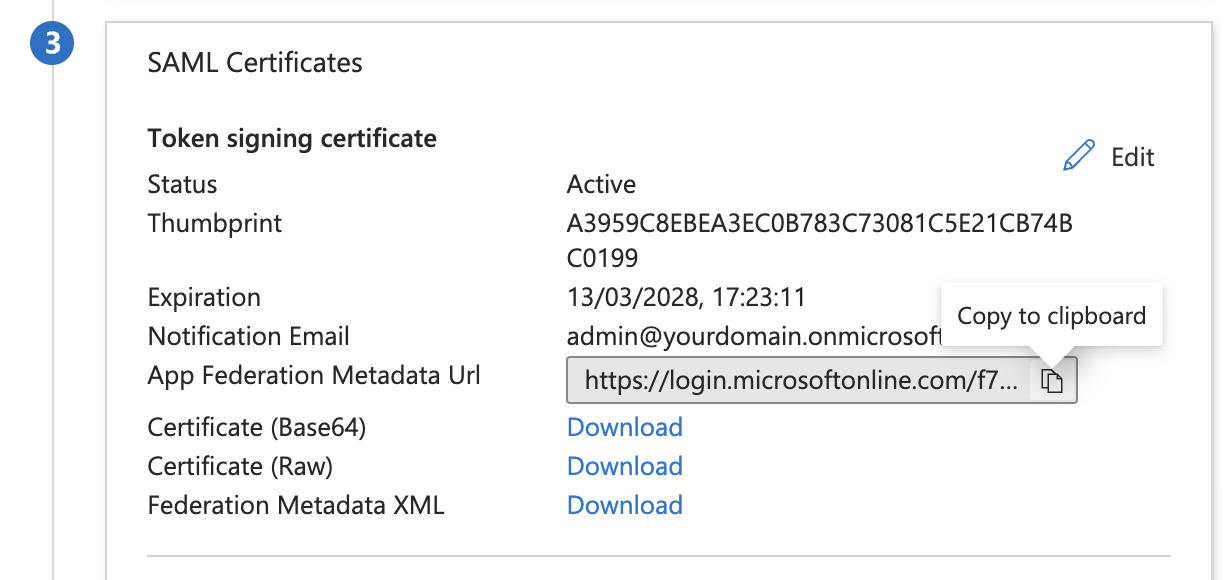
- Go to SAML Certificates section
- On your local machine: generate a new certificate and key, this can be done on a Linux host using the below command.
openssl req -new -x509 -days 3650 -nodes -subj /CN=Knocknoc/ -out user-demo-knoc-cloud.crt -keyout user-demo-knoc-cloud.key - Convert the certificate to pfx using the following command.
openssl pkcs12 -export -out user-demo-knoc-cloud.pfx -inkey user-demo-knoc-cloud.key -in user-demo-knoc-cloud.crt - Enter a password and note it down.
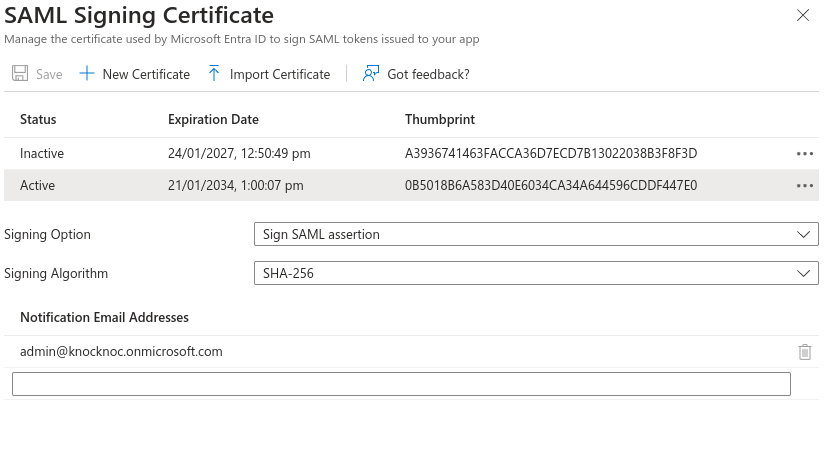
- Import Certificate, select the pfx certificate you just created and enter the password.
- It should automatically be set as Active. If it is not, click the dots on the right and choosing Make Certificate Active.
- On your local machine: generate a new certificate and key, this can be done on a Linux host using the below command.
- Copy the App Federation Metadata Url and save it, you will need it in the next step configuring Knocknoc.
- Now configure Knocknoc.
Knocknoc SAML Config
Knocknoc supports SAML for Users and/or for Administrators. Initially we suggest configuring SAML for Users, and once confirmed as working extending this to the Administrator users, whilst retaining a break-glass local Admin user for emergencies or broken SAML situations.
- Login In the Knocknoc admin interface.
- Click on Settings on the left.
- For the "Metadata URL", paste in the "App Federation Metadata Url" you previously saved. It starts with https://login.microsoftonline.com/...
- For the SAMLKeyFile, upload the key (.key) file you created in during the SAML Configuration.
- For the SAMLCertFile, upload the certificate (.crt) file you created in during the SAML Configuration.
- Click Save.
Final Testing
Assuming you granted your own user permission to one or more Knocknoc groups in EntraID, you should now be able to login to Knocknoc using SSO.
- Browse to https://demo.knoc.cloud
- There should now be an "SSO Login" button.
- Click this, if you are not already authenticated to your IdP you should now be directed to the IdP login page. Note: If you are already authenticated you'll simply be redirected to an authenticated Knocknoc session.
- If ACLs have already been added you should also see these now say Granted.
You can also test using the Entra testing tool which is in Step 5 of the Entra configuration, shown below. Remember you will need to log in with a User or Group you granted access previously.
If this all works, congratulations! You've successfully run the SAML gauntlet.

