
Agent Installation
For the admin who know what they need, and needs a fast way to get it, you can use this command to setup and install knocknoc-agent very quickly.
- Browse to https://YourKnocknoc.url/admin and login with the knocknoc-admin user.
- Click on Agents then Create Agent.
- Enter a sensible name e.g. [AgentServerHostname].
- Copy the token that is produced.
- Login to the server hosting the agent via the command line and become the root user.
- Run this command it will configure apt, setup secure repository access, and install knocknoc agent.
curl -sSL https://packages.knocknoc.io/setup/setup_knocknoc_agent.sh | bash - Accept the License Agreement.
- Enter the URL and Port of your Knocknoc server. If this Agent is installed locally and defaults have been applied, use
127.0.0.1:8756 - Paste the agent token from the Admin portal created earlier.
- Confirm if you have a valid SSL certificate on your Knocknoc server. If you are using 127.0.0.1:8756, select No.
- The installer will check what backends are enabled using the
/opt/knocknoc-agent/knocker/knockerutility. - You can now start adding and configuring Knocs in the admin panel!
Agent Requirements
The agent will attempt to connect to your Knocknoc server using https on port 443/TCP. This could be on the Internet or internally within your own network. The package installation will automatically prompt you for the server hostname. You can reconfigure this in the config file (typically /opt/knocknoc-agent/etc/knocknoc-agent.conf) or by running configure-knocknoc-agent.
The agent is currently supported on the following platforms:
- Debian 11, 12
- Ubuntu 20, 22, 23 and 24
- Oracle Linux 8.x
- Red Hat EL7+
- CentOS 7+
- Other Red Hat derivatives like Rocky and Oracle Linux
- Debian ARM64 (e.g. Raspberry Pi)
- Docker on amd64 Linux
- Microsoft Windows
Let us know if you're looking to use a different platform!
Agent registration keys & Infrastructure as Code
Agents can be deployed and initially integrated with the Knocknoc server using individual keys or shared keys. Server version 7.5.4 and Agent 1.6.1 or above is required.
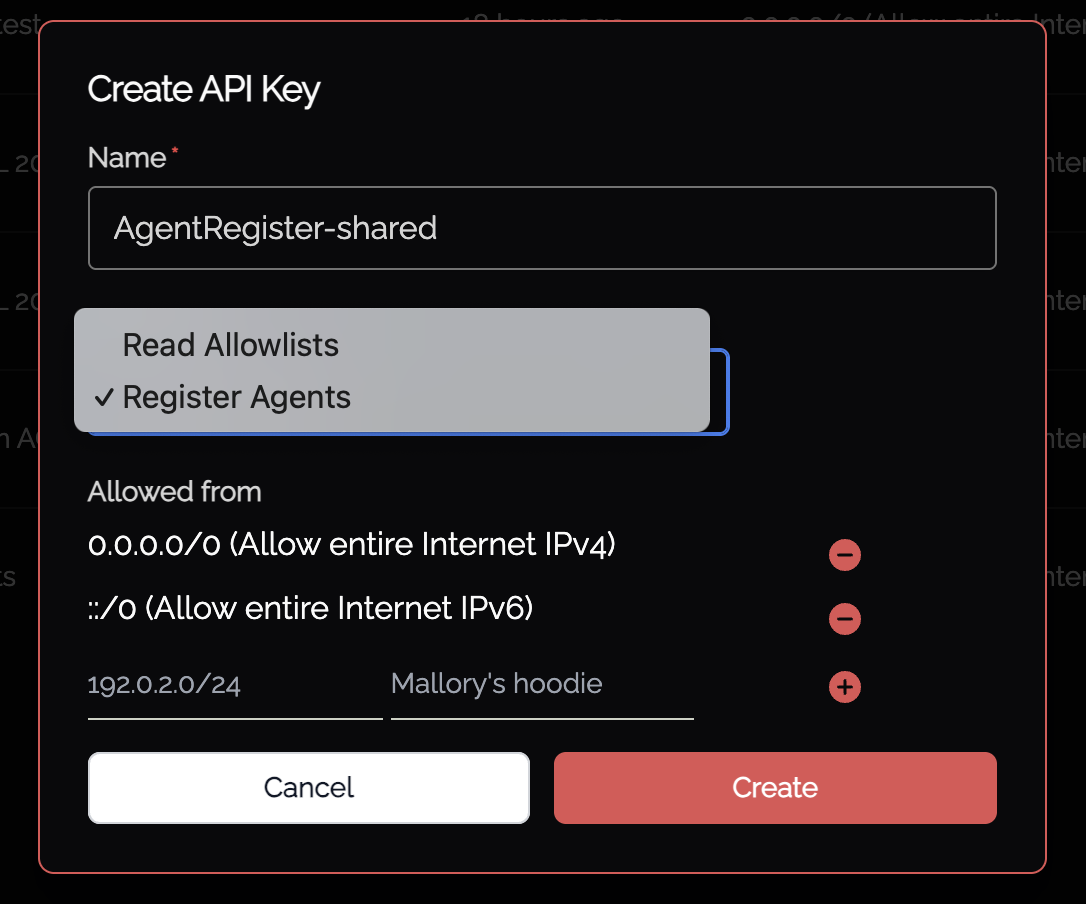
Individual per-agent keys are created (as above) through the Admin UI just-in-time, whereas shared keys are created and managed via the API Keys Admin functionality. Selecting "Register agents" allows the creation of an API key which allows multiple agents to be registered against using that key. IP address restrictions are managed per API key, as shown below.
Instead of specifying the Token (or using the basic installer), the /opt/knocknoc-agent/knocknoc-agent.conf file should specify RegisterKey and Name fields:
RegisterKey = "<api key>"
Name = "Agent's Initial Name"

# Do *NOT* set a value for Token, or comment it out
#Token = "xxxxx"

# other settings
LogLevel = "info" #trace
Insecure = "false" # when set to true, SSL/TLS is not CA verified
After registering successfully a "token" value will be created and stored in /opt/knocknoc-agent/var/token for future connections. The RegisterKey can be deleted, disabled or otherwise restricted (eg: IP address sources) and the Agent will use its own token for ongoing trust.
Knocknoc Agent behind an outbound proxy
To get knocknoc-agent working through a web proxy, add the proxy environment variable to the systemd unit file.
- Edit the systemd unit file.
sudo systemctl edit knocknoc-agent.service - Add this line under the [Service] section - you may need to add a section.
Environment="HTTPS_PROXY=http://proxyIPaddress:proxyport" - Reload the systemctl daemon
systemctl daemon-reload - Restart knocknoc-agent
systemctl restart knocknoc-agent