
SAML with ADFS
The following example assumes your Knocknoc instance is located at https://demo.knoc.cloud. Wherever you see that, please substitute it for your own instance URL.
Create certificates
Create a key/certificate pair on your local machine
- Generate a new certificate and key, this can be done on a Linux host using the below command.
openssl req -new -x509 -days 3650 -nodes -subj /CN=Knocknoc/ -out user-demo-knoc-cloud.crt -keyout user-demo-knoc-cloud.key - Enter a password and note it down.
- This will be required for both sides of the connection, Windows AD FS and Knocknoc
Knocknoc SAML Config
- Login In the Knocknoc admin interface (eg: https://your-knocknoc.cloud/admin/)
- Click on Settings on the left.
- Under Public URL enter you knocknoc url. Note: do not add a / at the end of the URL.
- For the SamlMetadataUrl enter your ADFS host, adding /FederationMetadata/2007-06/federationmetadata.xml
- eg: https://your-adfs-site/FederationMetadata/2007-06/federationmetadata.xml
- For the SAMLCertFile, upload the certificate (.crt) file you created in during the Certificate creation.
- For the SAMLKeyFile, upload the key (.key) file you created in during the Certification creation.
- Click Save.
- You can verify this worked correctly by visiting https://your-knocknoc.cloud/api/saml/metadata and observing the downloaded metadata file.
Setting Up the IdP (ADFS)
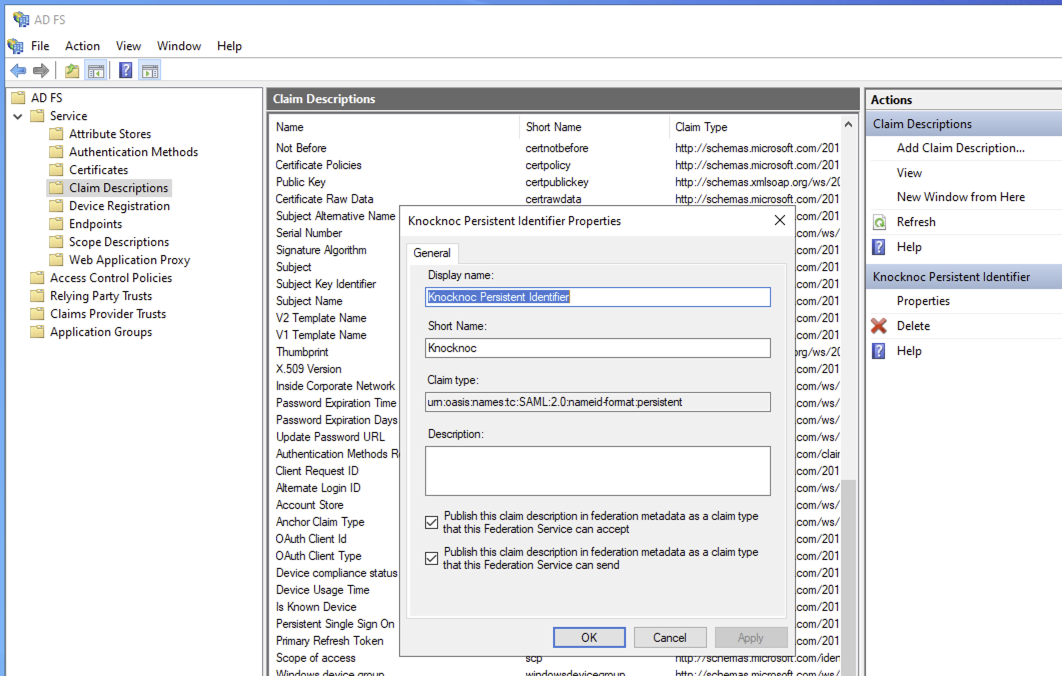
Define the Claim Description
Define the Relying Party Trust
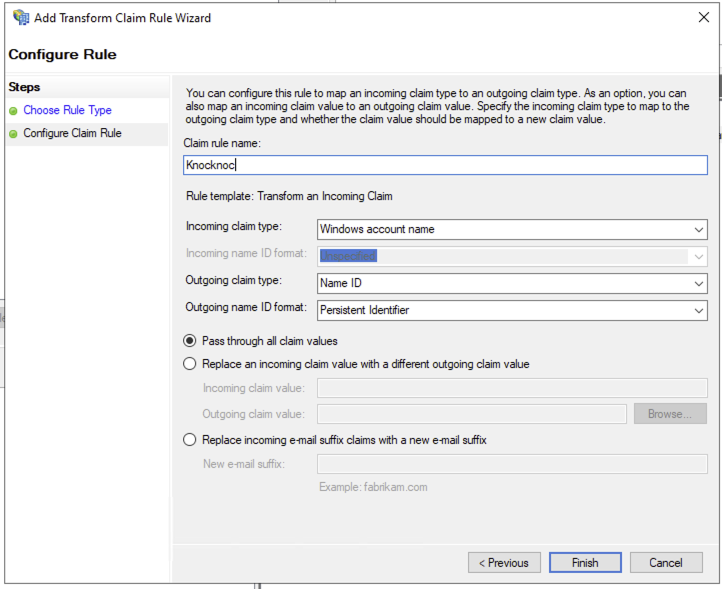
Define the Claim Issuance Policy
-
Once on the Edit Claim Issuance Policy section
- Click Add Rule
- Select Transform and Incoming Claim, click Next
- Name the rule, eg: Knocknoc
- Incoming claim type should be set to Windows account name
- Outgoing claim type: Name ID
- Outgoing name ID format: Persistent Identifer
- Click Finish and Apply
- It should appear similar to the below
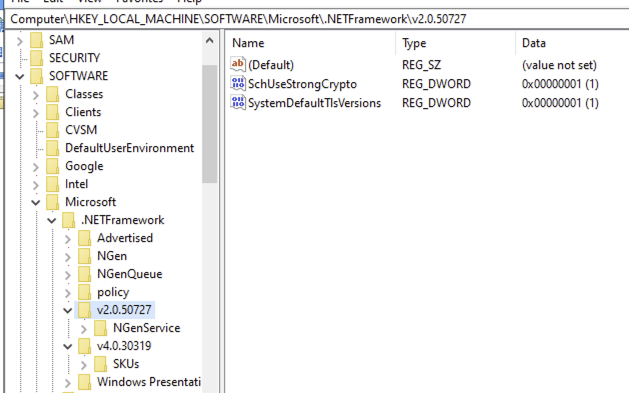
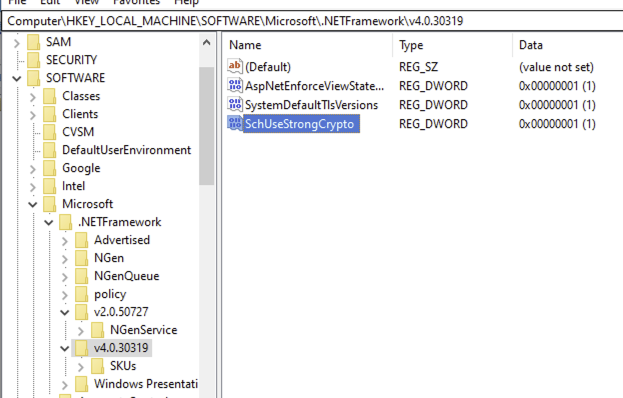
TLS errors and enabling TLS/1.2
If you receive TLS/SSL errors trying to validate the metadata file, you may need to enable TLS/1.2 via your registry.

Registry configuration to enable TLS/1.2:
Final Testing
Assuming you granted your own user permission to one or more Knocknoc groups in EntraID, you should now be able to login to Knocknoc using SSO.
- Browse to https://demo.knoc.cloud
- There should now be an "SSO Login" button.
- Click this, if you are not already authenticated to your IdP you should now be directed to the IdP login page. Note: If you are already authenticated you'll simply be redirected to an authenticated Knocknoc session.
- If ACLs have already been added you should also see these now say Granted.
If this all works, congratulations! You've successfully run the SAML gauntlet.